Mod: Auto-Retract Awning


DETAILS: Auto-Retract Awning
Adding this Bluetooth module to your awning’s wiring enables several new useful functions. You can extend/retract your awning from the sofa, the campfire, or anywhere up to 100 yards away based on the distance test I performed with my iPhone (more details below). You can also turn the awning’s LED light strip on and off remotely as well as dim the light. And last but not least, the version I purchased includes a motion sensor that installs inside the top part of the front awning arm which enables the awning to self-retract if it gets too windy (user settable to 5 different sensitivity levels). All of this adds modern functionality to an otherwise basic awning design.
Switch Details
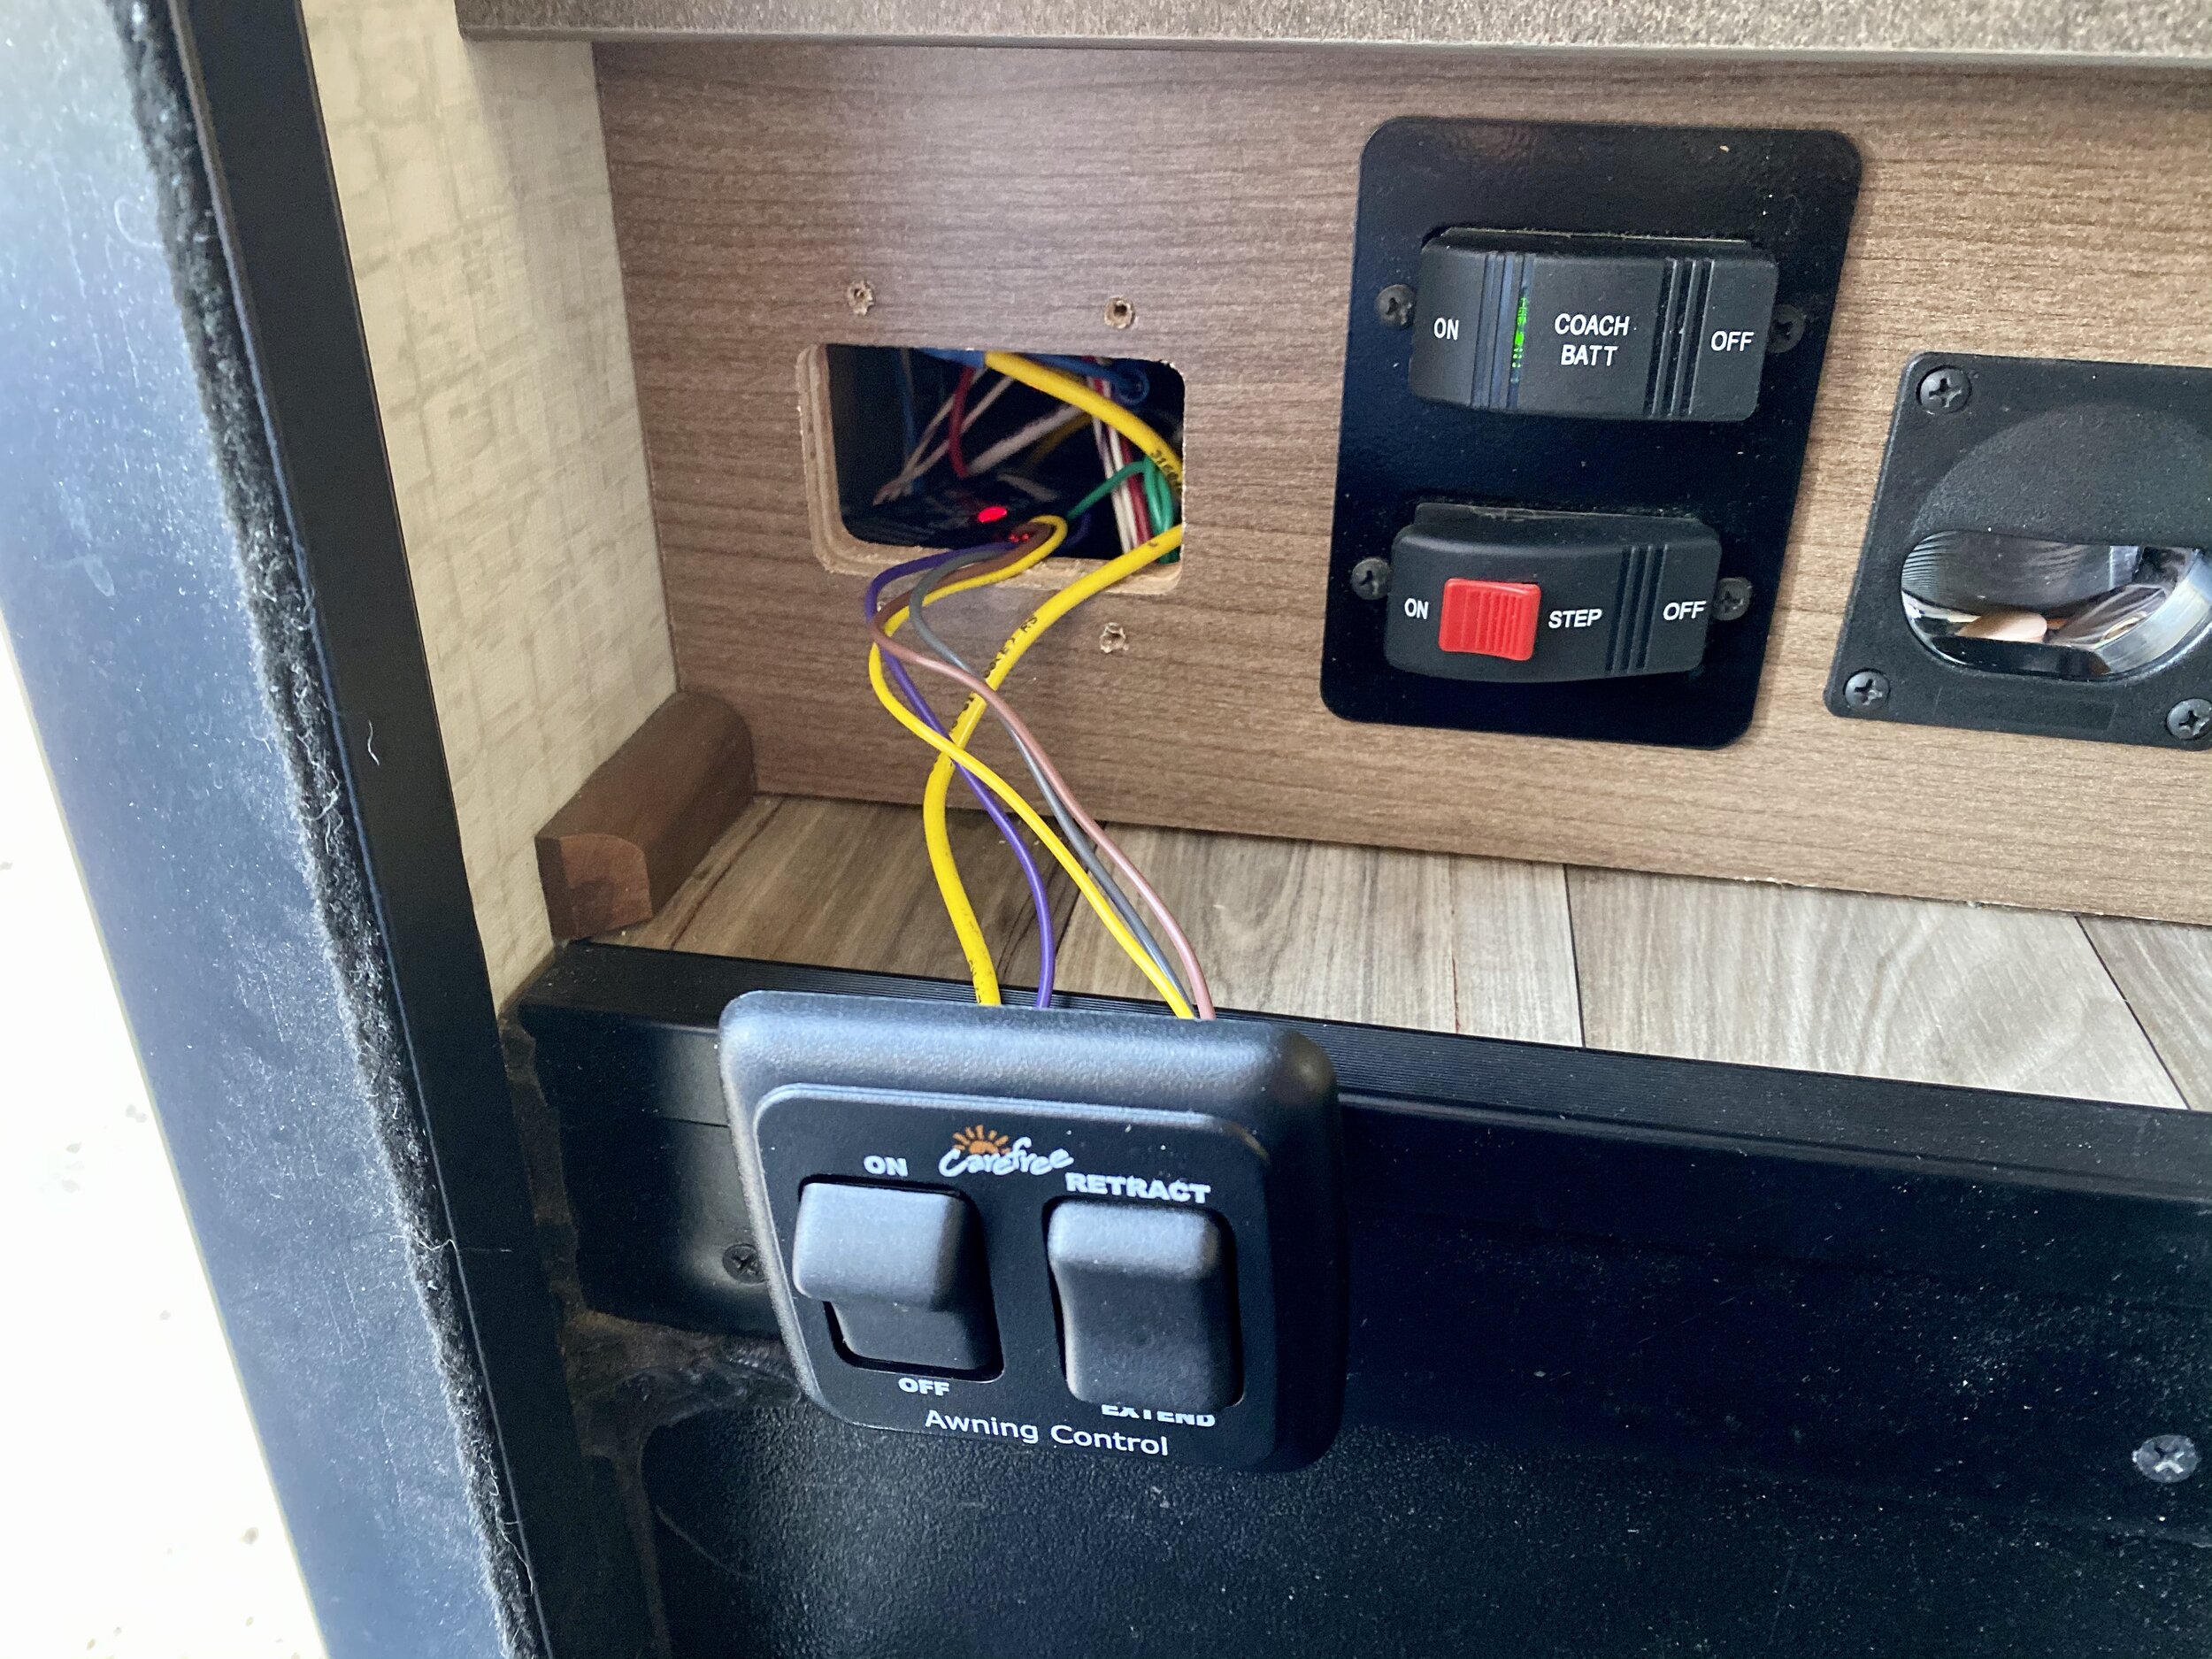
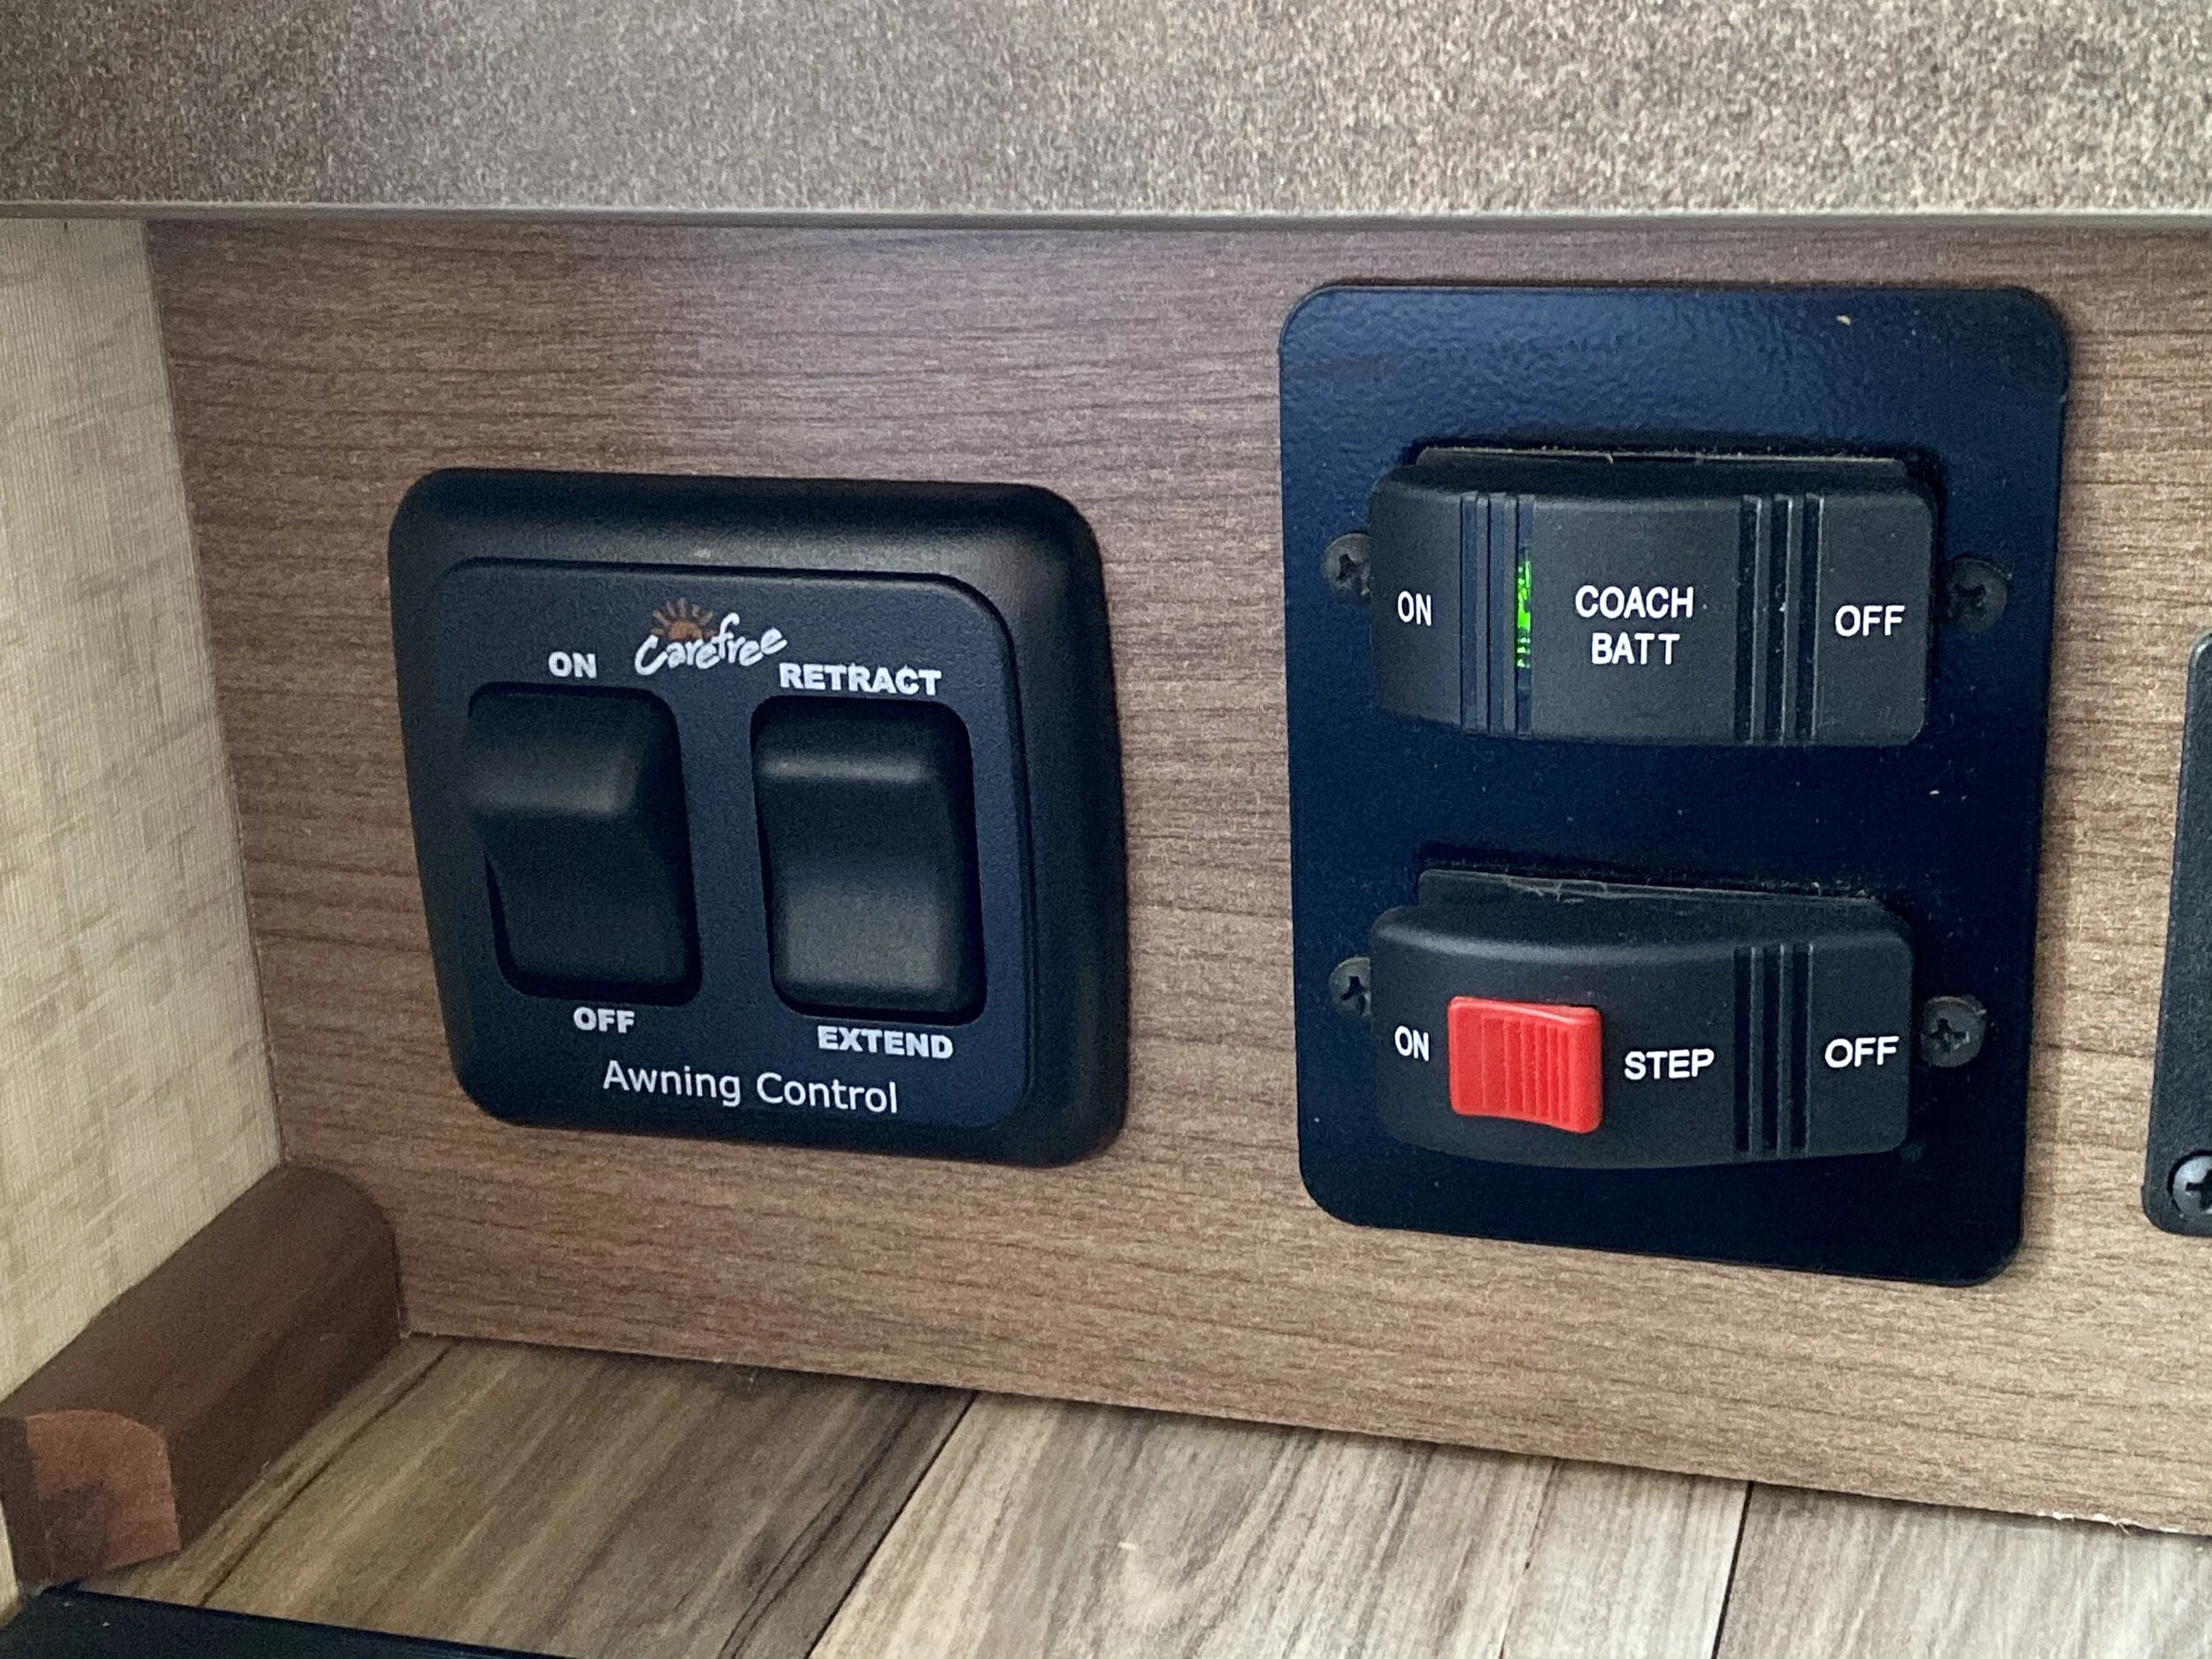
The product comes with a new set of switches which replace the original OEM awning switches. They fit in the same space and cover the hole with room to spare. The new switches function differently than the ones they replace; there is no physical on/off switch for the light (see note below about alternate wiring). The awning light is turned on/off (and dimmed) from the mobile app as well as the optional handheld remote control.
Another option for the light would be to add an additional 3rd switch. As designed, the included on/off is a master switch for the awning motor and ensures that an errant Bluetooth command could never deploy your awning unintentionally. When in the off position, the awning will not extend/retract by either the adjacent switch or the mobile app.
Note: It is possible to hard-wire the awning motor wire (Violet wire) to constant power and instead make the Carefree on/off switch operate the awning light by connecting the switch to the White/Violet wire.
The new extend/retract switch has a new one-touch function; you no longer need to hold the switch while extending/retracting. Just a single push — and let go — and the awning will finish extending/retracting on its own!
Wiring Details
In order for this Bluetooth module to work, it must be installed in-between the original Winnebago wiring and the two switches. This enables the Bluetooth functions to occur without ever physically pressing the switches.
Although different years/models may label the coach wires differently, the following is how the module wired into my 2018 J’s wires (the capital letters in parentheses are the Winnebago codes printed on the yellow and white coach wires). While this worked for me, it would be prudent to cross-reference the official wiring diagram from Carefree (linked below).
First, supply the fused +12vdc yellow wire (RS) to the bottom position of the new on/off switch.
LEFT SIDE OF MODULE:
Red wire to yellow wire (FFD) *
Black wire to white ground (FFE4)
Blue wire to yellow wire (FFR)
White wire to yellow wire (JJR)
White/Violet wire to yellow wire (FFD2) *
White/Black wire not needed (see note below)
White/Red wire to yellow wire (ZZK) *
RIGHT SIDE OF MODULE:
Violet wire top position, on/off switch
Green wire not needed (see note below)
Gray wire bottom position, extend/retract switch
Yellow wire middle position, extend/retract switch
Brown wire top position, extend/retract switch
* These wires split to two wires — cut them after the split, not before
Unused Coach Wires
I had three unused coach wires which I covered with electrical tape: Yellow wire (ZZK2), White wire (FFE2) and White wire (NE10).
White/Black Wire
This left-side module wire is expecting to connect to the ground wire of the awning’s LED light strip. However, the LED’s ground wire doesn’t pass through the switch complex, but instead is connected directly to ground elsewhere. Connecting the White/Black wire to ground won’t hurt anything, but it won’t provide any function.
Ignition Lockout
Winnebago’s OEM wiring provides a relay in the awning’s circuit that disables the function of the awning when the chassis is in Drive, Neutral or Reverse. As such, there is no need to use the Green wire. By default, my awning does function with the engine running (while in Park) which is nice if I’m extending or retracting the awning while just arriving/departing a campsite and the engine is still running to keep the voltage high during the awning’s operation.
The Carefree instructions (linked below) illustrate an option to use this wire to auto-retract the awning when the vehicle’s engine starts, but that isn’t necessarily what I want, so I left this wire taped off and unused.
Motion Sensor Location / Installation
The motion sensor is installed via double-sided tape inside the roller tube end cap on the front arm (see photos). There are 6 screws that hold the black plastic halves together (circled in one of the photos). Once the hub is opened, the instructions indicate where to stick the motion sensor (see arrow in photos which point to the black motion sensor).
Motion Sensor Sensitivity Setting
In the mobile app, the motion sensor’s sensitivity can be set between 1 (least sensitive) and 5 (most sensitive). By default, it is set to 3, though I found this setting to be too liberal — the awning stayed out even in a stiff, gusting breeze when I would have typically decided to retract it in such conditions. I then set it to 5, the most sensitive setting, and it retracted within a few seconds in the same conditions. I find that setting 4 is the sweet spot for now. I would feel comfortable walking away from the RV with the motion sensor set to 4.
Module Location / Switch Mounting
After the wiring is complete, test all functions with both switches. Provided everything is working, carefully stow the module and all wires inside the hole (behind where the switches will be mounted). I didn't mount the module with the provided double-sided tape — I just stuffed everything into the hole for ease of removal if/when necessary in the future.
The provided switch plate is a different size than the OEM switch plate. Just center the new one in the opening and drill 4 new holes to complete the installation.
Mobile App Download and Control
In order to control the awning from your smart phone or tablet, you need to first download the app from either the Apple App Store or the Android Google Play Store. Search for “Carefree Connects” and download for free.
The app allows you to both extend and retract the awning with a single press of a button (no need to hold). You can also click and hold two other “in” and “out” buttons to fine tune the awning’s position. Alternatively, if you want to extend the awning halfway, you can press “extend” to start — and then press “extend” again to stop — once you’ve reached your desired position.
The app also provides a button to turn the LED light on and off as well as a dimming slider to control the brightness.
Adjusting the Awning’s Extended Position
Upon extending the awning for the first time, the LED lights will automatically position themselves at approximately a 45 degree angle toward your coach. If you wish to point them at a different angle, you can use the mobile app to reposition the roller tube by pressing the “rollback adjustment buttons” at the bottom of the screen until you reach the desired position. Tapping the left button will slightly retract the awning, while tapping the right button will slightly extend it. Once you have found the position you like, retract the awning to save the position. Now, every future extension should roll out to your saved position.
Bluetooth Range
Using the app on my iPhone 11 Pro, I was able to operate all of the awning’s functions approximately 100 yards away! It was very impressive (see photo). However, when using my old 2nd generation iPad mini, the range was a modest 50 feet — which is still more than enough distance when sitting around the campfire.
Bluetooth Module + Switch + Motion Sensor:
www.amazon.com/dp/B00NS81UB4
CAREFREE INSTRUCTIONS:
Carefree Wireless Awning Instruction Manual: https://bit.ly/2WMdcxr
Carefree Connects Mobile App User Guide: https://bit.ly/2xp8Phf