Mod: Water Accumulator Tank


DETAILS: Water Accumulator Tank
An accumulator tank helps keep a constant pressure in your water lines, eliminating the pulsing from the pump. Even when boondocking, you’ll have a constant flow of water without the constant on/off cycling of the water pump. The pump still comes on, but only when the tank gets low on pressure — and the pump will run continuously (for approximately 10 seconds) until the tank is full again.
The tank I purchased is 2 gallons, about half of which can be emptied before the pump is triggered. In addition to a “city water” flow and pressure, this mod can help eliminate the sound of the pump in the middle of the night when flushing the toilet, etc. It will also extend the life of your water pump since it’s either on, or off, and not quick cycling.
Installation
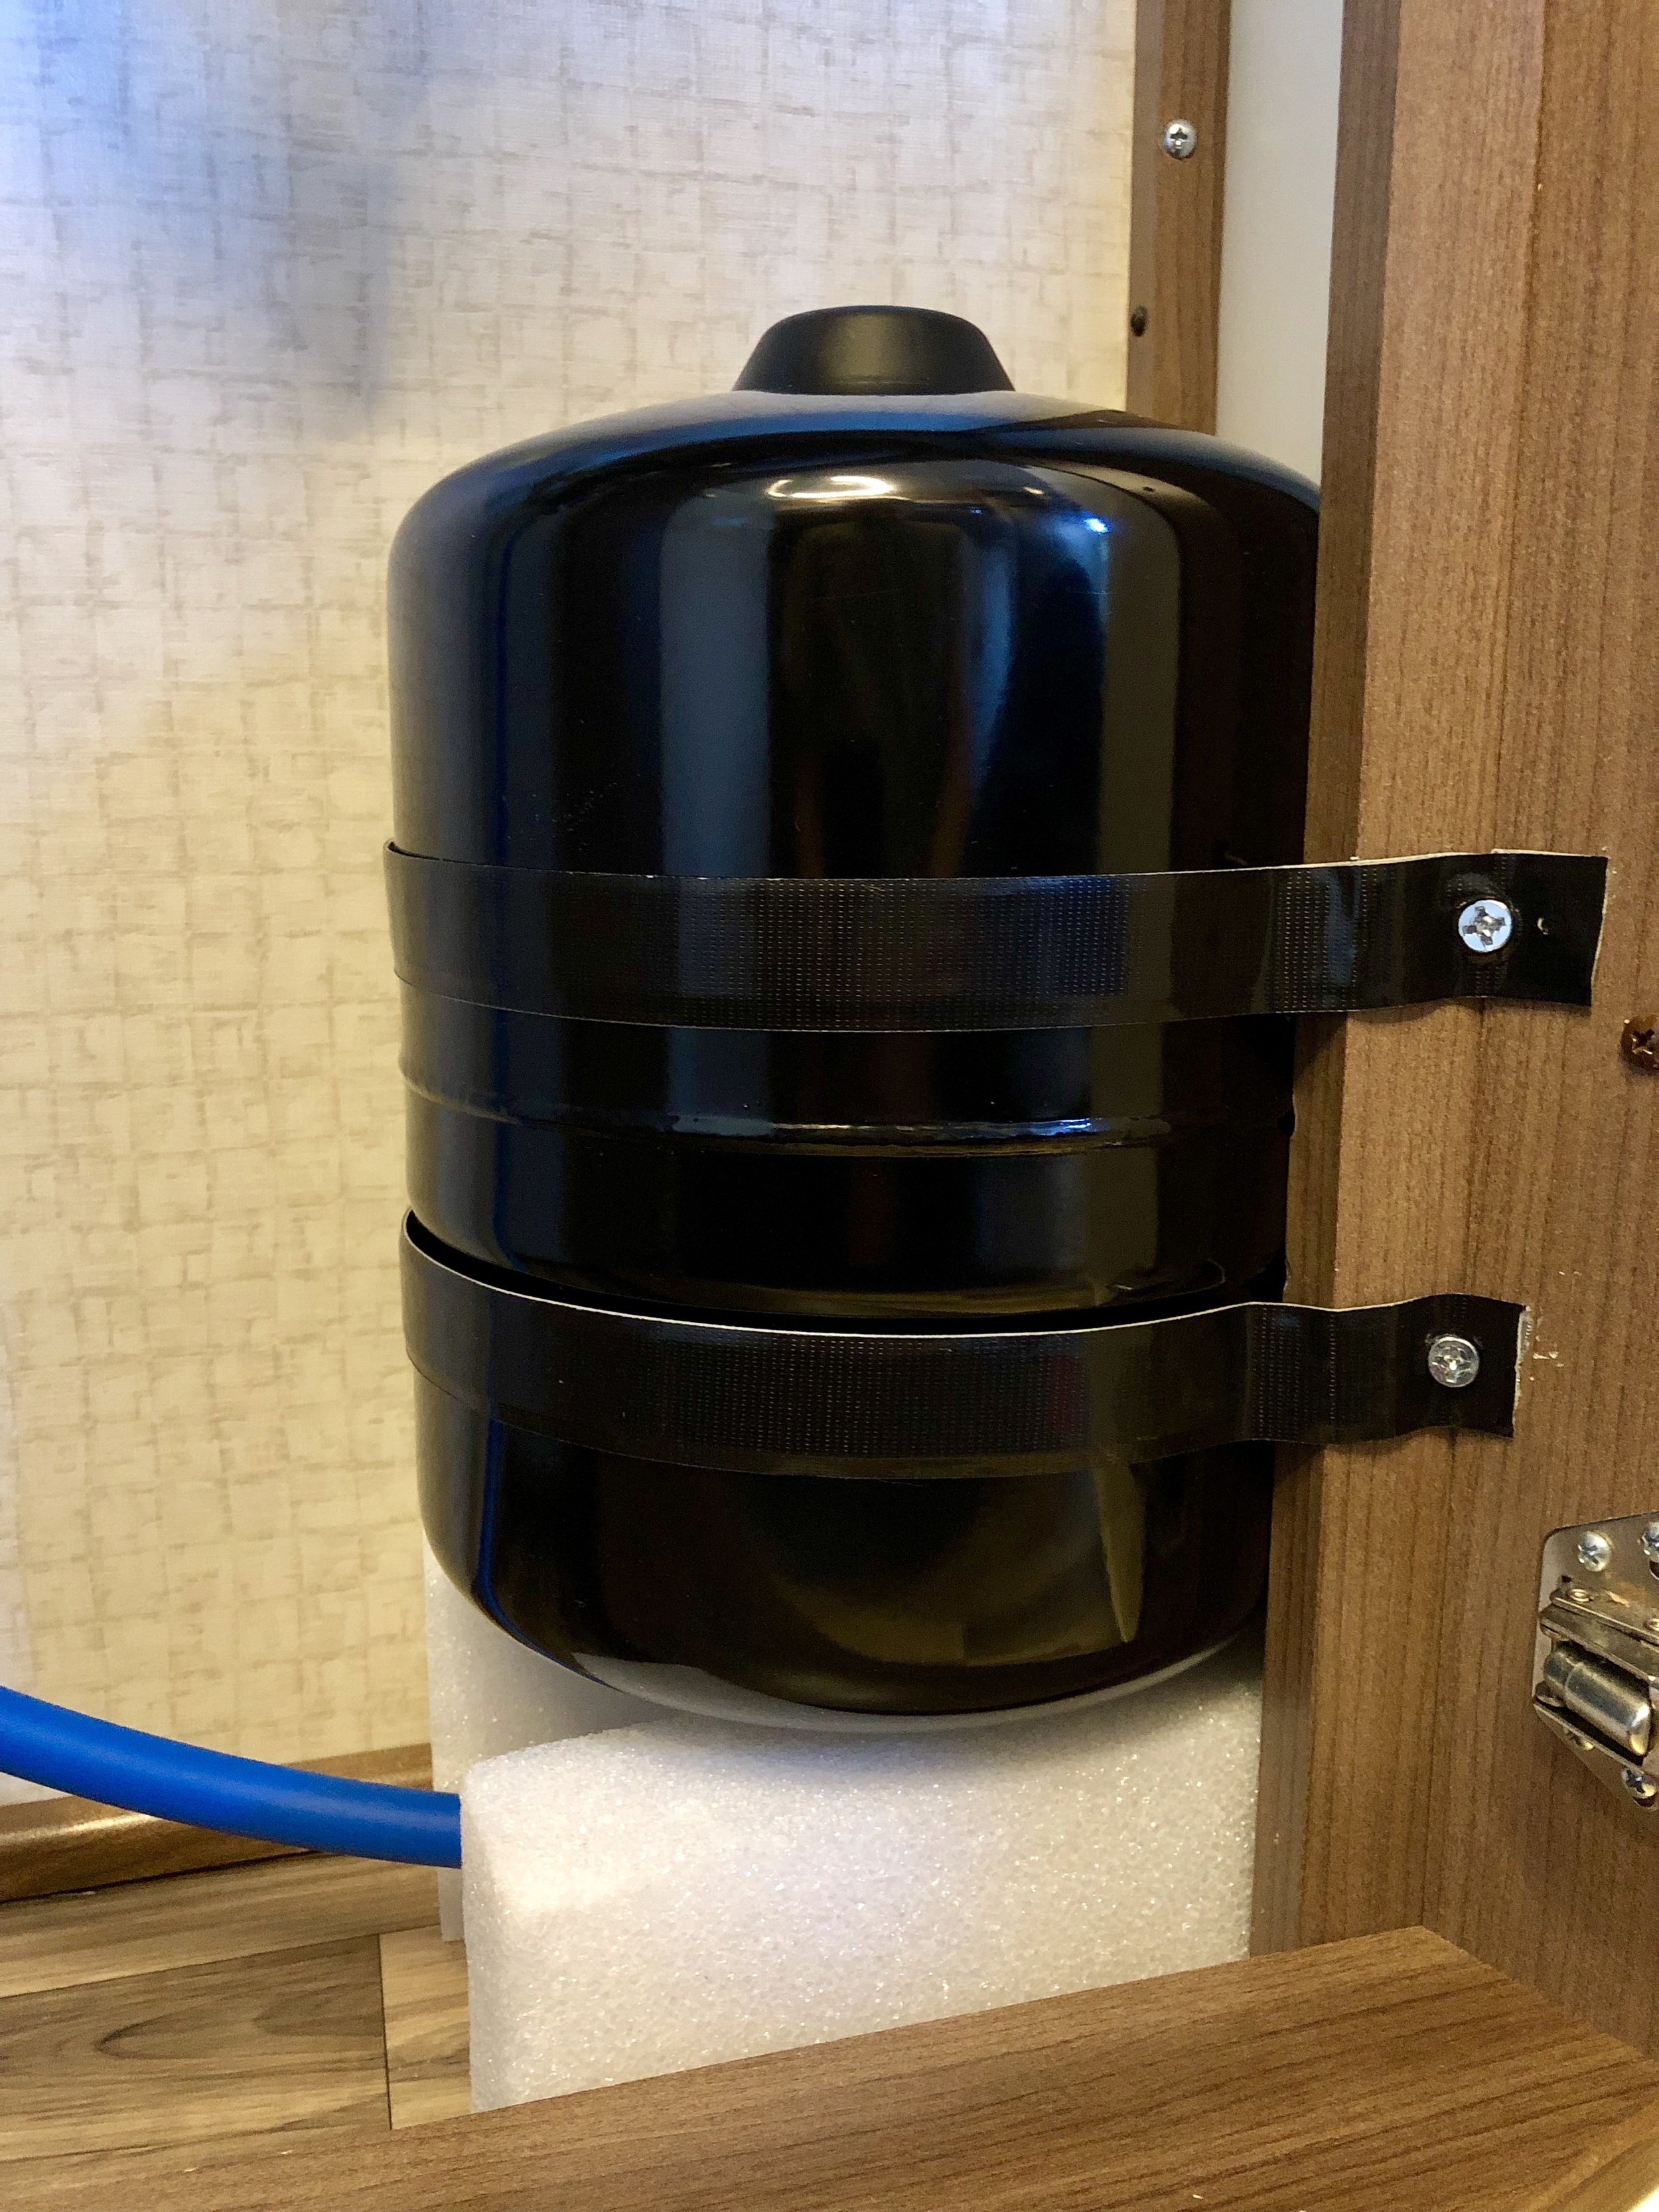
The installation is surprisingly easy — and everything you need is listed below. First, choose a location near a cold water line. You can install it close to the water pump if easily accessible, otherwise anywhere on a cold water line will pressurize the entire RV. I chose the location under the bathroom sink (pictured).
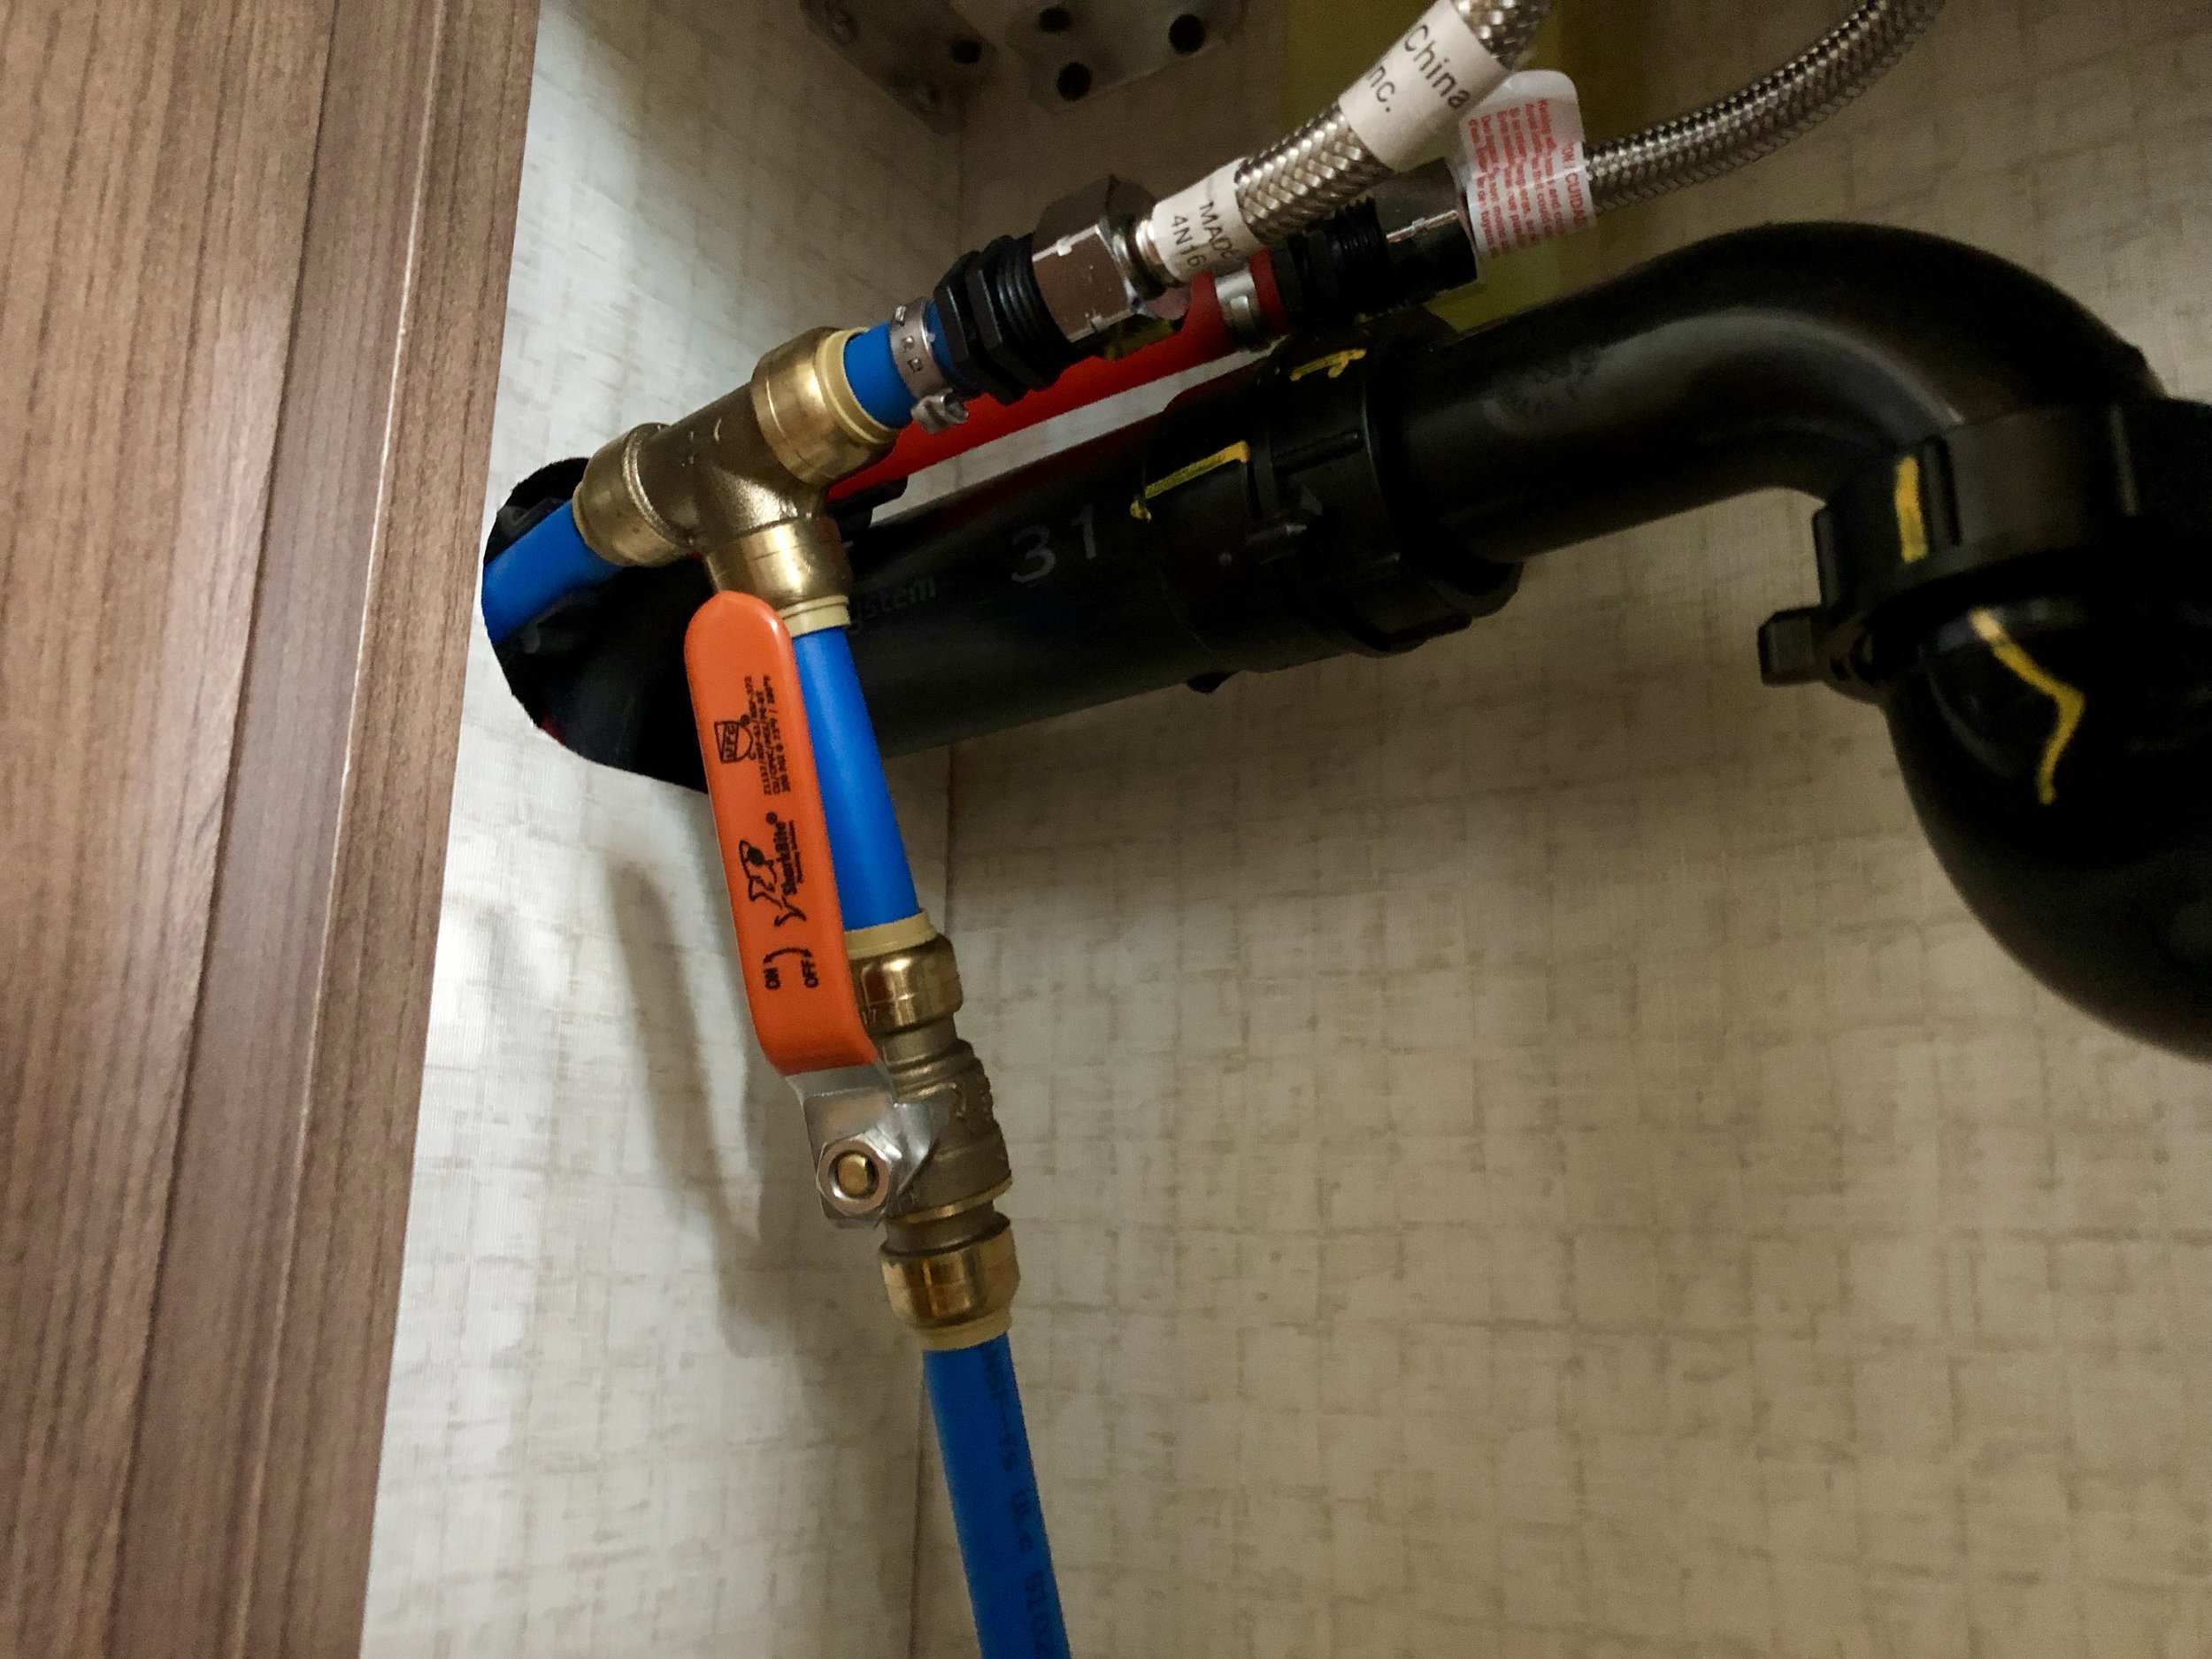
The ball valve (with orange handle) is optional, but I would recommend it. It allows you to take the accumulator out of the loop and resume using your water pump as it originally came from the factory. Instances it might make sense to turn “off” the accumulator; if you suspect a leak, want to test for a leak or if you are going to park your RV in storage.
You’ll only need to make one cut to the existing cold water line with the PEX Tubing Cutter (linked below), but be sure to measure twice, and cut once! The SharkBite Tee is placed where you cut the line (see picture #4 above). The PEX tubing is a push-to-connect fitting that is watertight.
Tank Mounting
You can mount the tank however you wish, in any orientation, but I decided to mount it upright on two styrofoam bricks (8 x 4 x 2 inches) so the elbow fitting at the bottom of the tank is slightly elevated (see photos #2 and 3 above). You can purchase these at an arts and crafts store like Michaels, or just click here to buy on Amazon. I secured the tank snuggly in place with two 3/4” wide metal hanger straps. To prevent chaffing of the tank, I placed 1” Gorilla tape on both sides of each strap (making the straps look black when in fact they are silver/metal underneath).
Click on the photos above to see the un-cropped versions, then visually assemble all the pieces listed below.
Pressure Adjustment
Once installed, you’ll need to adjust the pressure by adding or releasing air with a bicycle pump via the Schrader valve on the top of the tank. Set the pressure to 2 psi below the pump shutoff pressure. On my water pump, the shutoff pressure is rated at 25 psi, so I set my accumulator tank to 23 psi.
When the accumulator tank is full of water, I can shut off my water pump and open the faucet to the full position and get 35 seconds of consistent water pressure before the tank is empty. If you leave the pump on (normal use), you’ll get about 25 seconds of consistent water pressure before the pump cycles back on.
2-Gallon Water Accumulator Tank: www.amazon.com/dp/B00IRFW38W
Pex Tubing: www.amazon.com/dp/B00A8HUWKI
Teflon Tape: www.amazon.com/dp/B00IYFC2VI
SharkBite Tee: www.amazon.com/dp/B002STXNZU
SharkBite Ball Valve: www.amazon.com/dp/B003128NXA
SharkBite 1/2” Elbow: www.amazon.com/dp/B078P7PP3T
SharkBite PEX Tubing Cutter: www.amazon.com/dp/B00A8HV16C