Mod: Cabover Storage Remodel


DETAILS: Cabover Storage Remodel
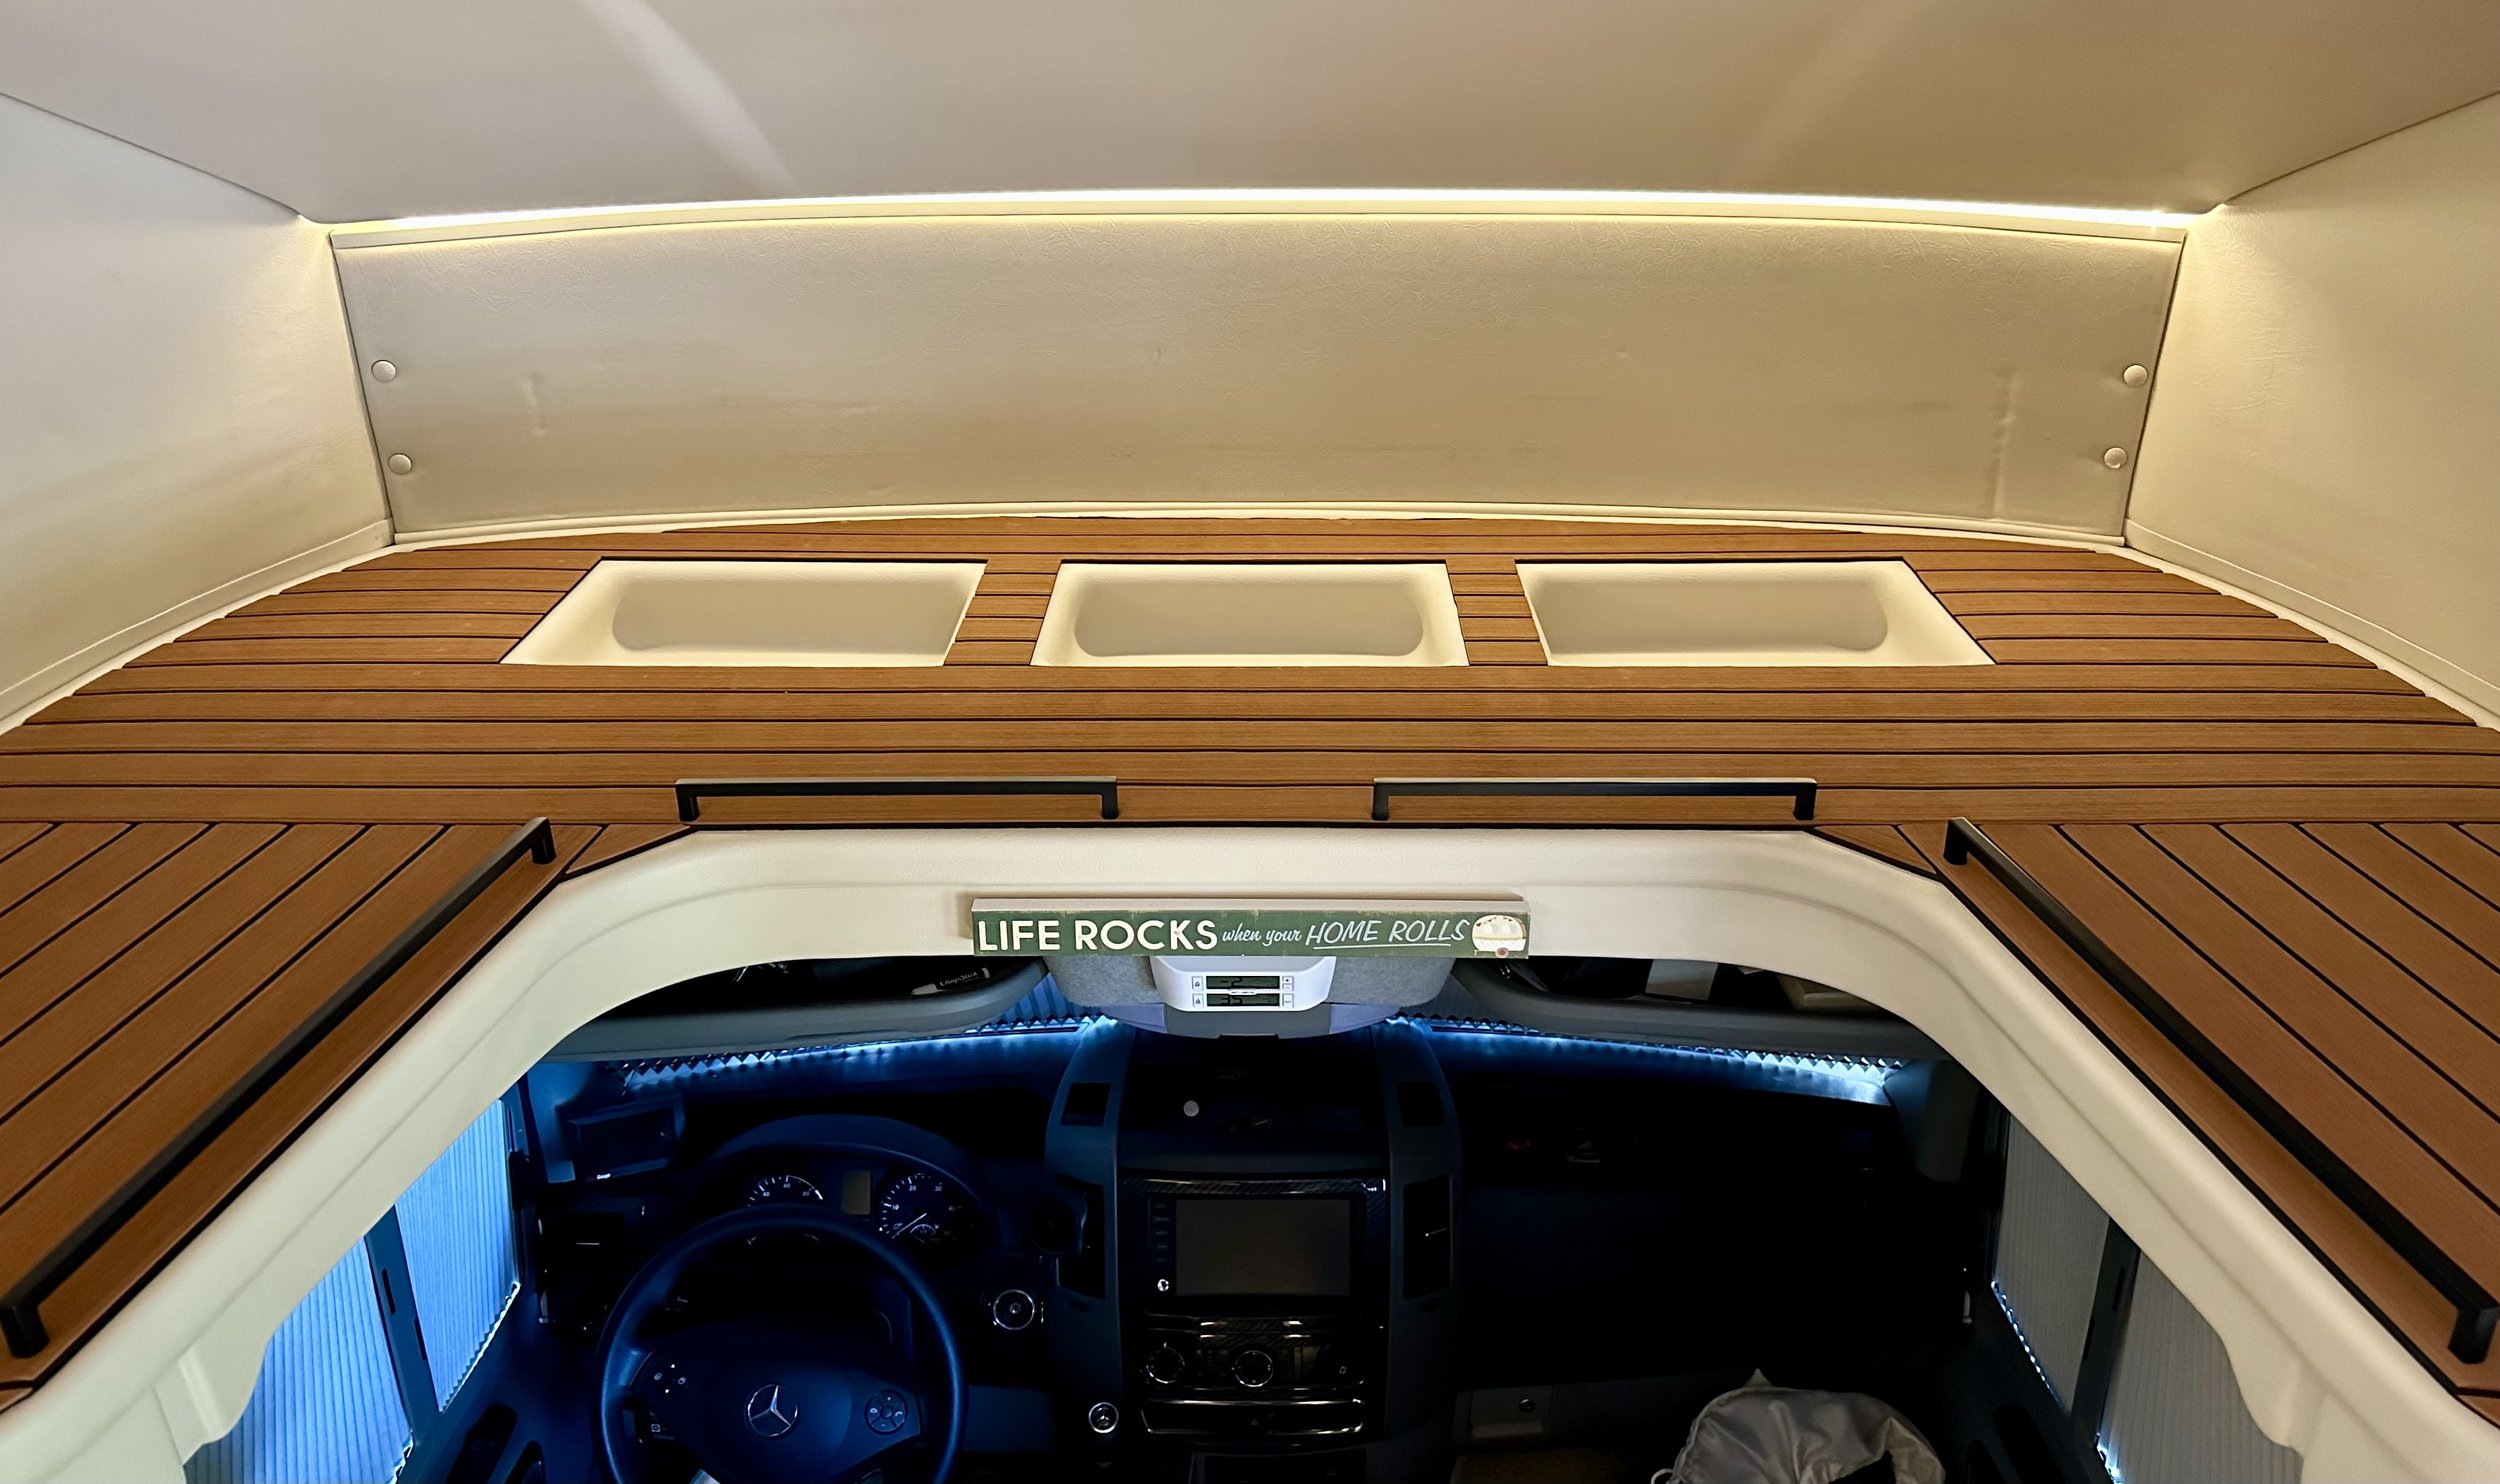
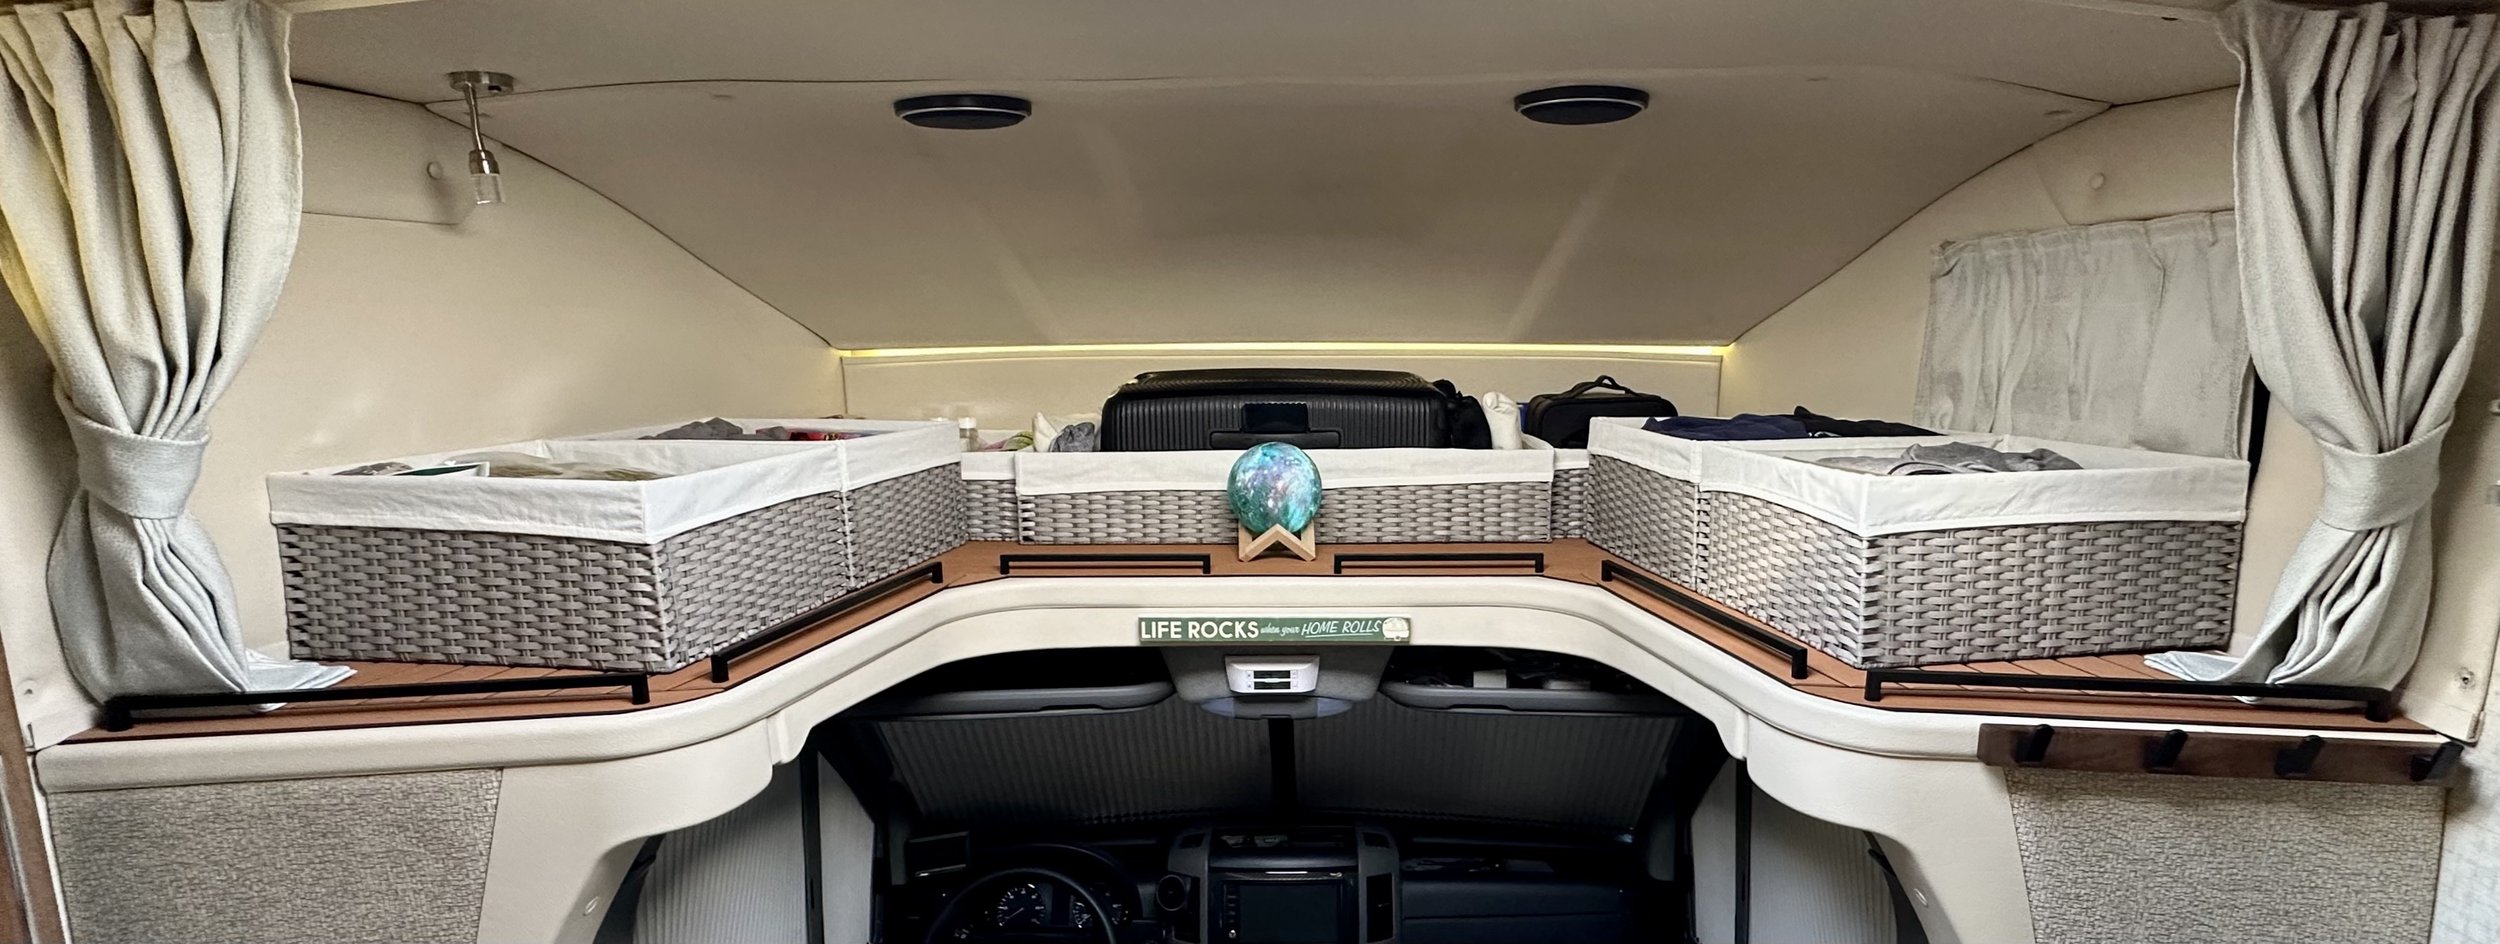
I started this project because I wanted to remove the weight of the cabover mattress that I never use while still making the area practical for storage. I was inspired to add both lightweight flooring material (designed for boats) and mini railings to finish it off. As a byproduct of this “remodel”, the whole area opened up, the bins are easier to access (since they aren’t elevated on a 4” mattress), and it’s forced me to carry less stuff. I can once again see the LED strip light at the front of the area. And my ladder is now in off-site storage along with the mattress. It’s a slimmed down look and feel!
Previously, I installed a cargo net across this area which I enjoyed for many years. But it was time for an upgrade!
Installation of EVA Foam Teak Decking
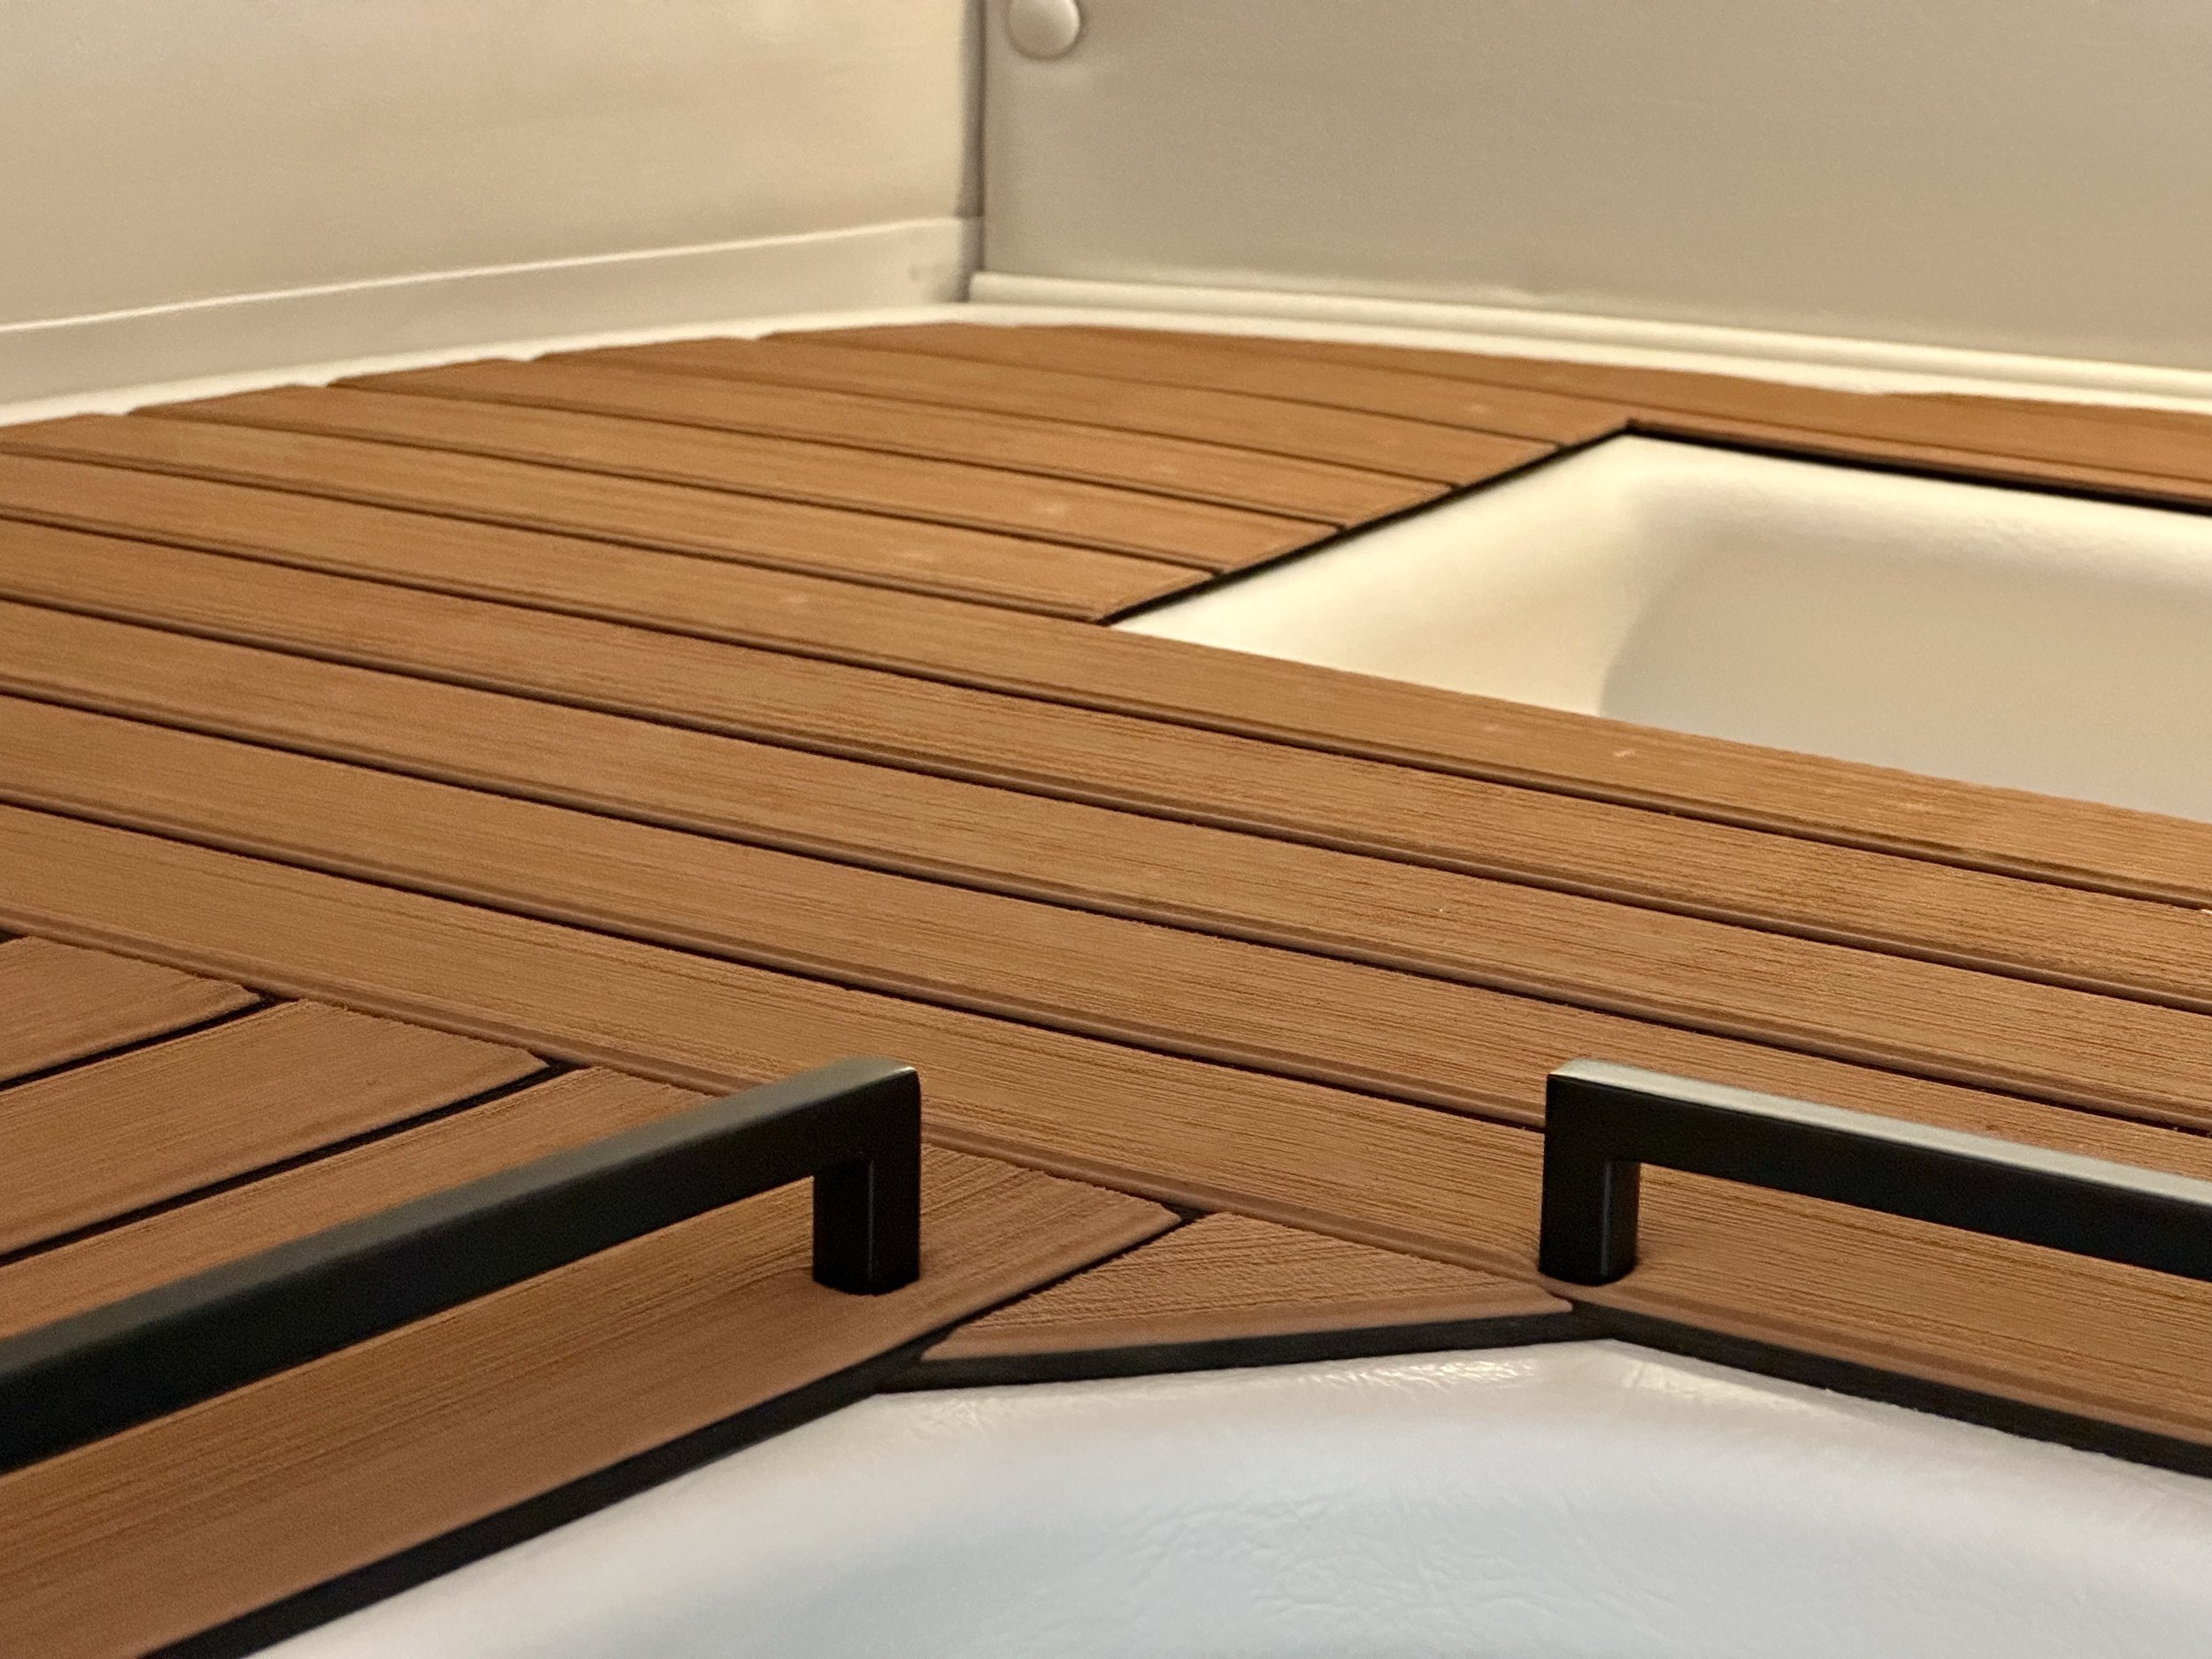
The teak-like flooring is very lightweight and is less than 4 lbs. total (as installed). The surface is non-slip so none of my baskets move while driving, but the rigid metal railings ensure nothing will fall into the cab. The EVA foam material is high quality, heavy duty, built to last in sunlight and designed to be walked on — so it should hold up well over time in this application. It’s adhesive-backed and is semi-permanent once in place.
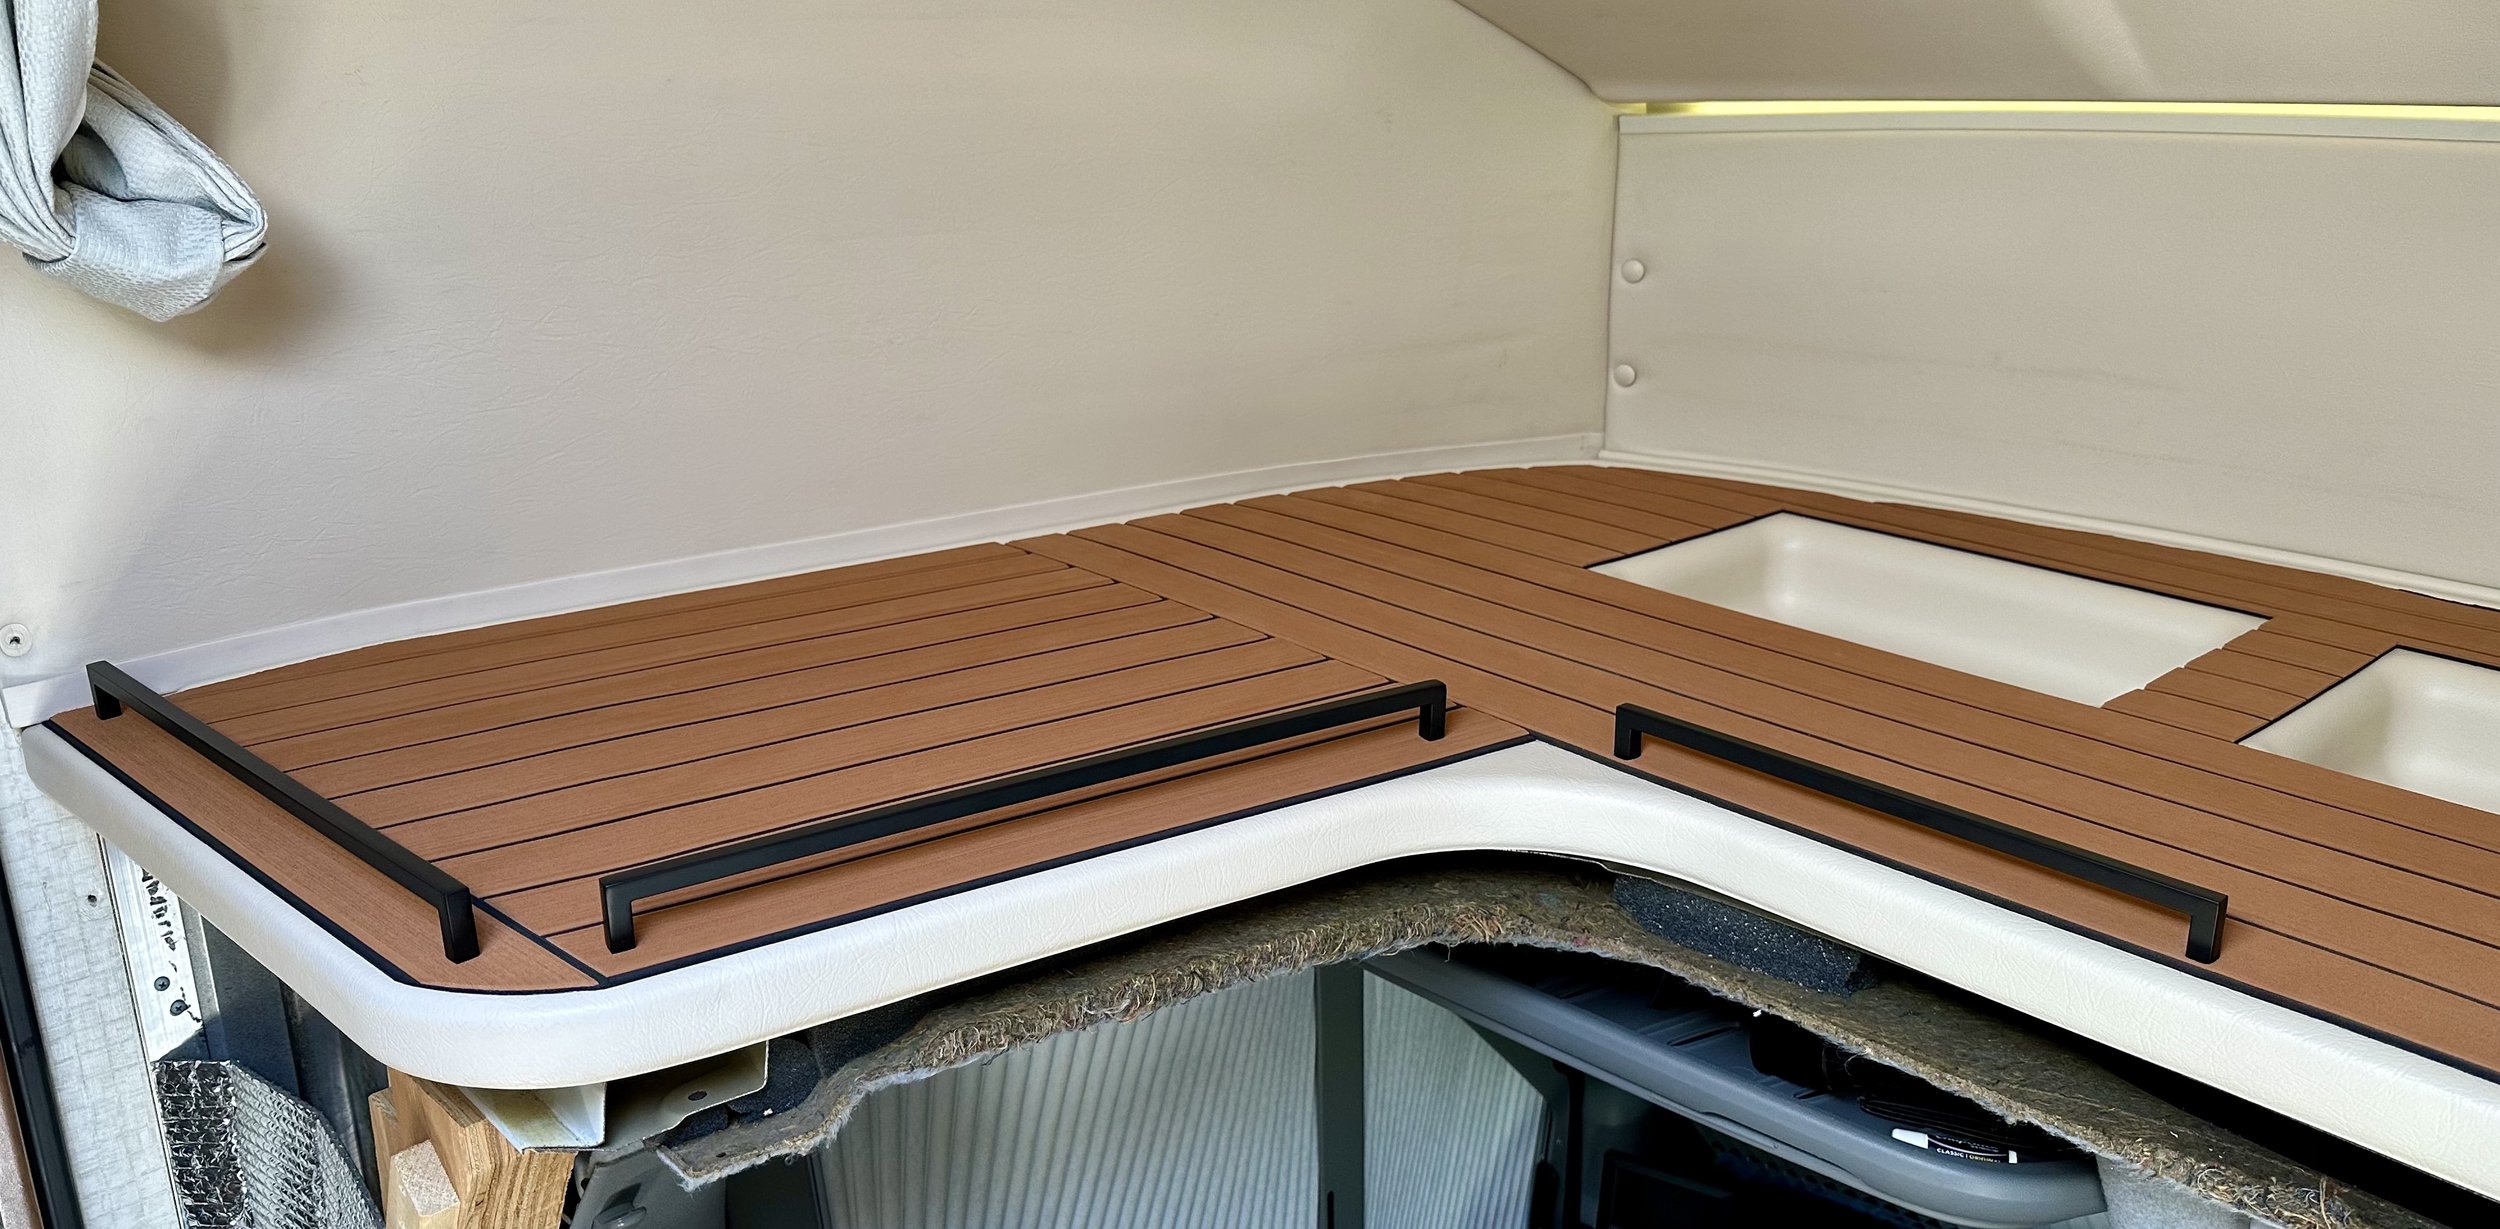
The pattern layout is totally subjective. I choose to get fancy and make the job more challenging! I drew the pattern on paper, then sketched parts of it on the plastic deck in pencil (see photos). This layout took several precision cuts, but as long as you measure twice and cut once, it’s relatively straight-forward.
I used brown kraft paper from an art supply store to cut and trim the various sections on paper first. Once the kraft paper sections fit perfectly, I used them as a template on top of the EVA foam. The hardest part is committing to the first section. After a lot of thought, I decided to start with a long section that was 3 strips wide across the middle (see photos). Once this was in place, you just fill in forward and backward — one piece at a time. Altogether, I made 6 sections cover the entire area (2 of the 6 sections were simply short border pieces at the leading edge).
Winnebago included 5 cubby holes in the molded plastic deck. I decided to cut around the 3 large ones and utilize them for storage (i.e. DVDs, books, etc.), but I covered up the two smaller cubby holes for a cleaner look. While I was at it, I added a dual USB port in the center cubby hole powered by the cab dome lights located just below (it runs on the chassis battery).
To cut the material, I used very sharp razor blades and large, heavy duty construction scissors. I watched several YouTube videos that shared techniques for success when working with EVA foam. The two most important take-aways: always use sharp blades, and make all cuts vertical through the material. For the former, I replaced the blade every couple cuts (it really does make a difference). For the latter, I used a long metal ruler to ensure straight lines and a rigid guide to cut straight down for clean edges. If you want the same pattern as mine, follow the photos for the order of cuts/sections. I used a seam roller to smooth out the material and ensure the edges are adhered securely.
For my pattern layout, I bought two different sizes of EVA foam to cover the area (see links). I believe it's possible to cover the entire area with a single purchase of the larger size (44” x 94”) provided you design a compatible layout and don’t make any mistakes.
Installation of Railings
The “railings” are actually pull handles for large cabinets and dresser drawers. They are secured by two included machine screws, one at each end of the railing. To gain access underneath the deck, you need to remove all three trim pieces that tuck under the bottom of the deck (note the removed trim pieces in many of the photos).
Removal of the two vertical trim pieces (that are immediately behind the driver’s and passenger’s seats) is relatively straightforward. However, the removal of the third, horizontal trim piece was the most difficult part of the job for me. First, remove the two screws that are drilled straight down from the top of the deck (I left them removed permanently since the railings ultimately secure the deck to the frame underneath). Next, I needed to lift the deck up a few inches to gain access to the screws that secure the horizontal trim piece. In the end, I used a heat gun underneath the deck to soften the glue along with the gentle application of a crowbar to lift up the deck from the metal frame. This will all make sense when you get to this step!
Once the trim pieces are removed, carefully plan the location of each railing noting what’s below. In some cases, the screw head ends up immediately on the underside of the deck (requiring a shorter machine screw and washer from the hardware store). In other cases, I used the included machine screws to go through a metal framing member. To be specific, of the 12 holes I drilled for 6 railings, exactly half of the them went through a metal framing member, the other half only the plastic deck (again, this will all make more sense once you remove the trim pieces and can see the underside).
Installation of Coat Hooks
Before I removed the ladder, I used to hang things on the two “hooks” on top, but with the ladder removed, I was missing the functionality. I installed a 4-hook coat rack that looks better and has twice the versatility. It screws into thick wood and is very secure.
EVA Foam Teak Decking (44 x 94 inch): www.amazon.com/dp/B0B4JTJ1KL
EVA Foam Teak Decking (23 x 94 inch): www.amazon.com/dp/B097CZC5G8
18” Railing (quantity 4): www.amazon.com/dp/B087YBJSX4
12” Railing (quantity 2): www.amazon.com/dp/B087Y5X81R
Coat Hooks: www.amazon.com/dp/B09N1JW8JZ
Large Basket, Light Grey (quantity 4): www.bit.ly/3XBqmuw
Medium Basket, Light Grey (quantity 2): www.bit.ly/3XBqmuw
Long Basket, Light Grey (quantity 1): www.bit.ly/3Q0rNkL
Seam Roller: www.amazon.com/dp/B07GVGTX2V
Moon Lamp: www.amazon.com/dp/B07RFGSLRD