Mod: Upgrade to 2 x 300ah EPOCH Batteries
DETAILS: Upgrade to 600ah of EPOCH Batteries
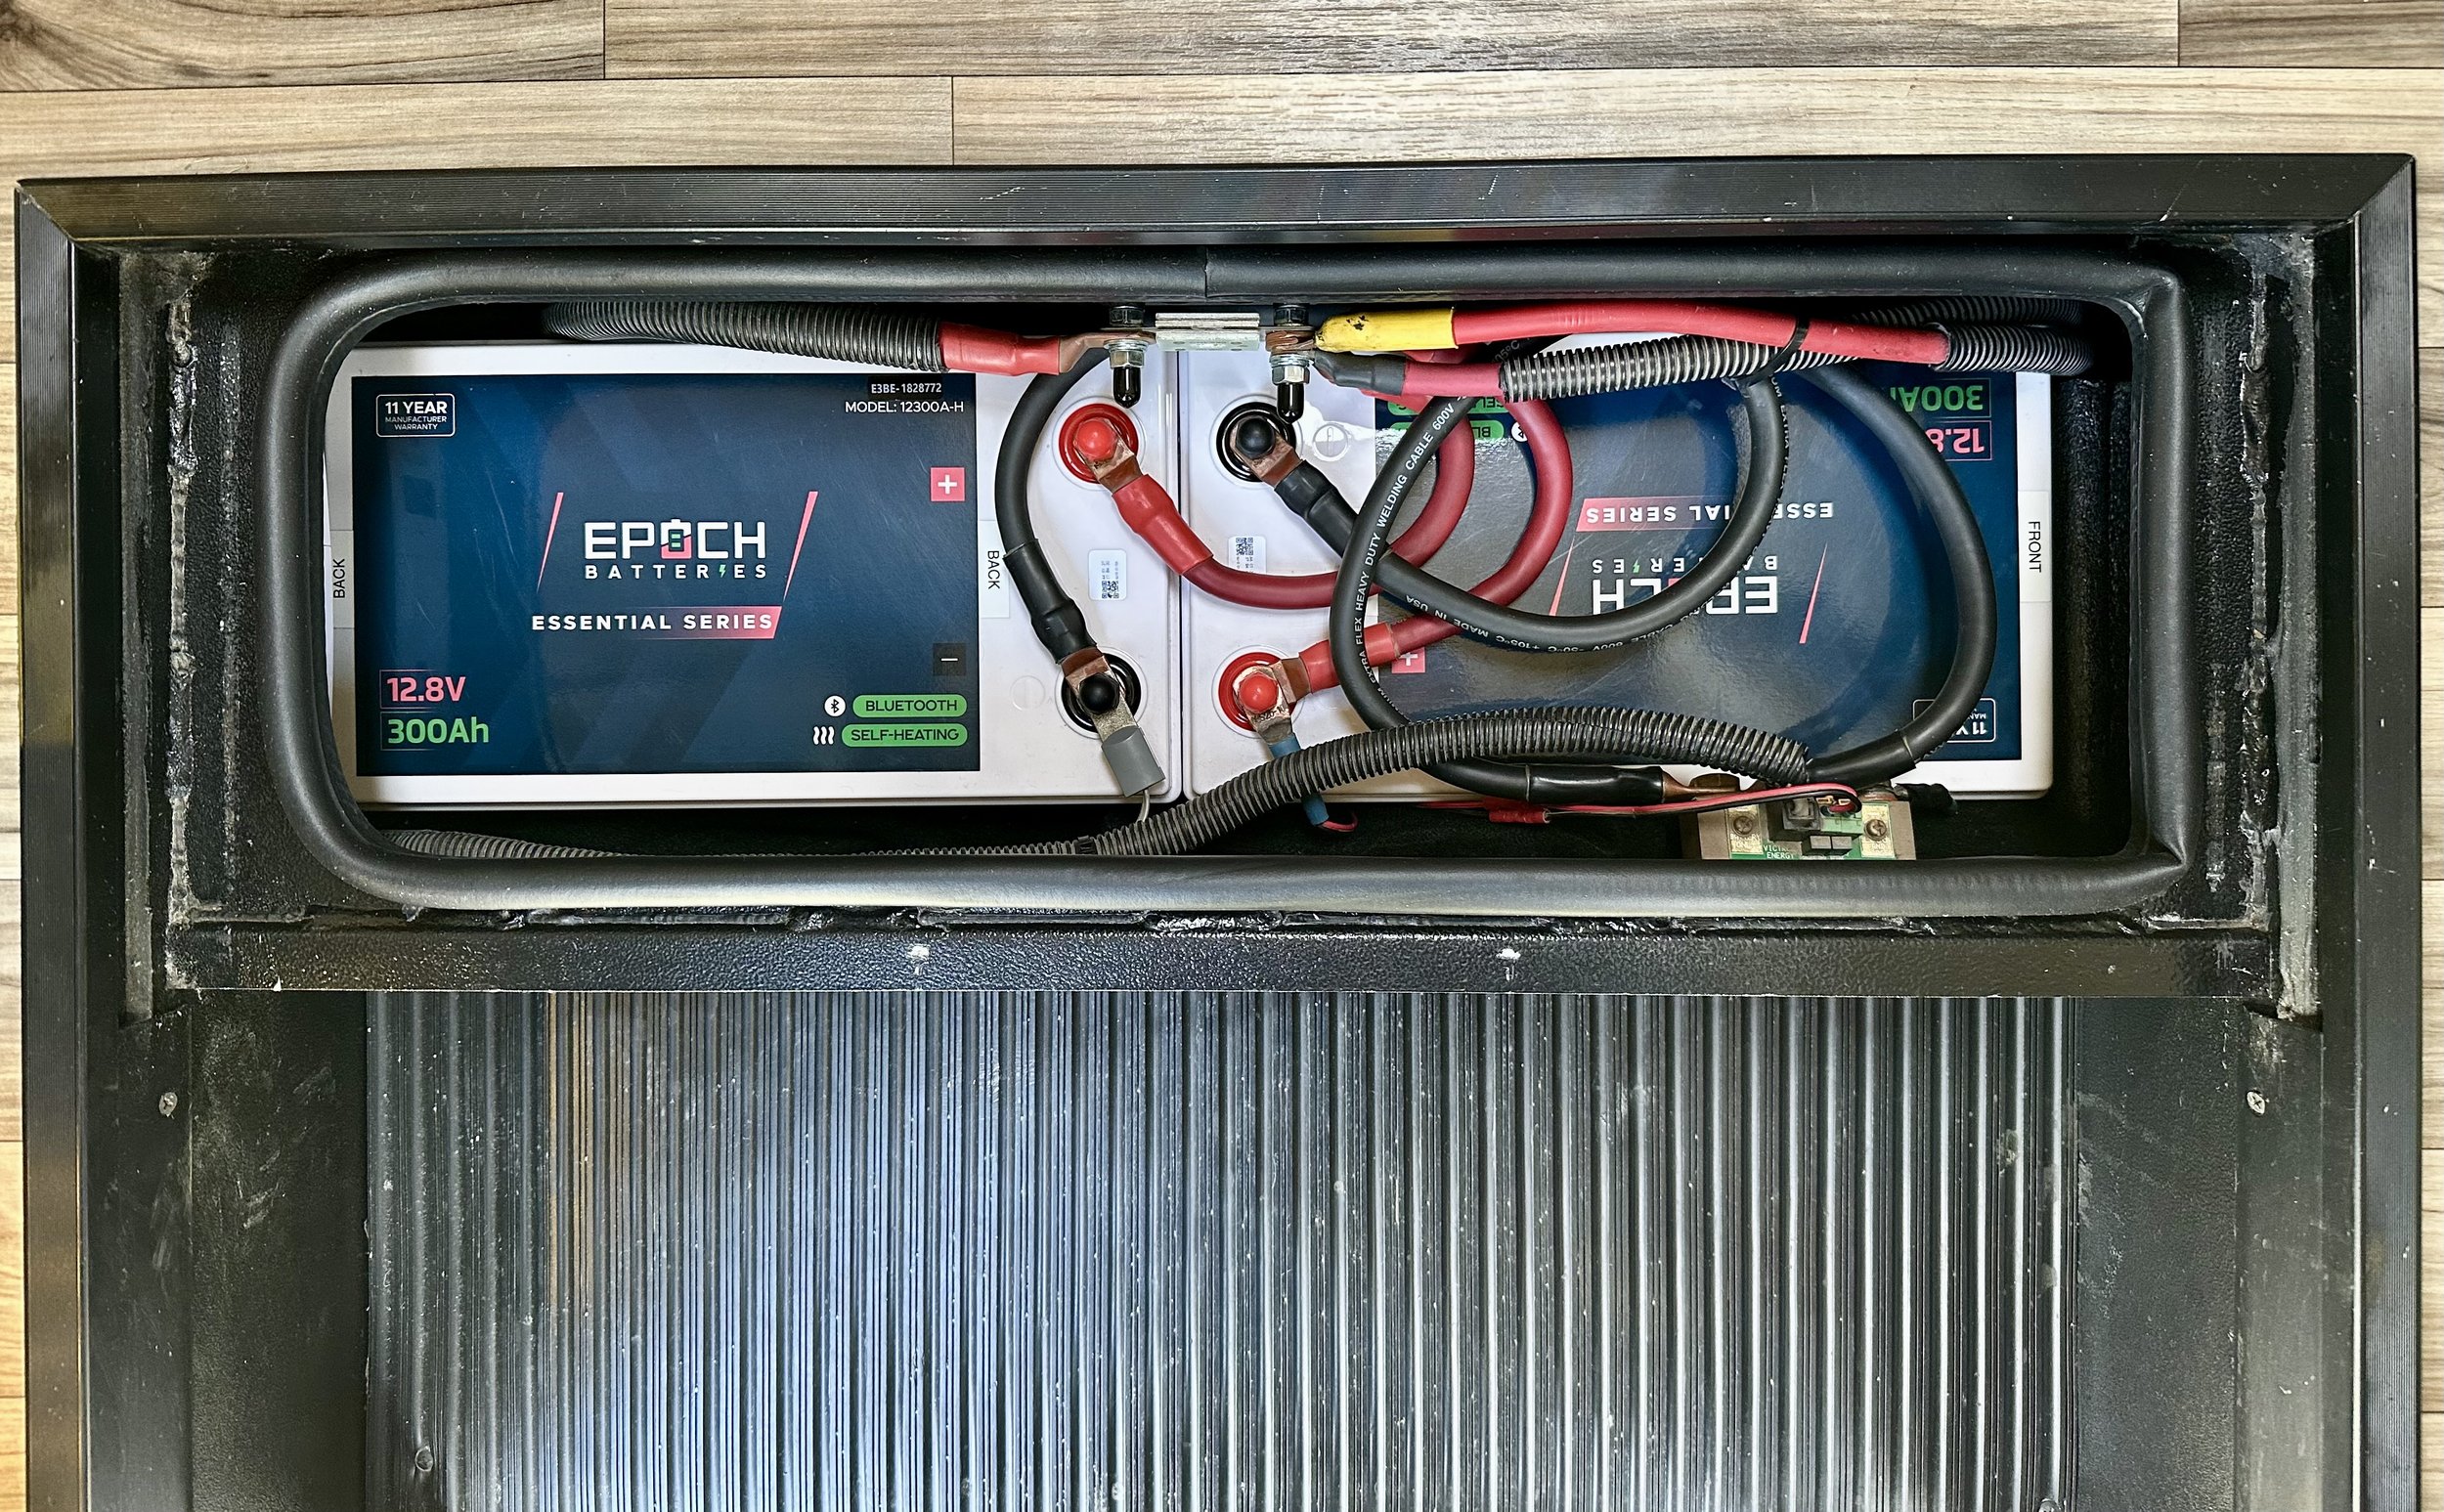
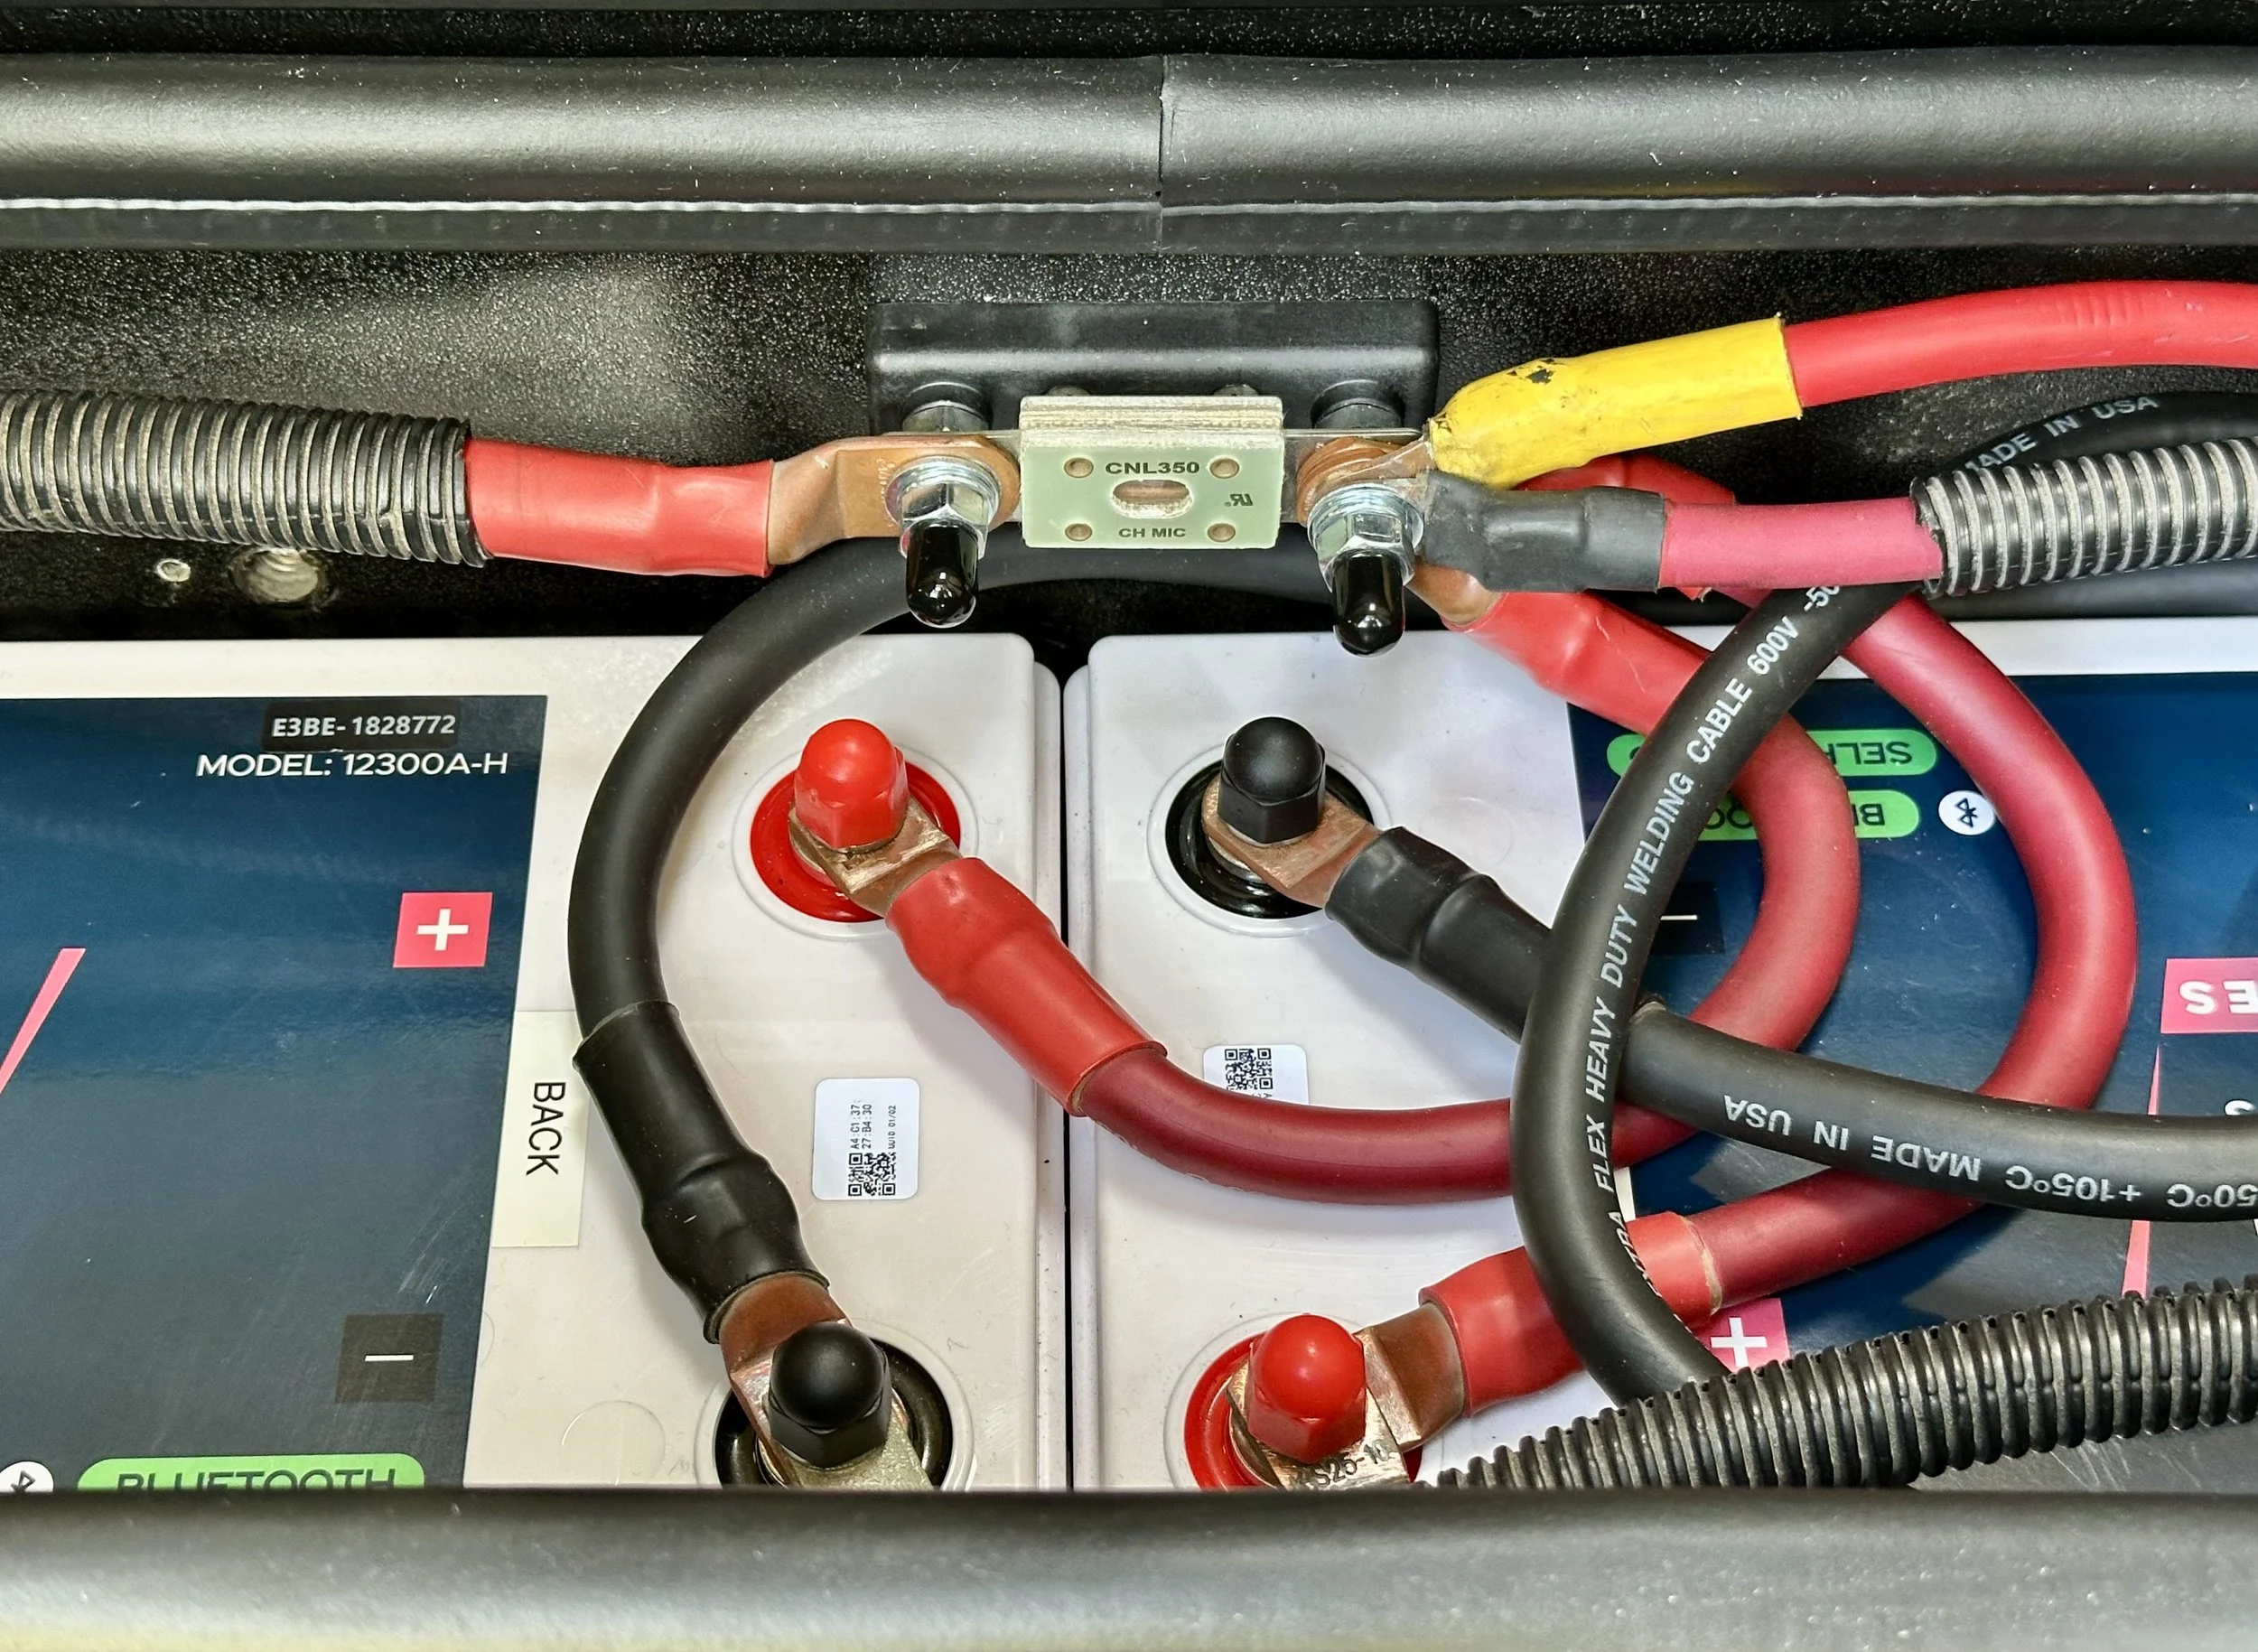
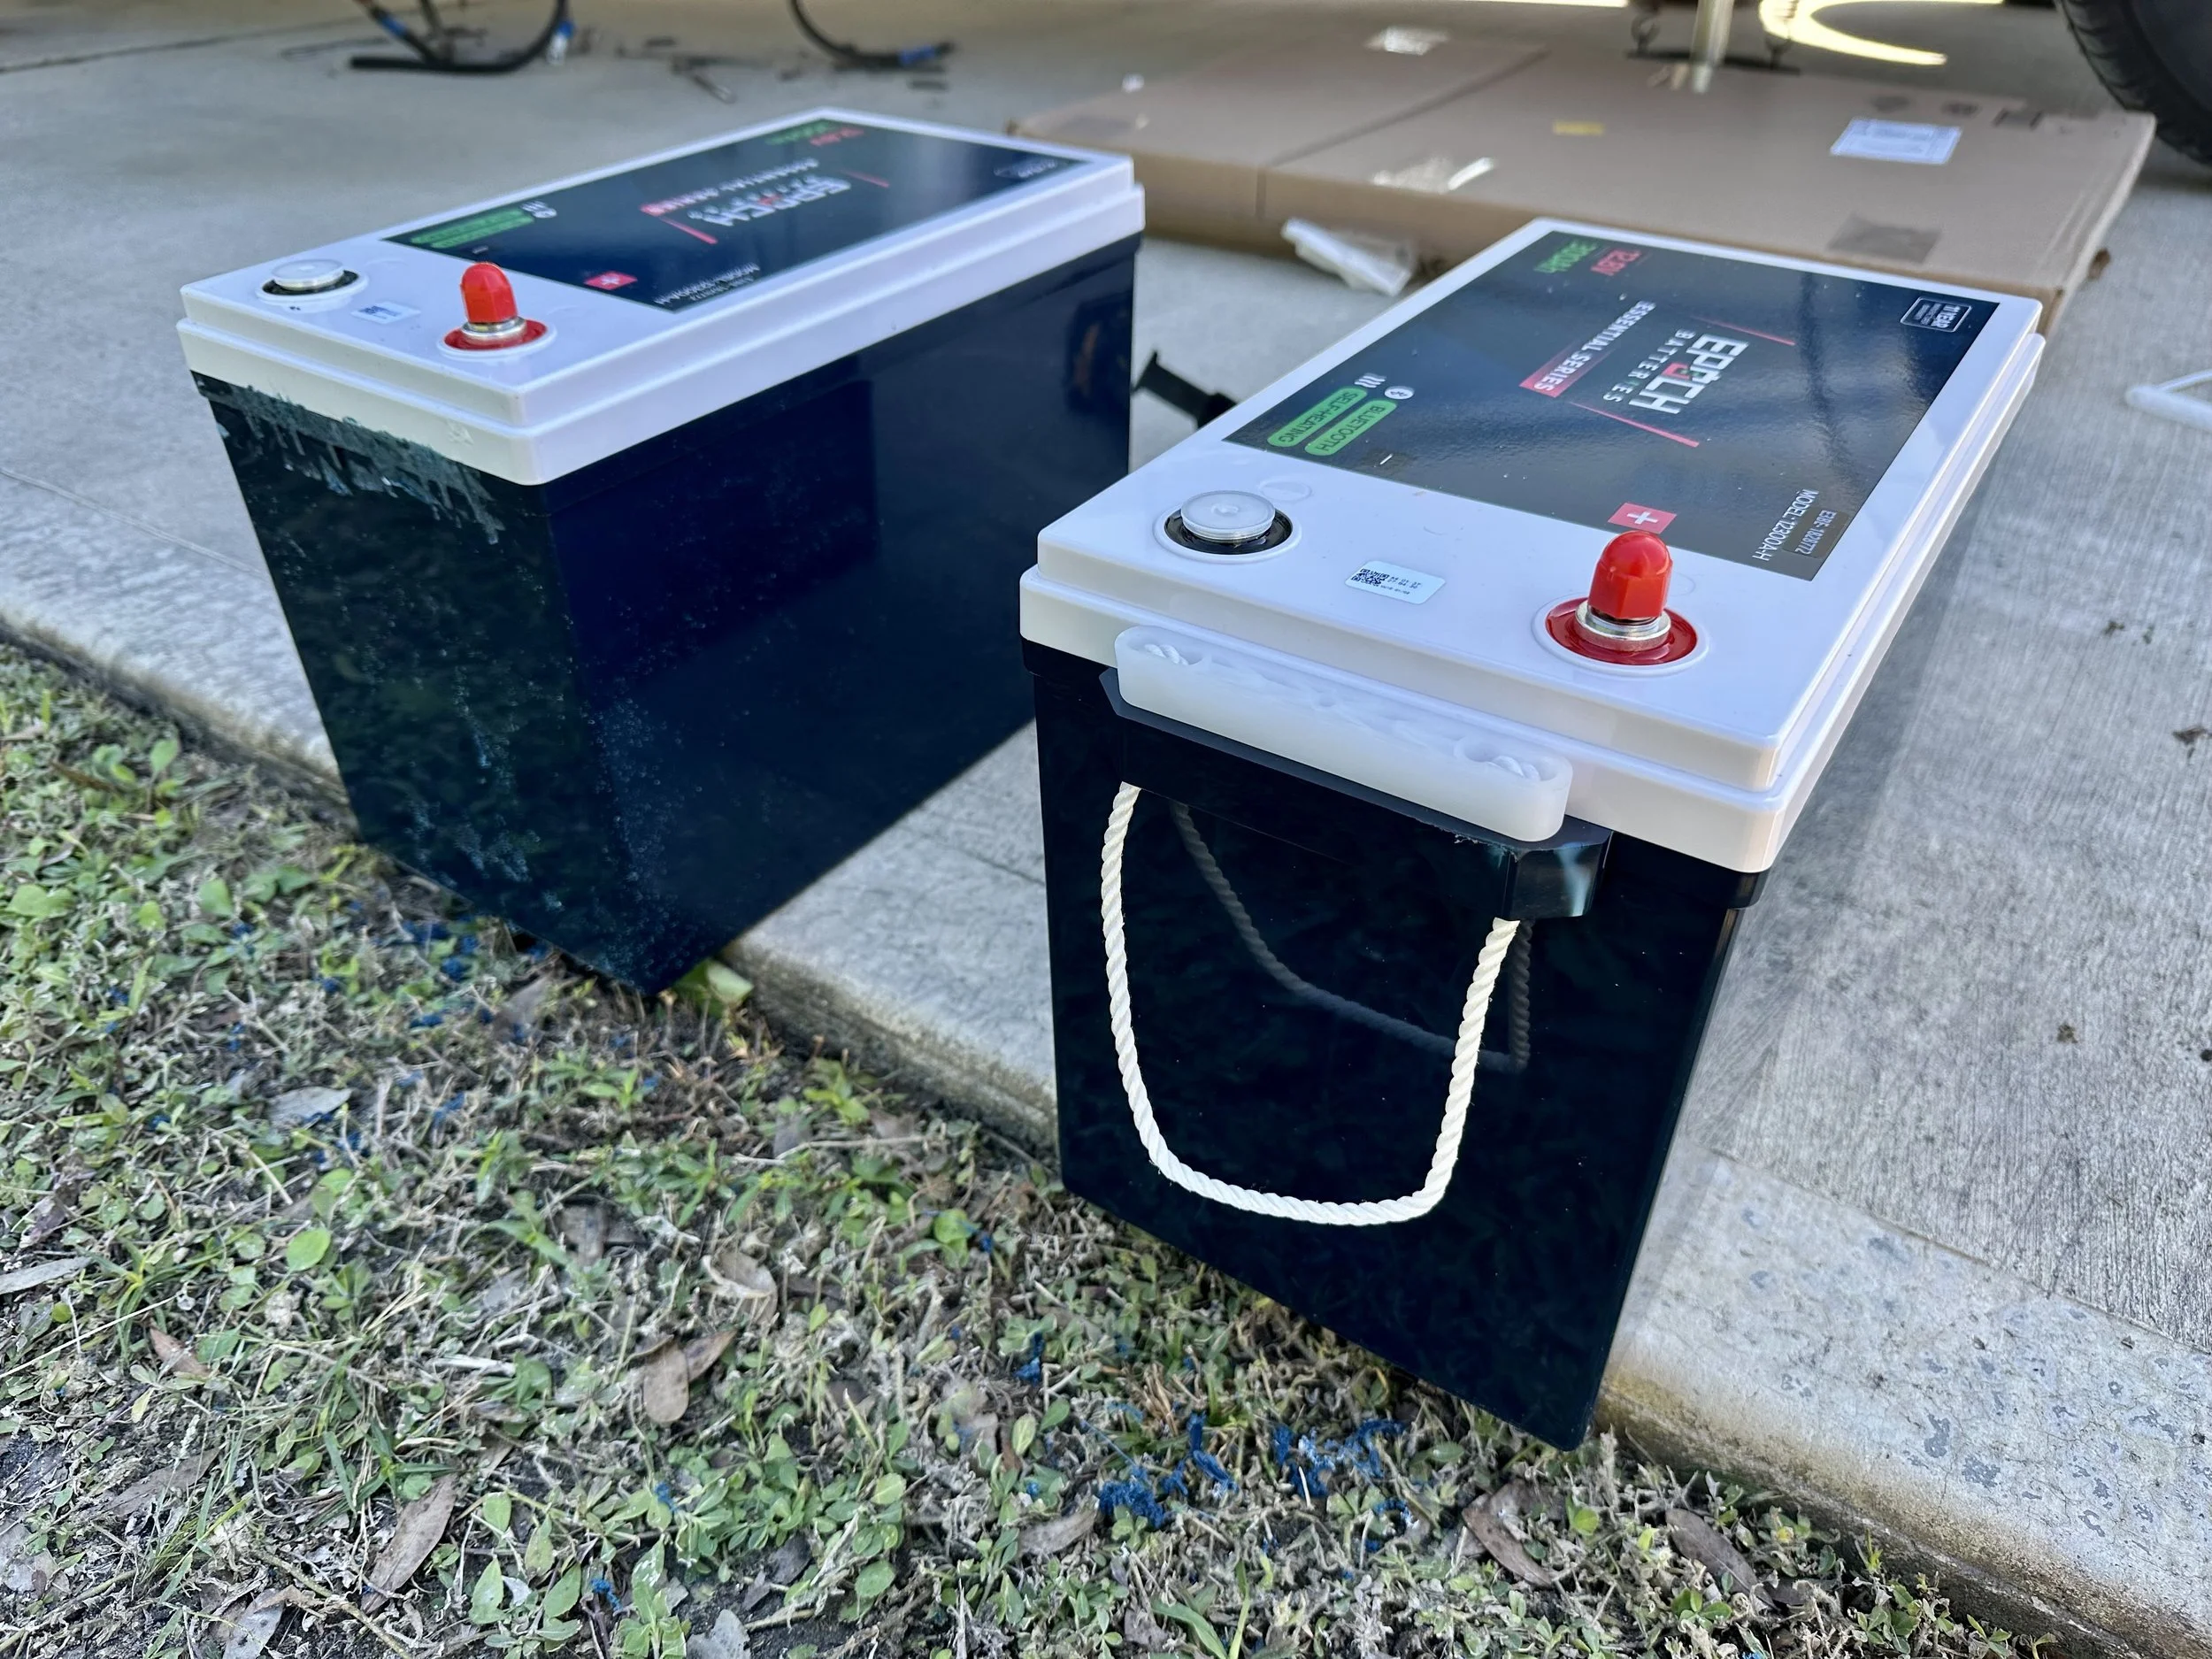
I just completed an upgrade from 2 x 10⁵ah Lion Energy lithium batteries to 2 x 300ah EPOCH lithium batteries. I went from a 210ah bank to a 600ah bank! Thanks to the many owners before me that did this upgrade, I knew they’d fit in my step compartment. What I want to highlight in this post are the modifications to the battery box if you have a View/Navion model between 2015-2019 (newer models don’t need any modifications). In the 2015-2019 rigs, the batteries will only fit if you cut some metal obstructions with the tool of your choice (I used a DeWalt Oscillating Multitool).
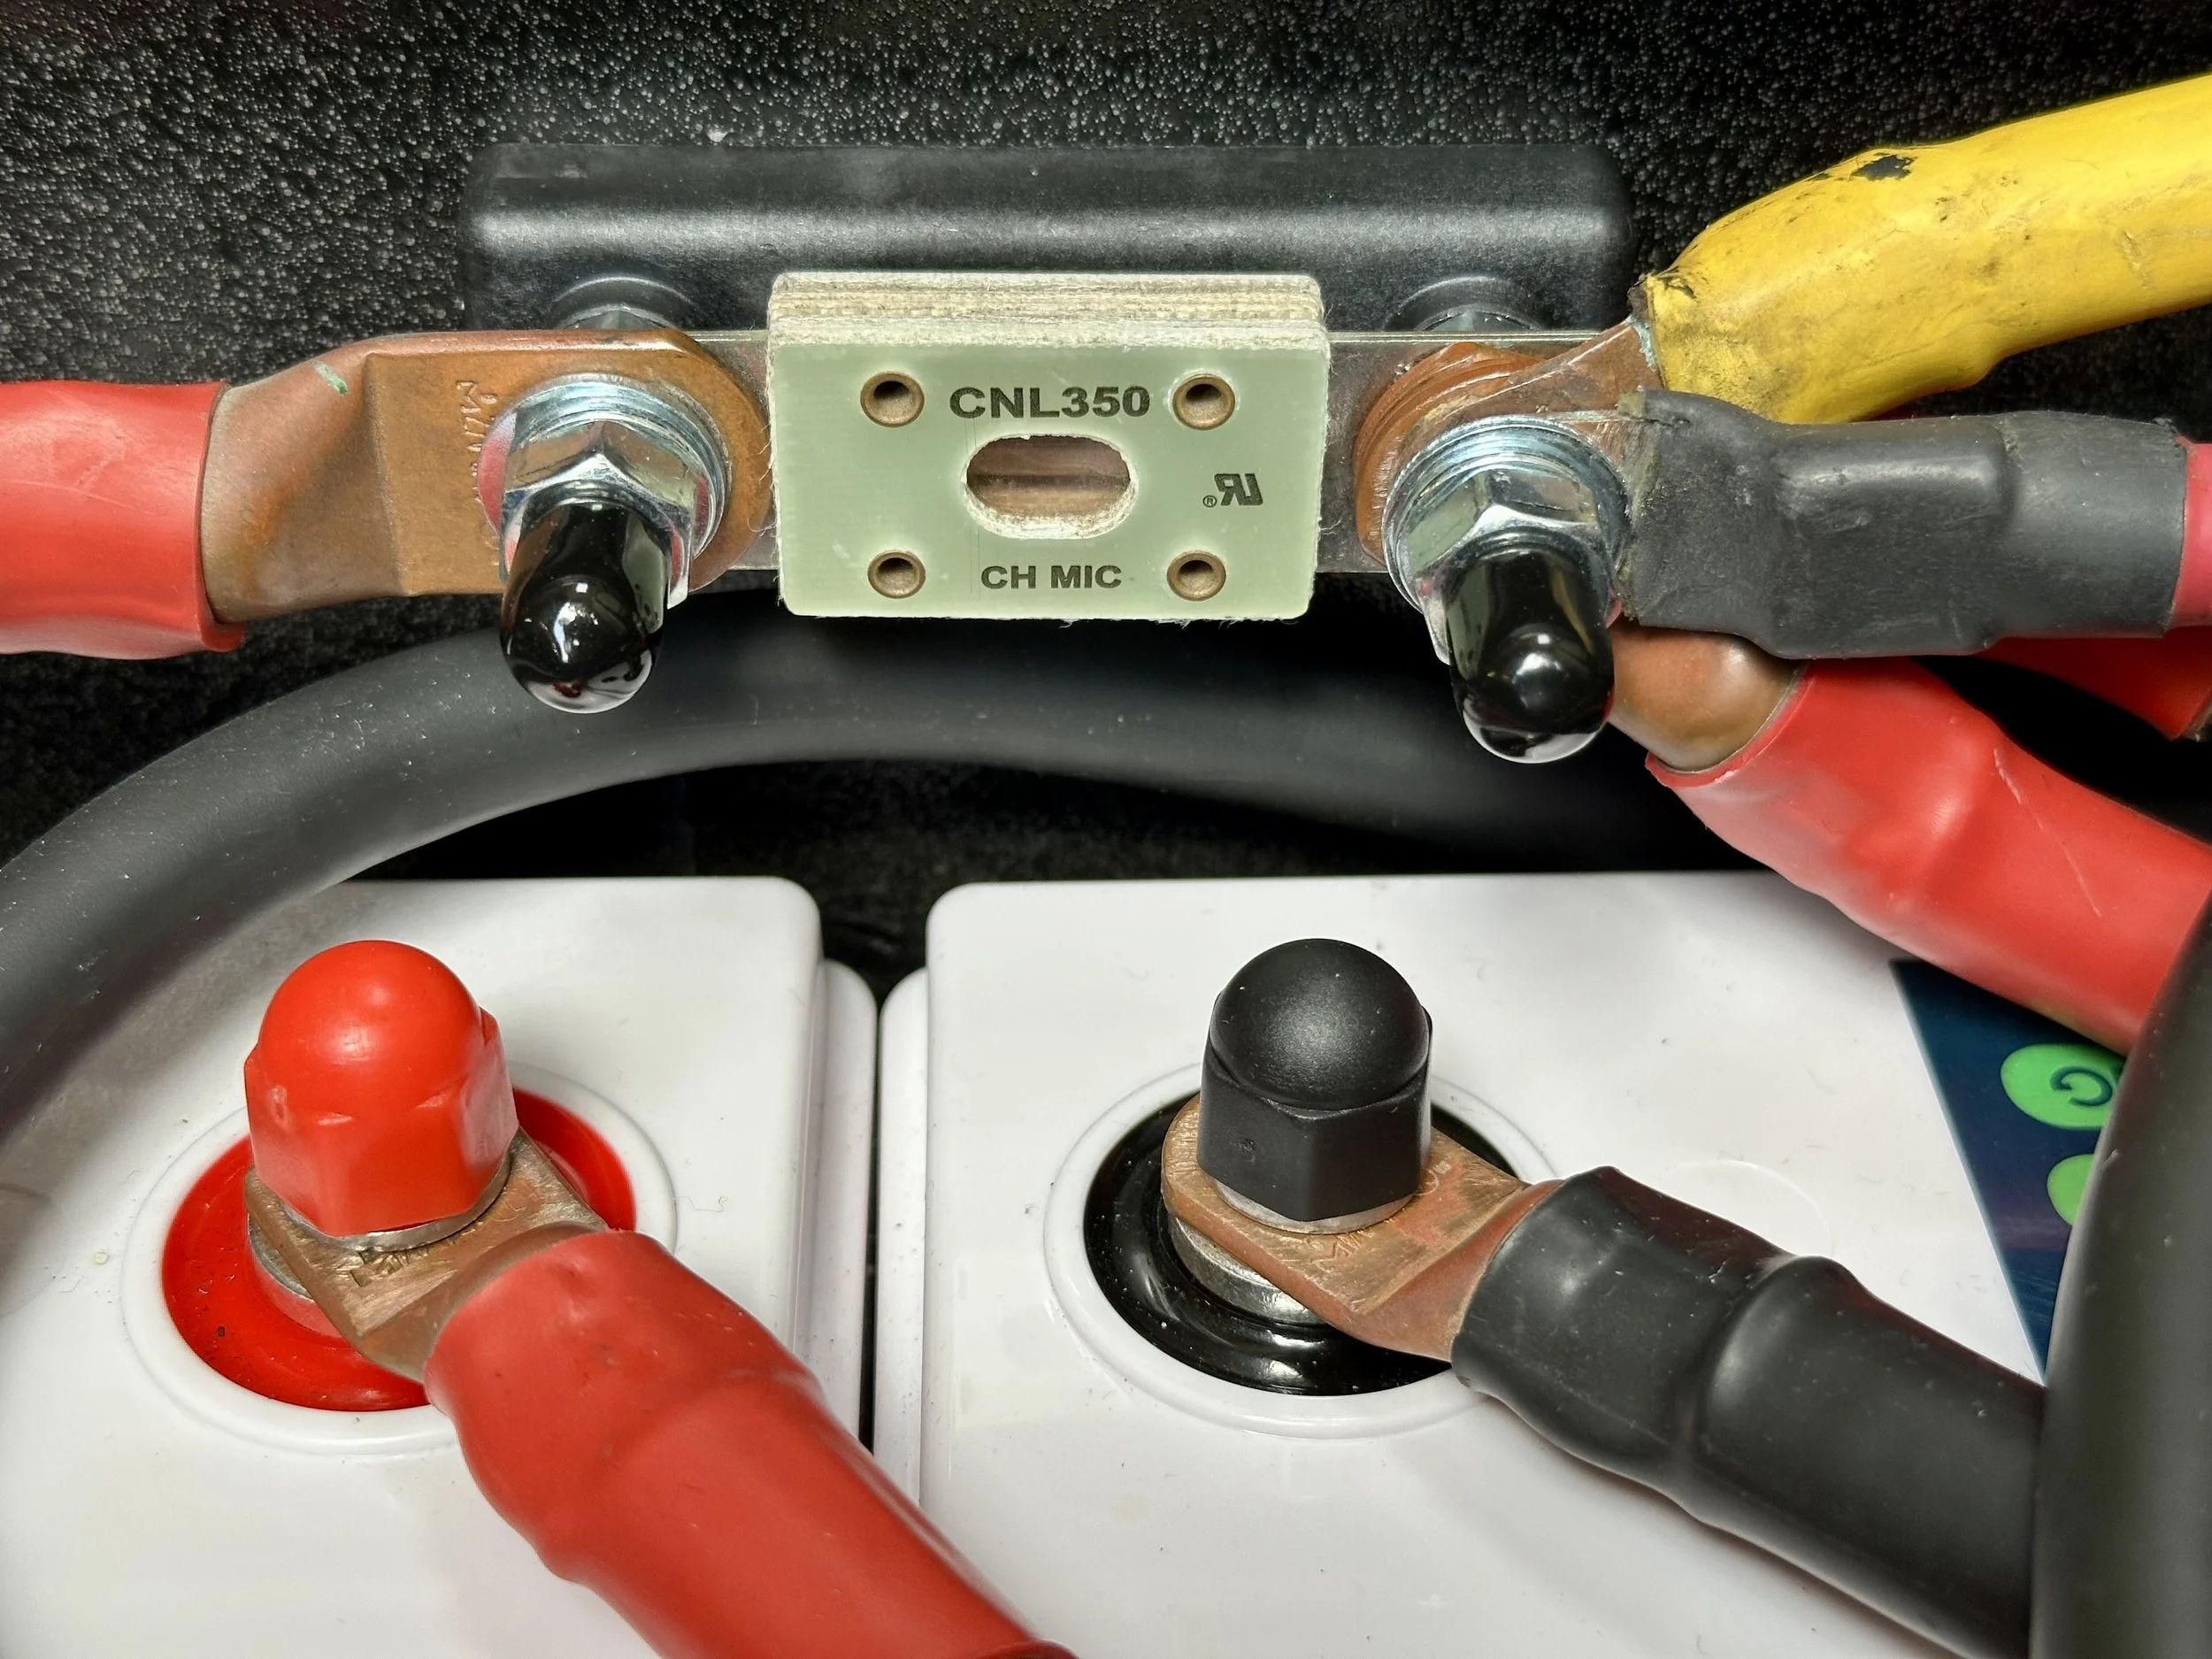
If you want to know how I did the wiring, it’s unchanged from my original post when I converted to lithium (click here for all those details).
Modifying the Compartment:
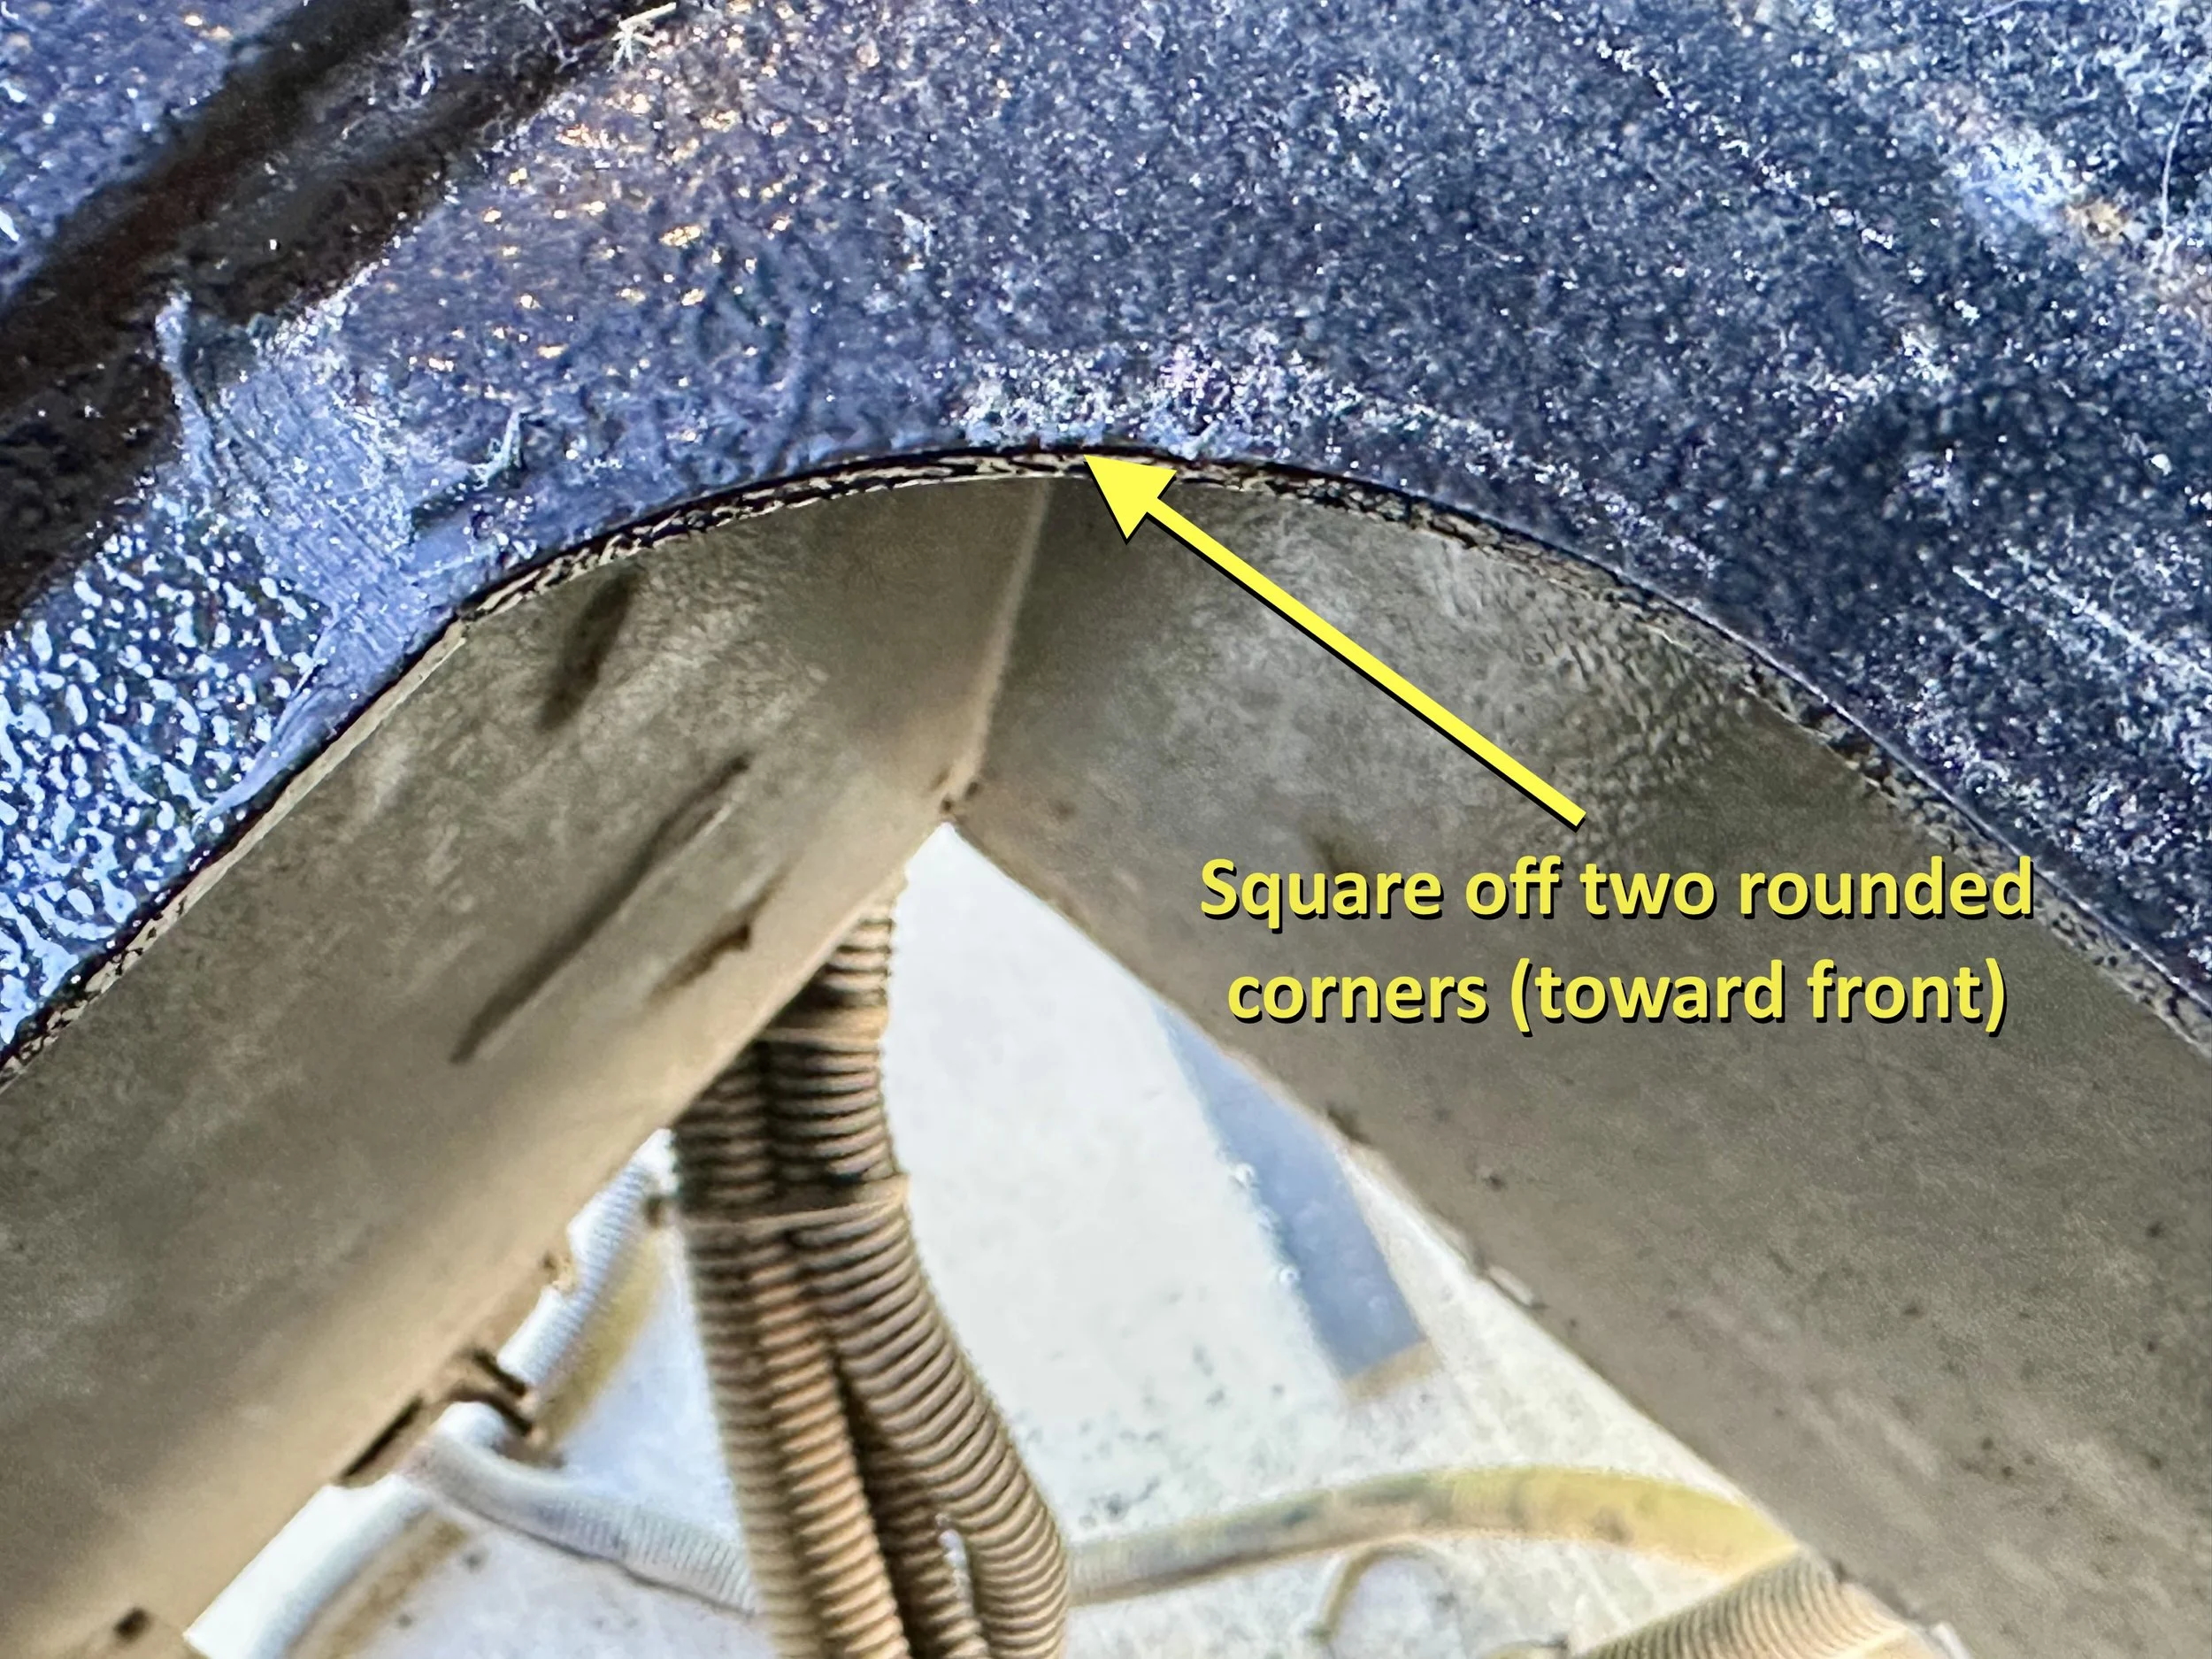
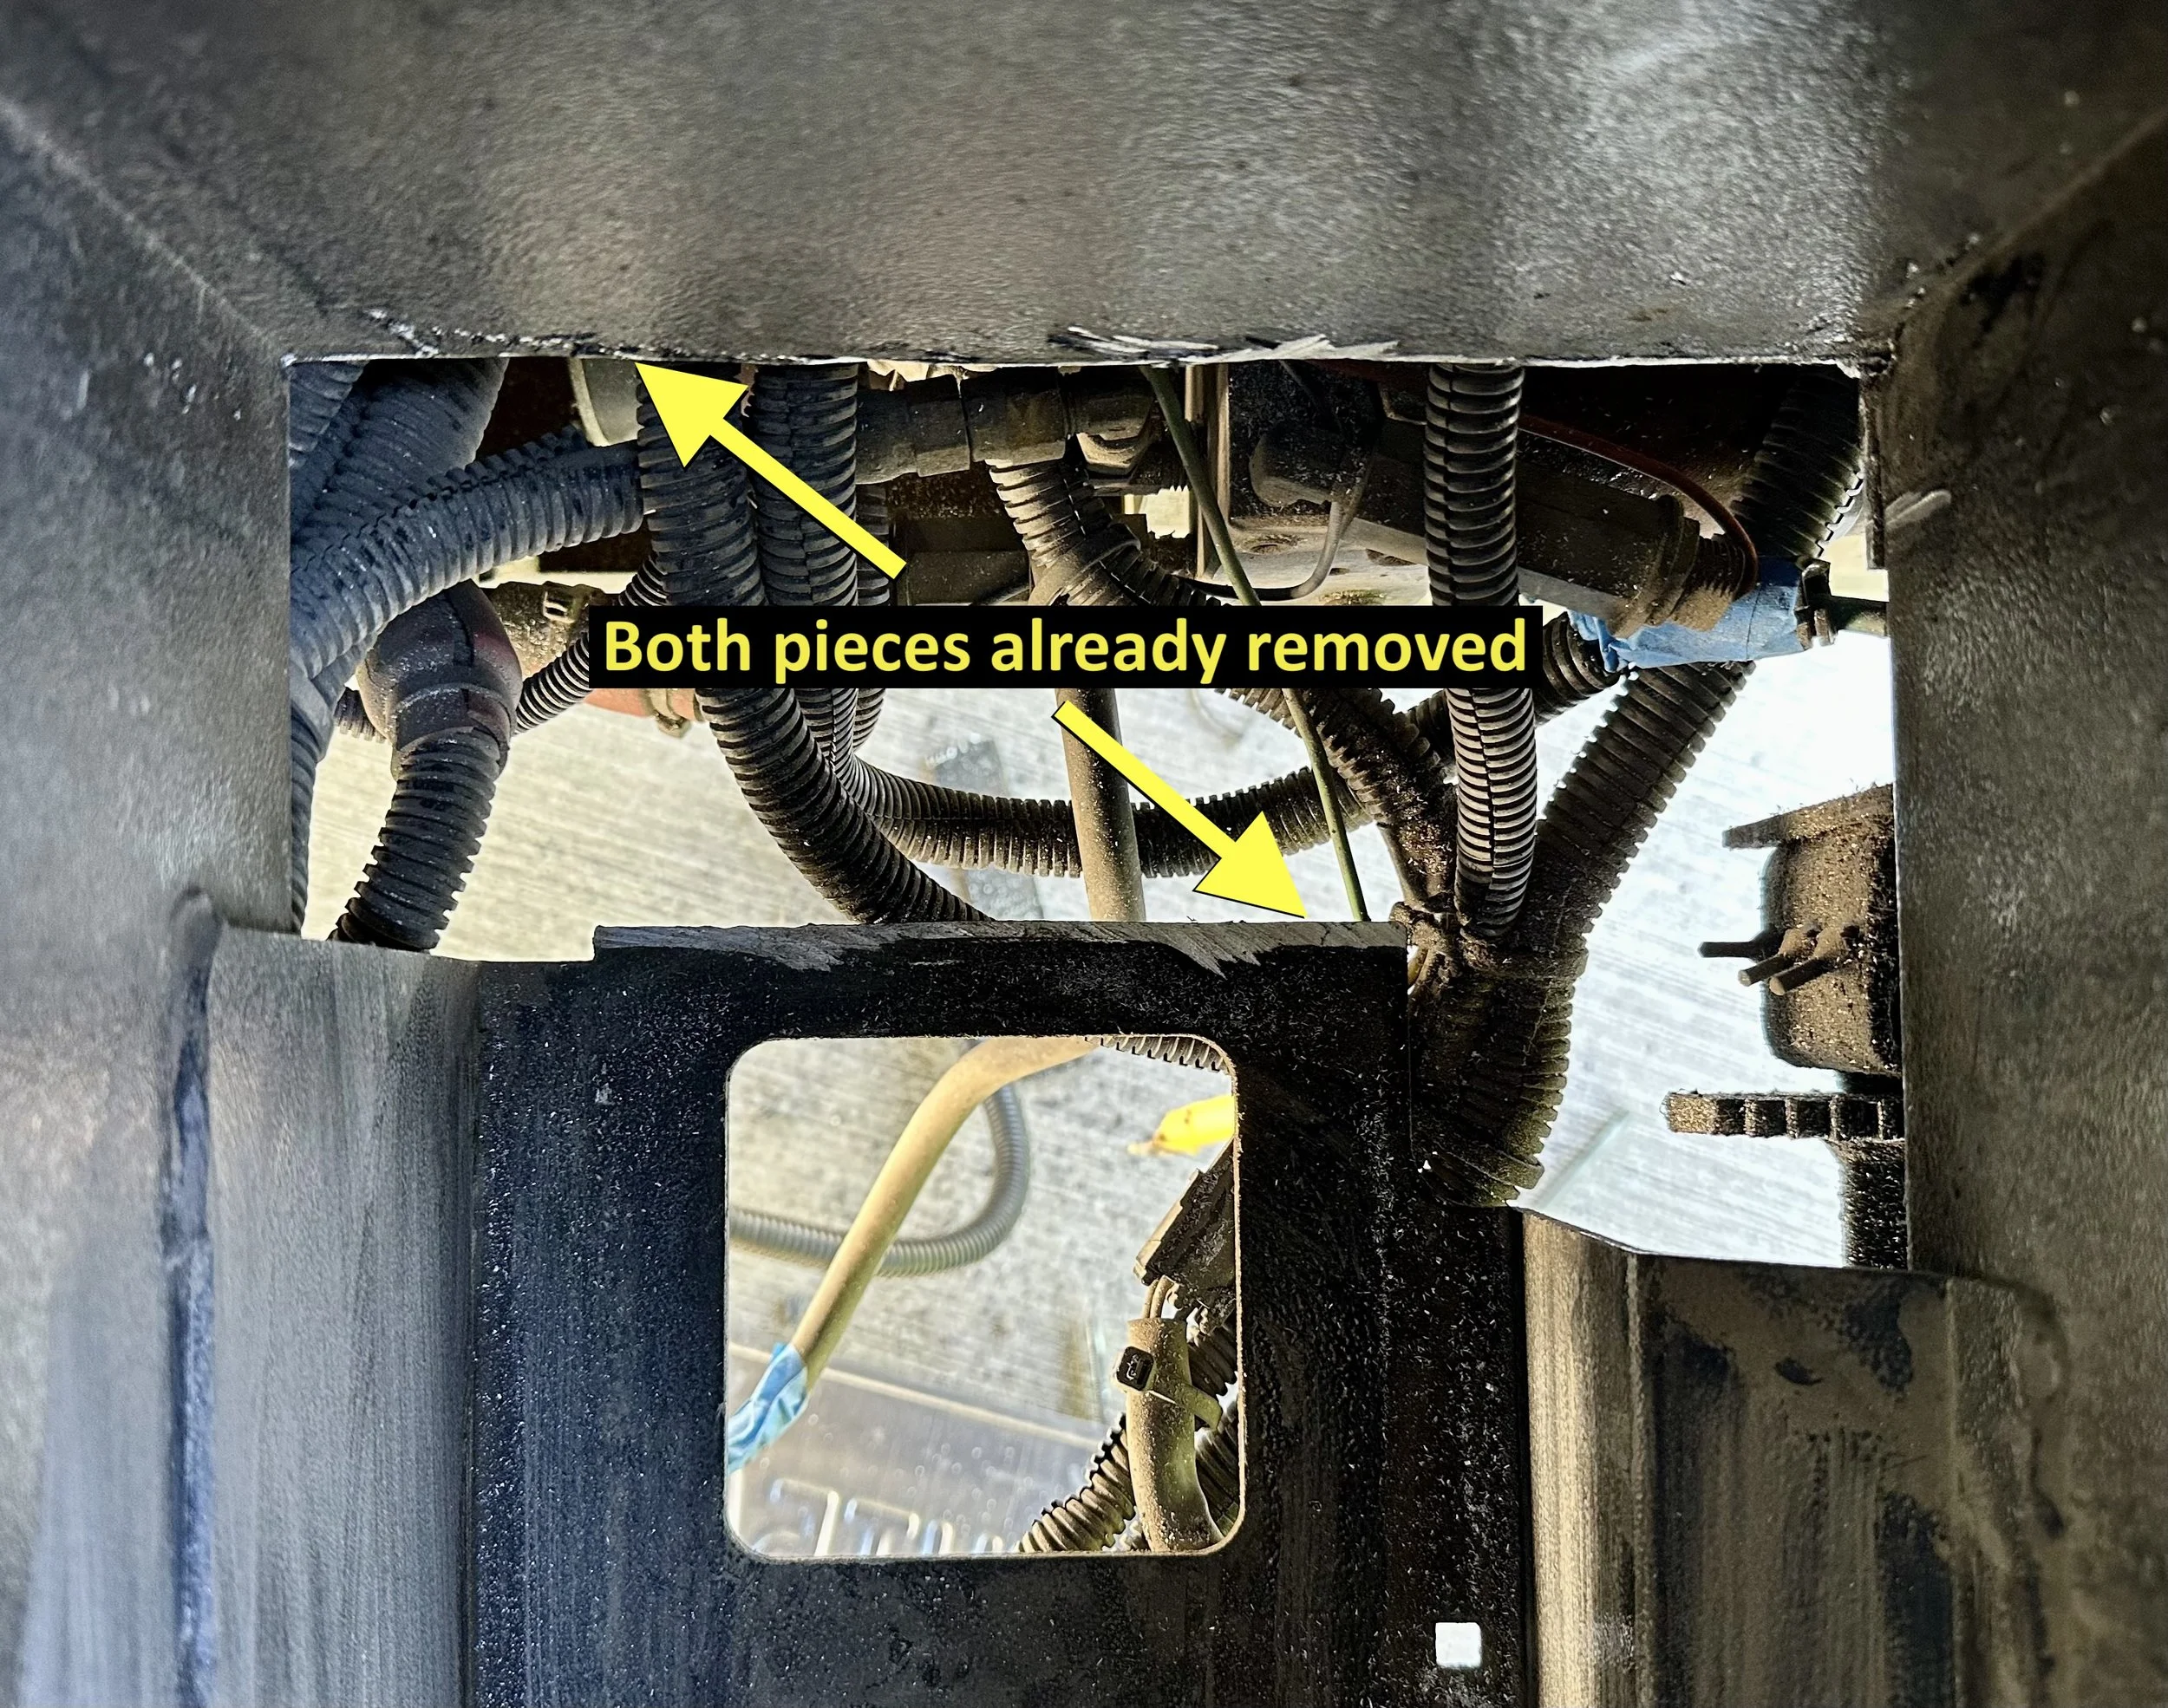
There are a few straight-forward modifications required — all involve cutting metal to allow the batteries to fit. You can cut them in any order, but I’ll list them here in the order of the photos/captions. The needed modifications will be very obvious once your old batteries are out and you're staring at an empty battery box. Until then, these metal obstructions are likely hidden by your existing batteries.
Before getting started, remove the rubber gasket around the rim of the compartment opening under the step. And, of course, measure the inside dimensions of your battery compartment to be sure the length, width and height of the batteries are compatible with your specific rig.
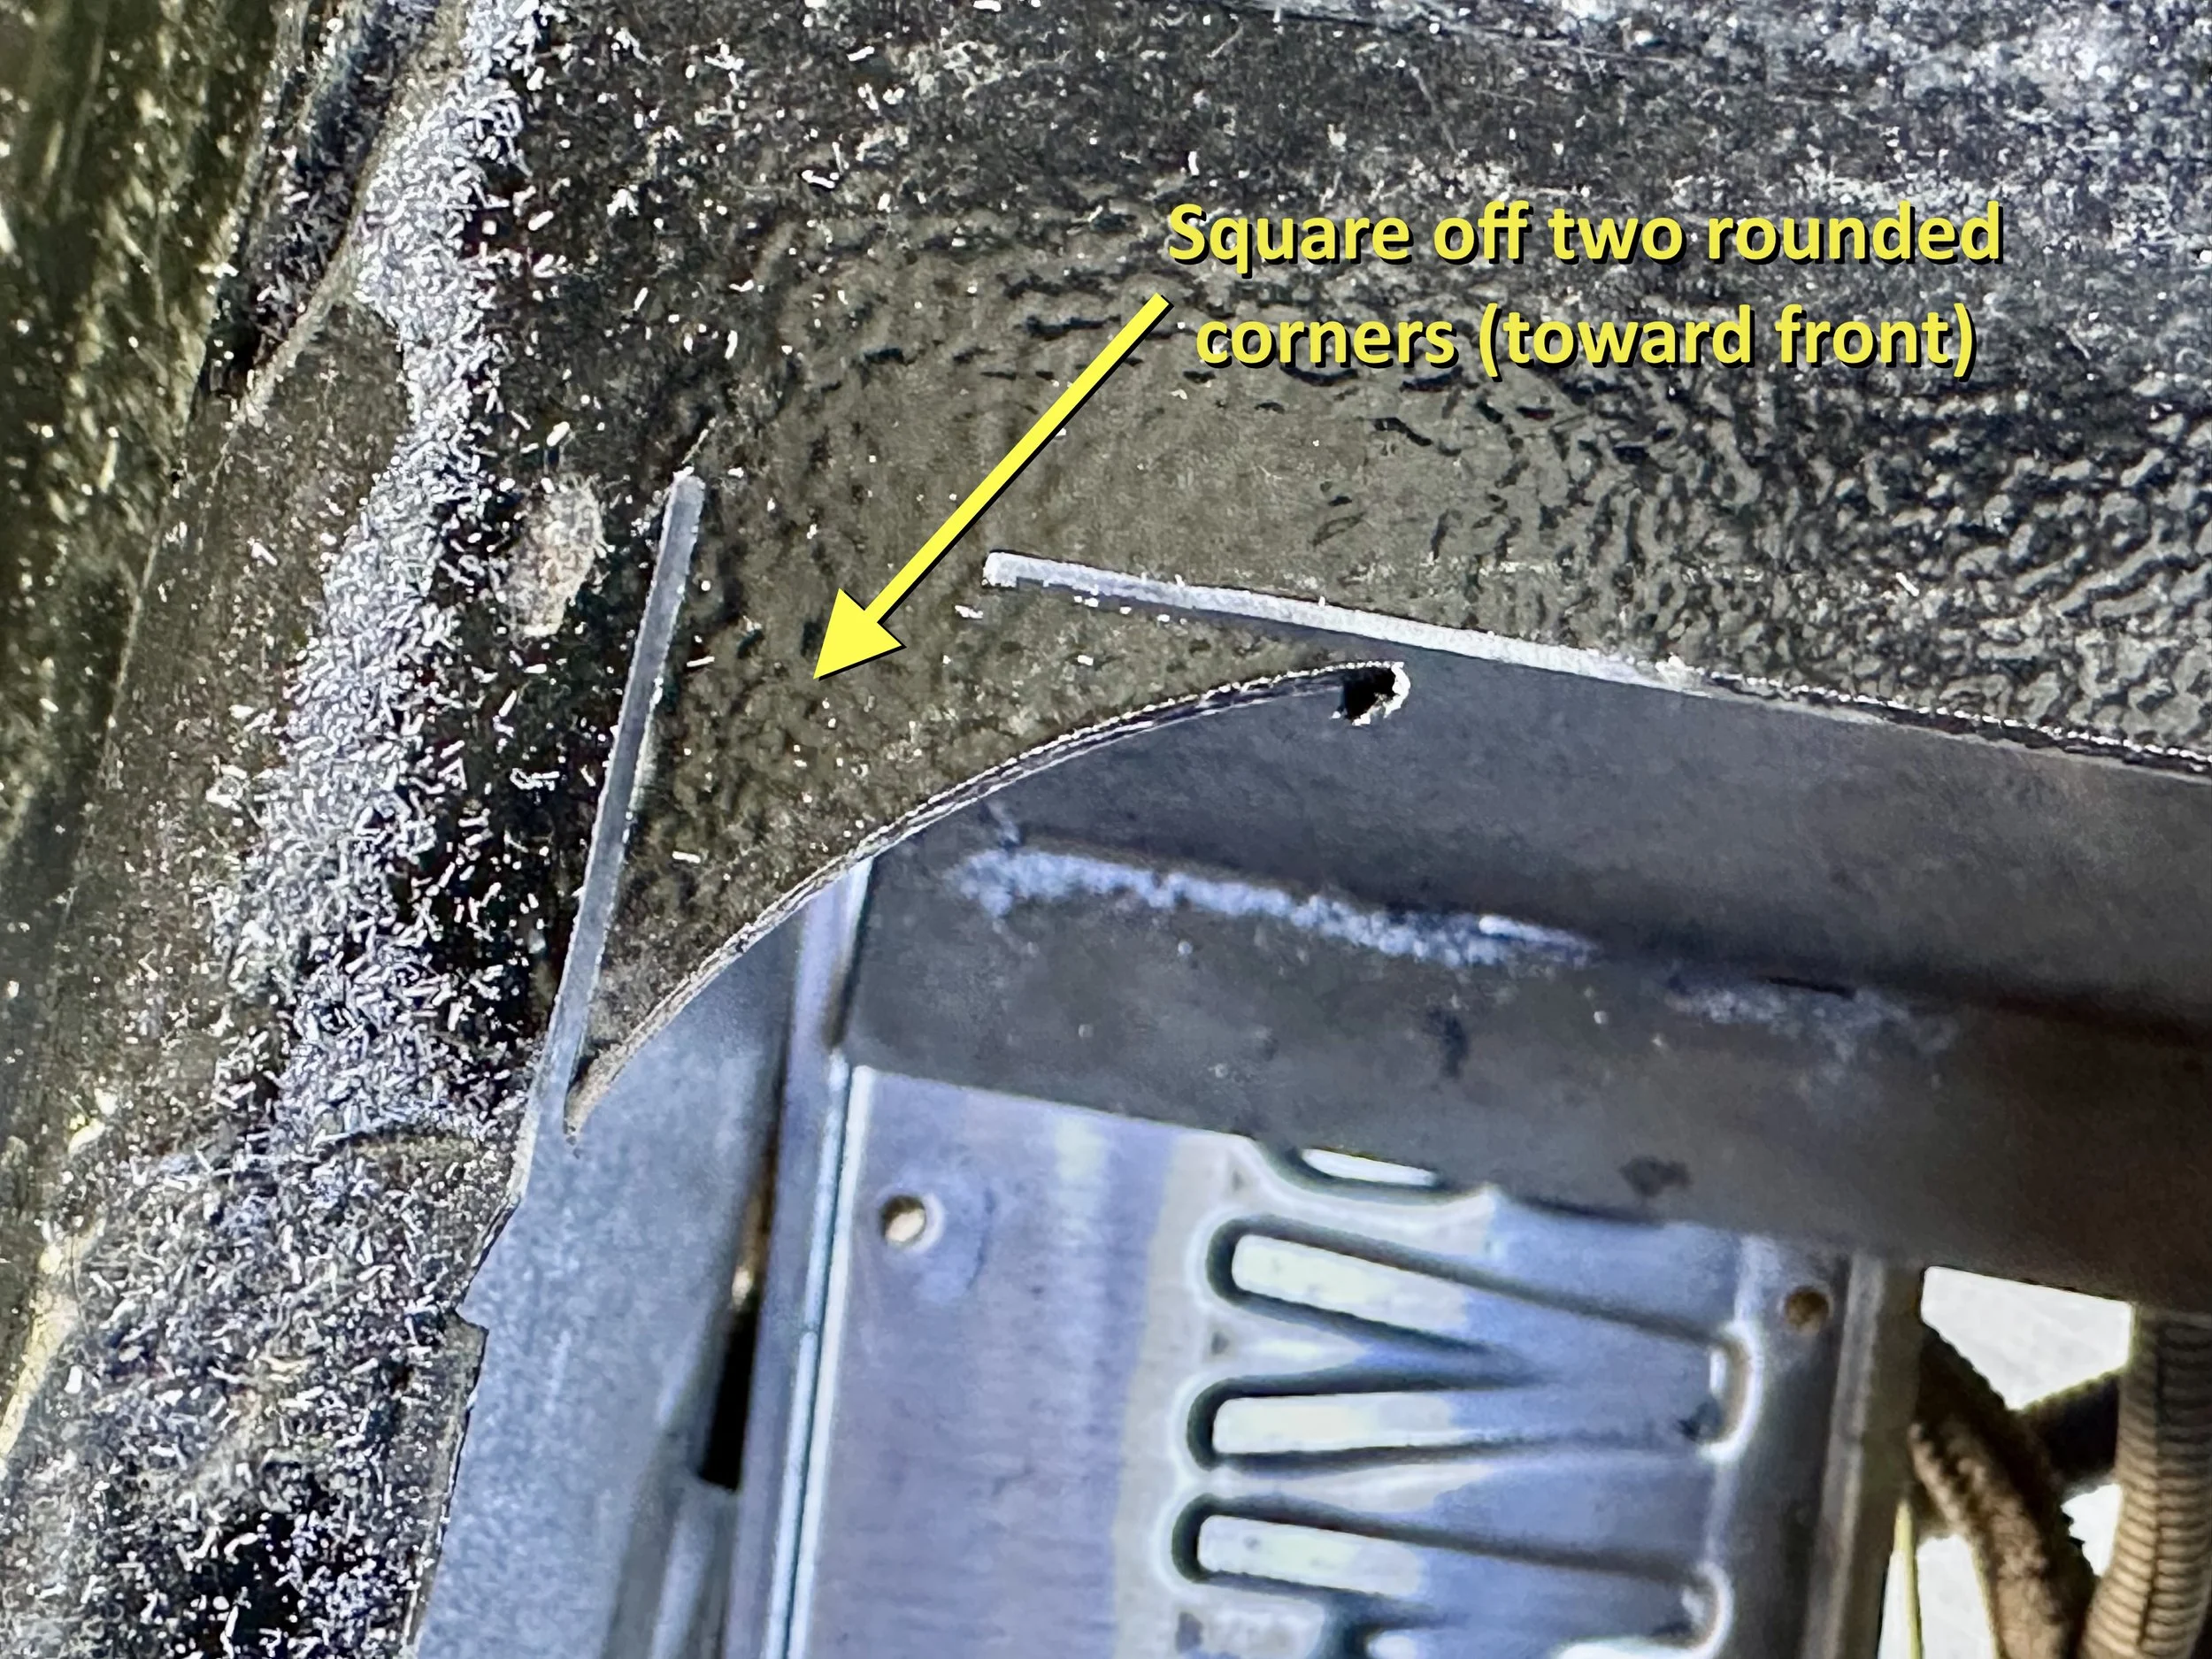
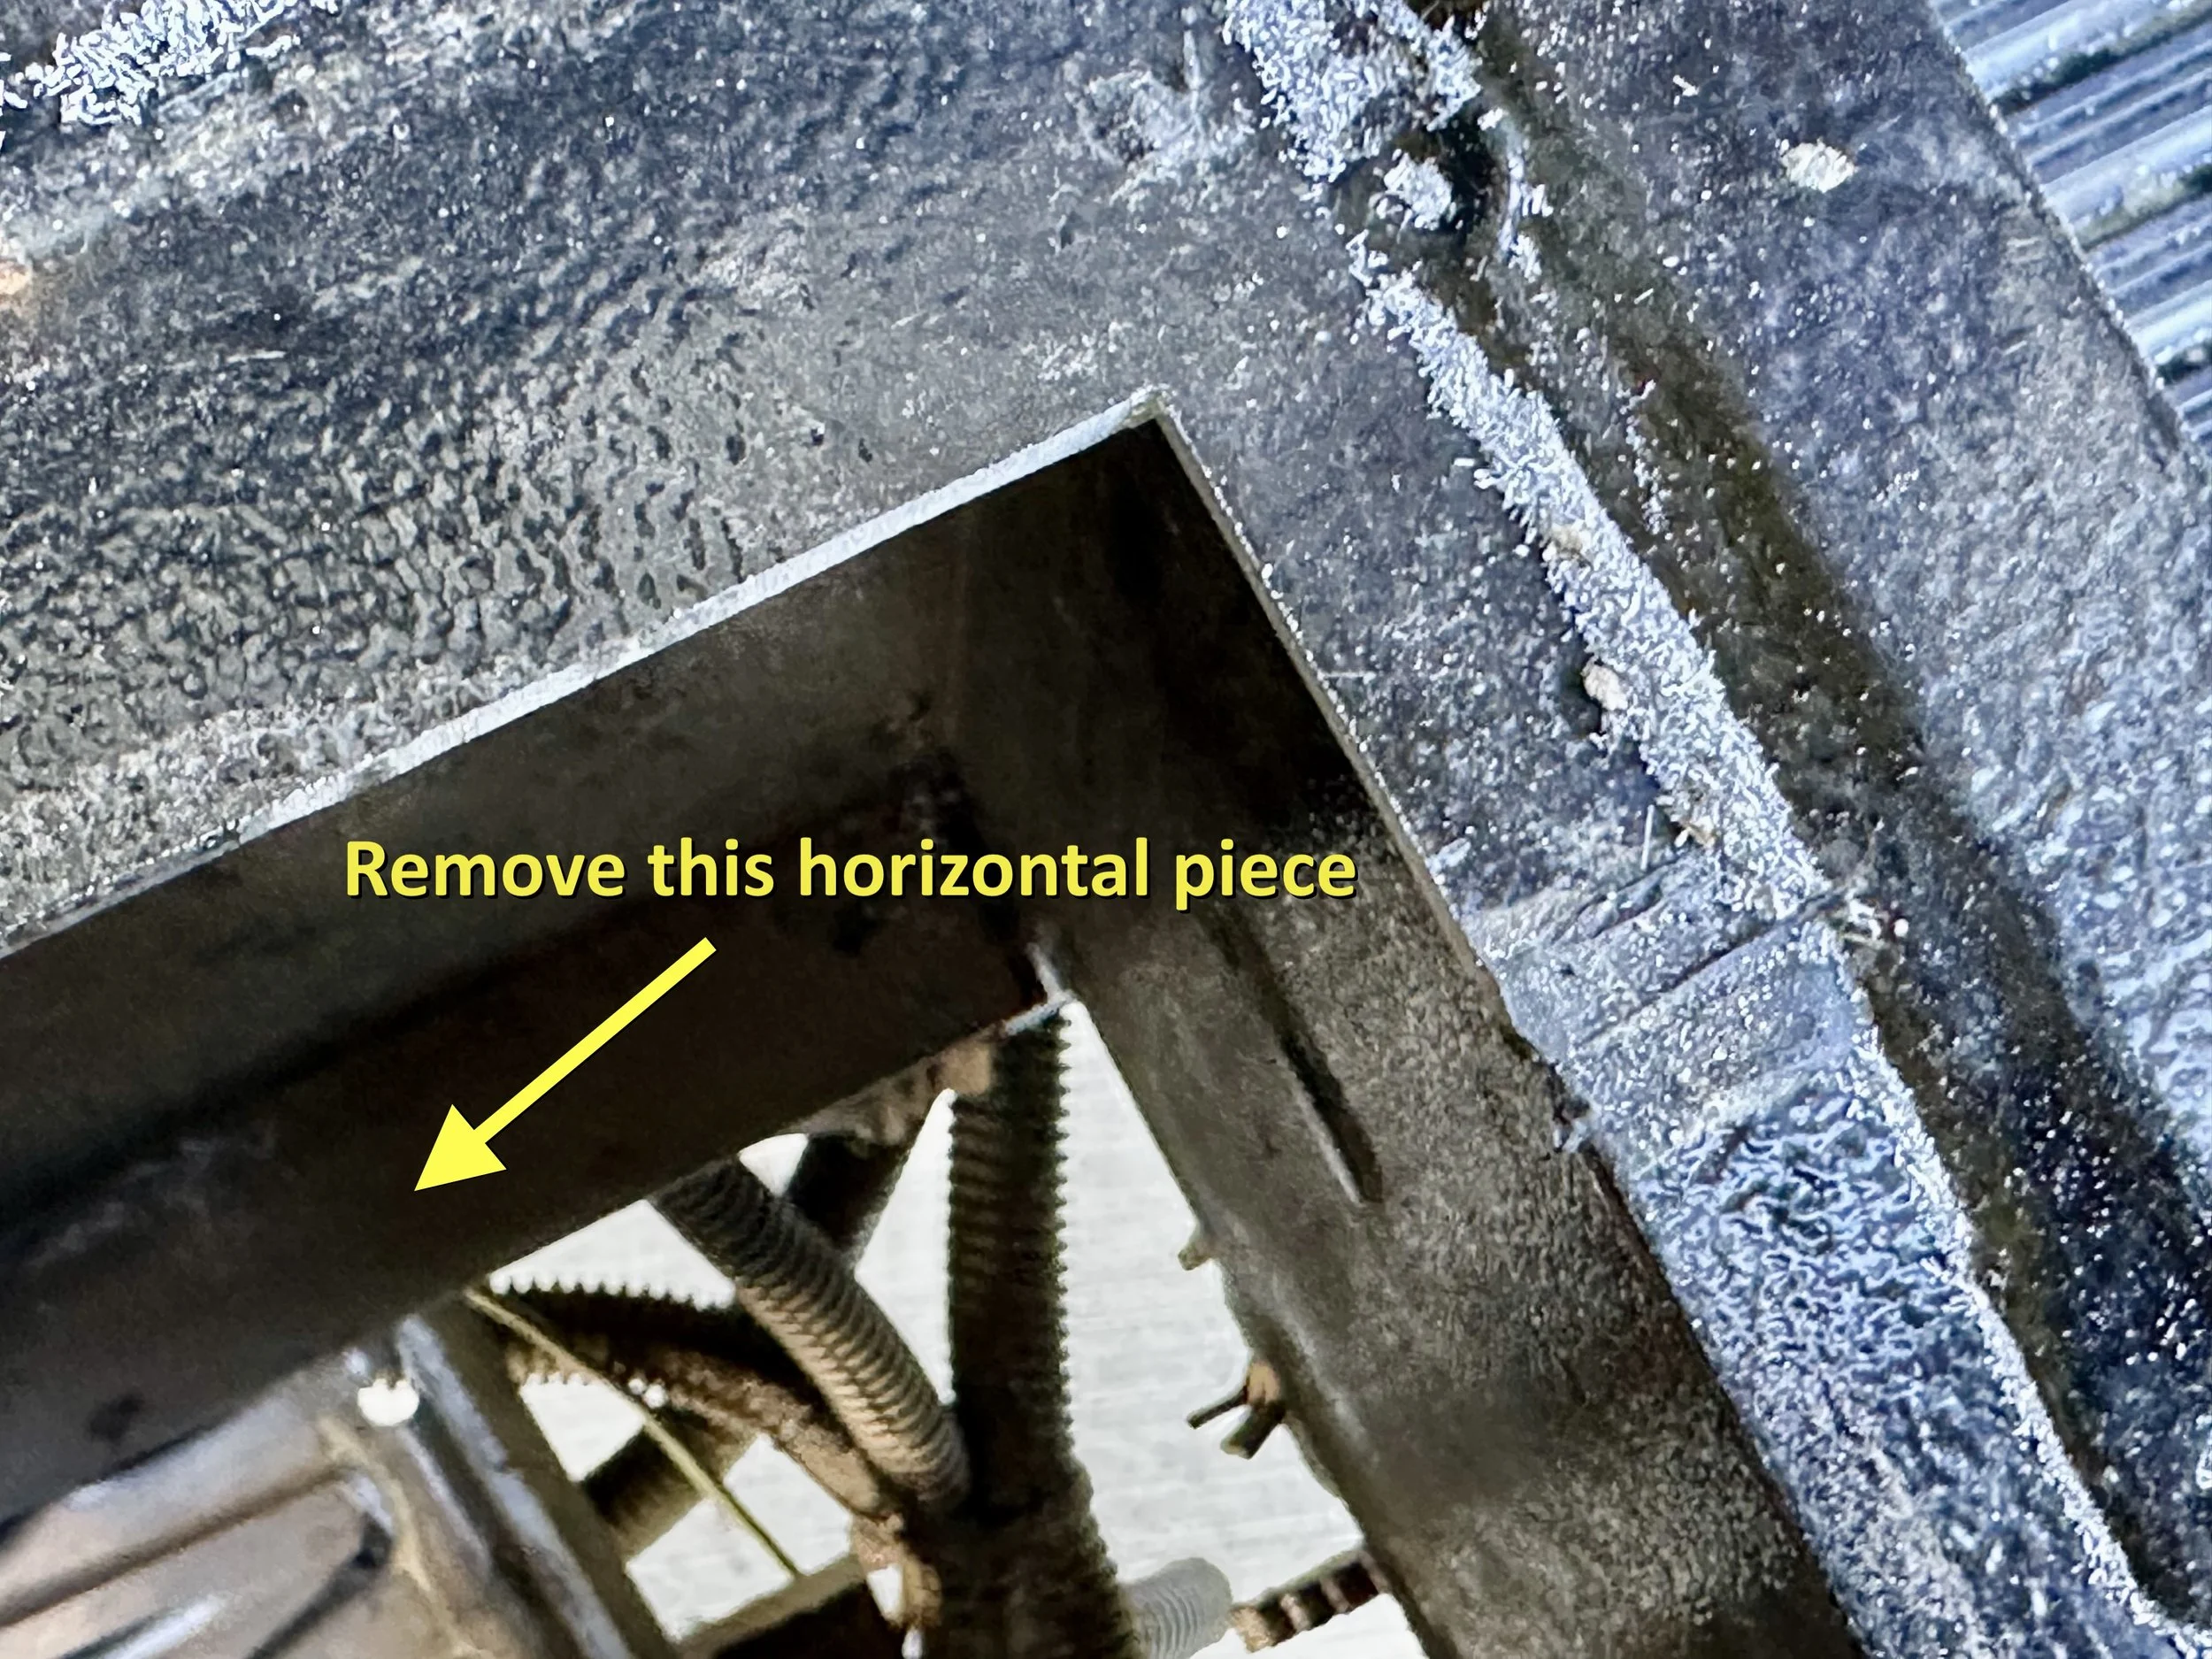
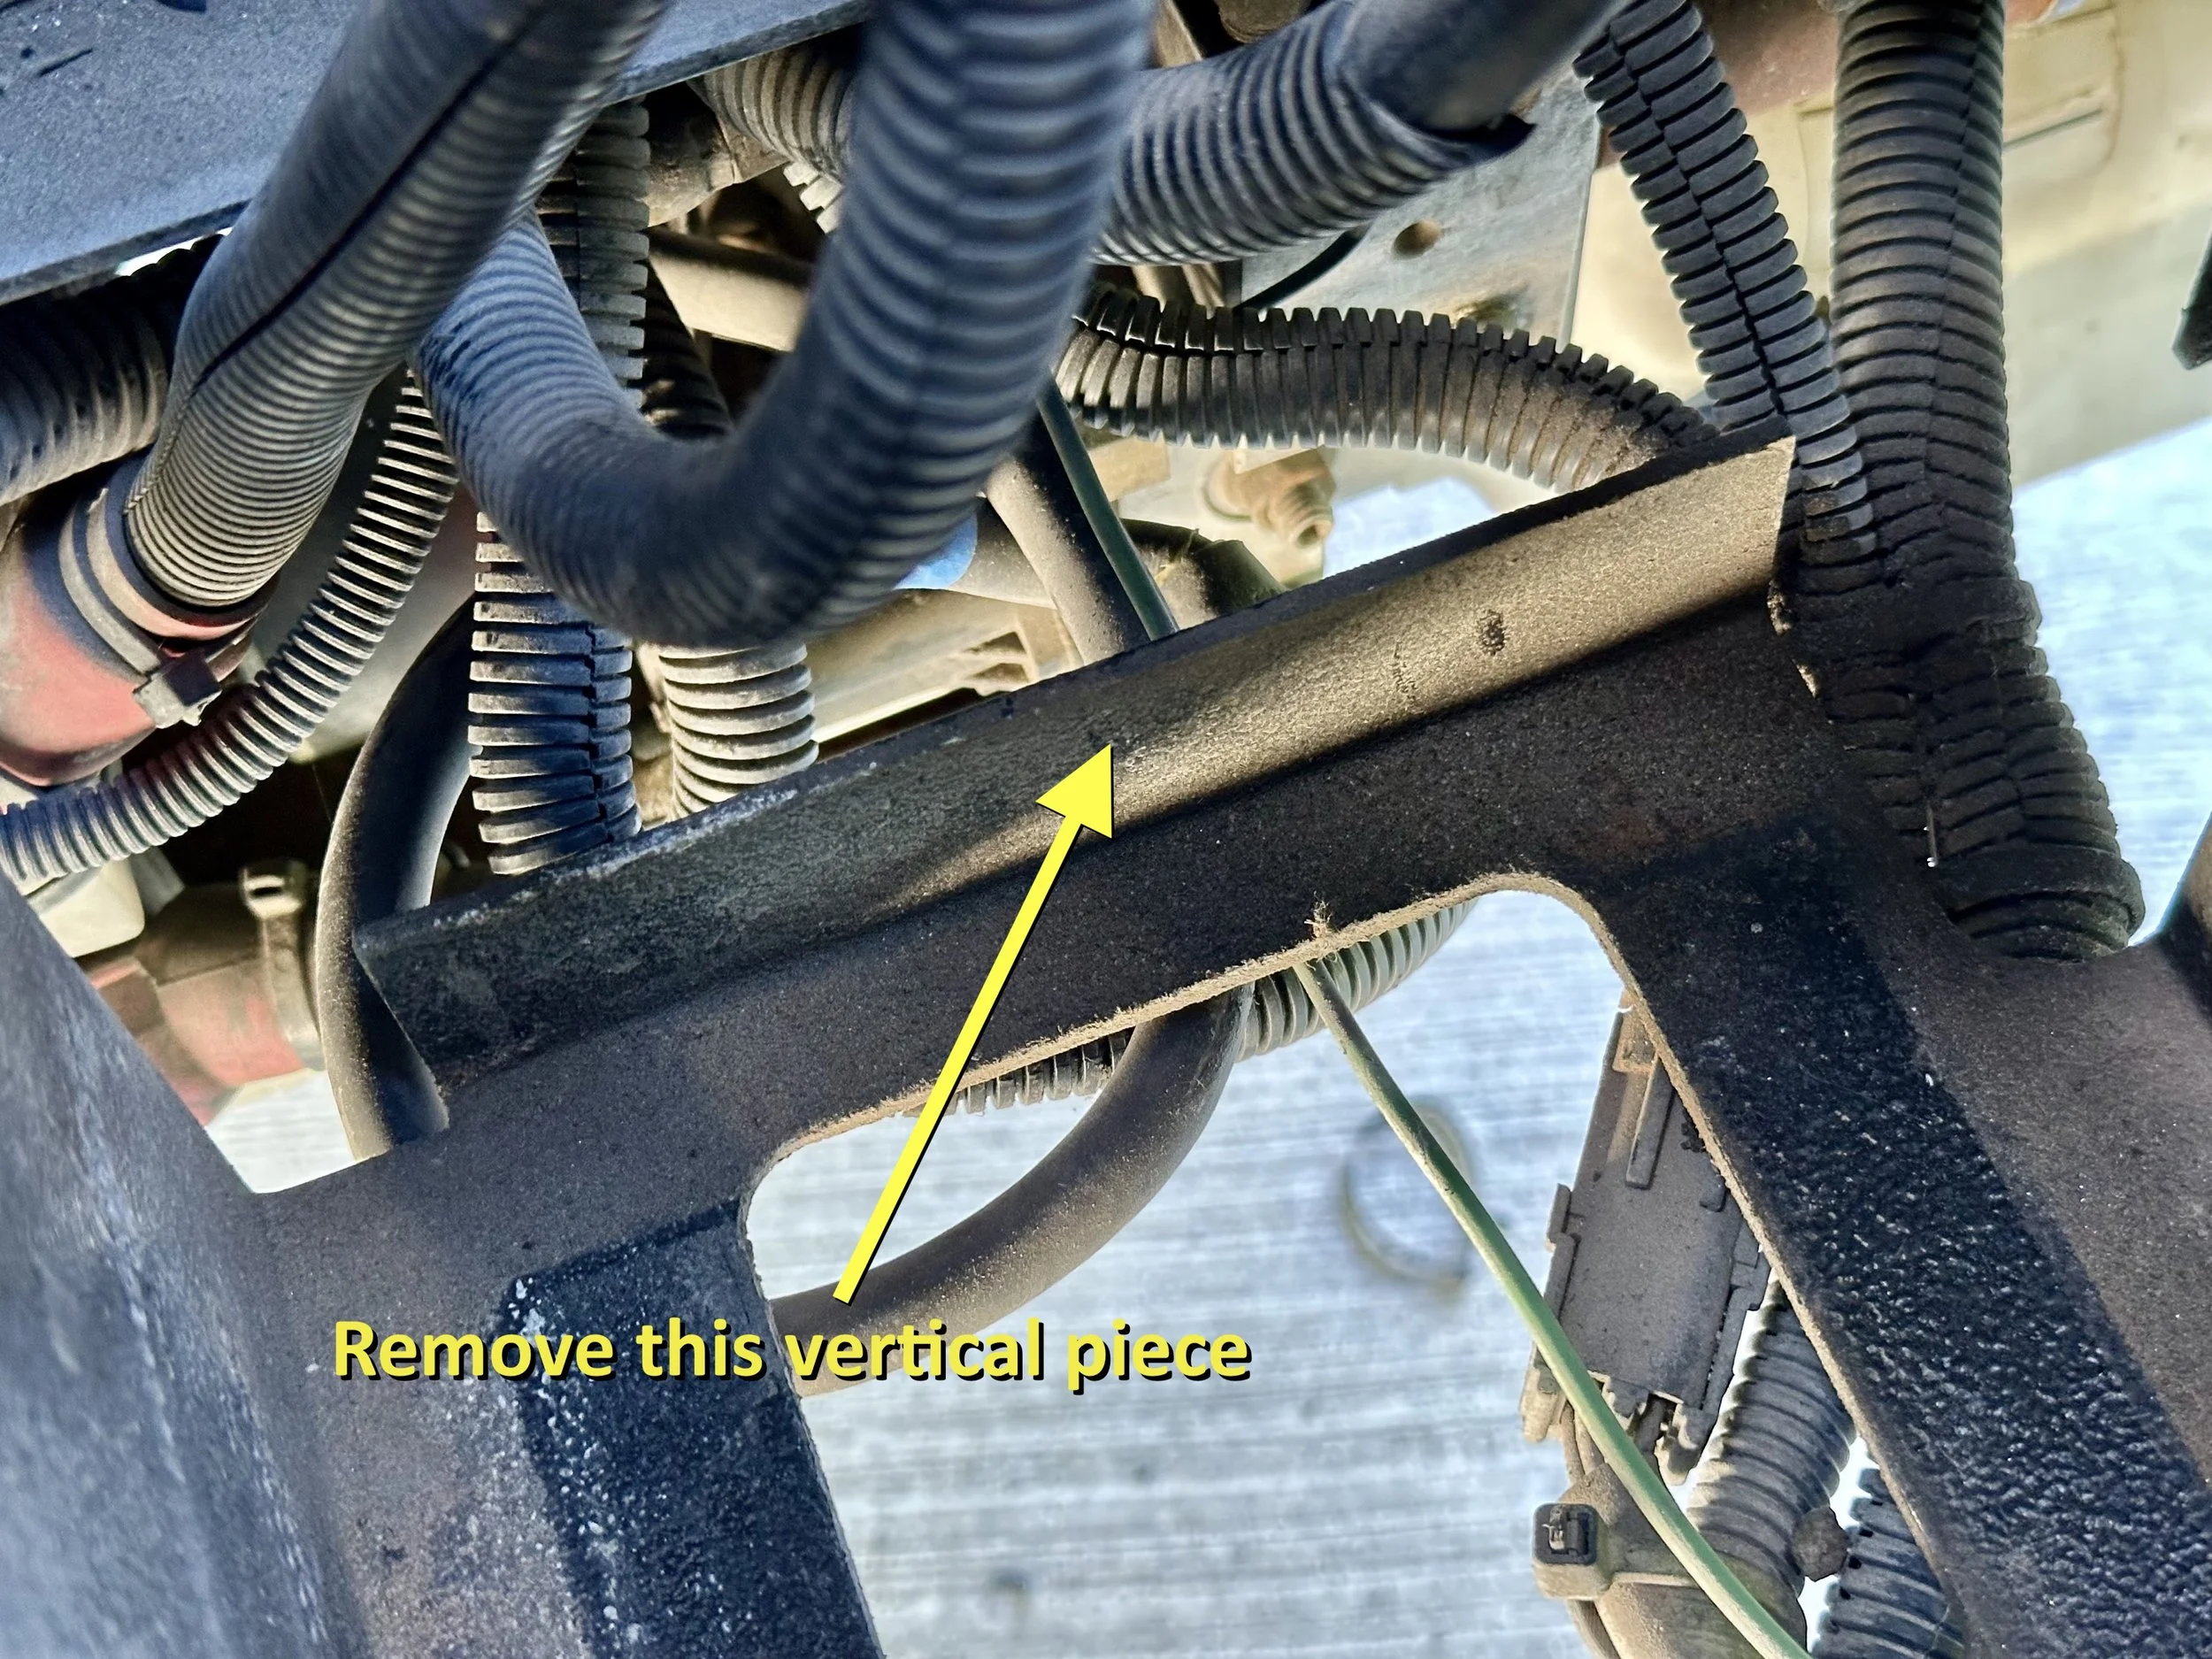
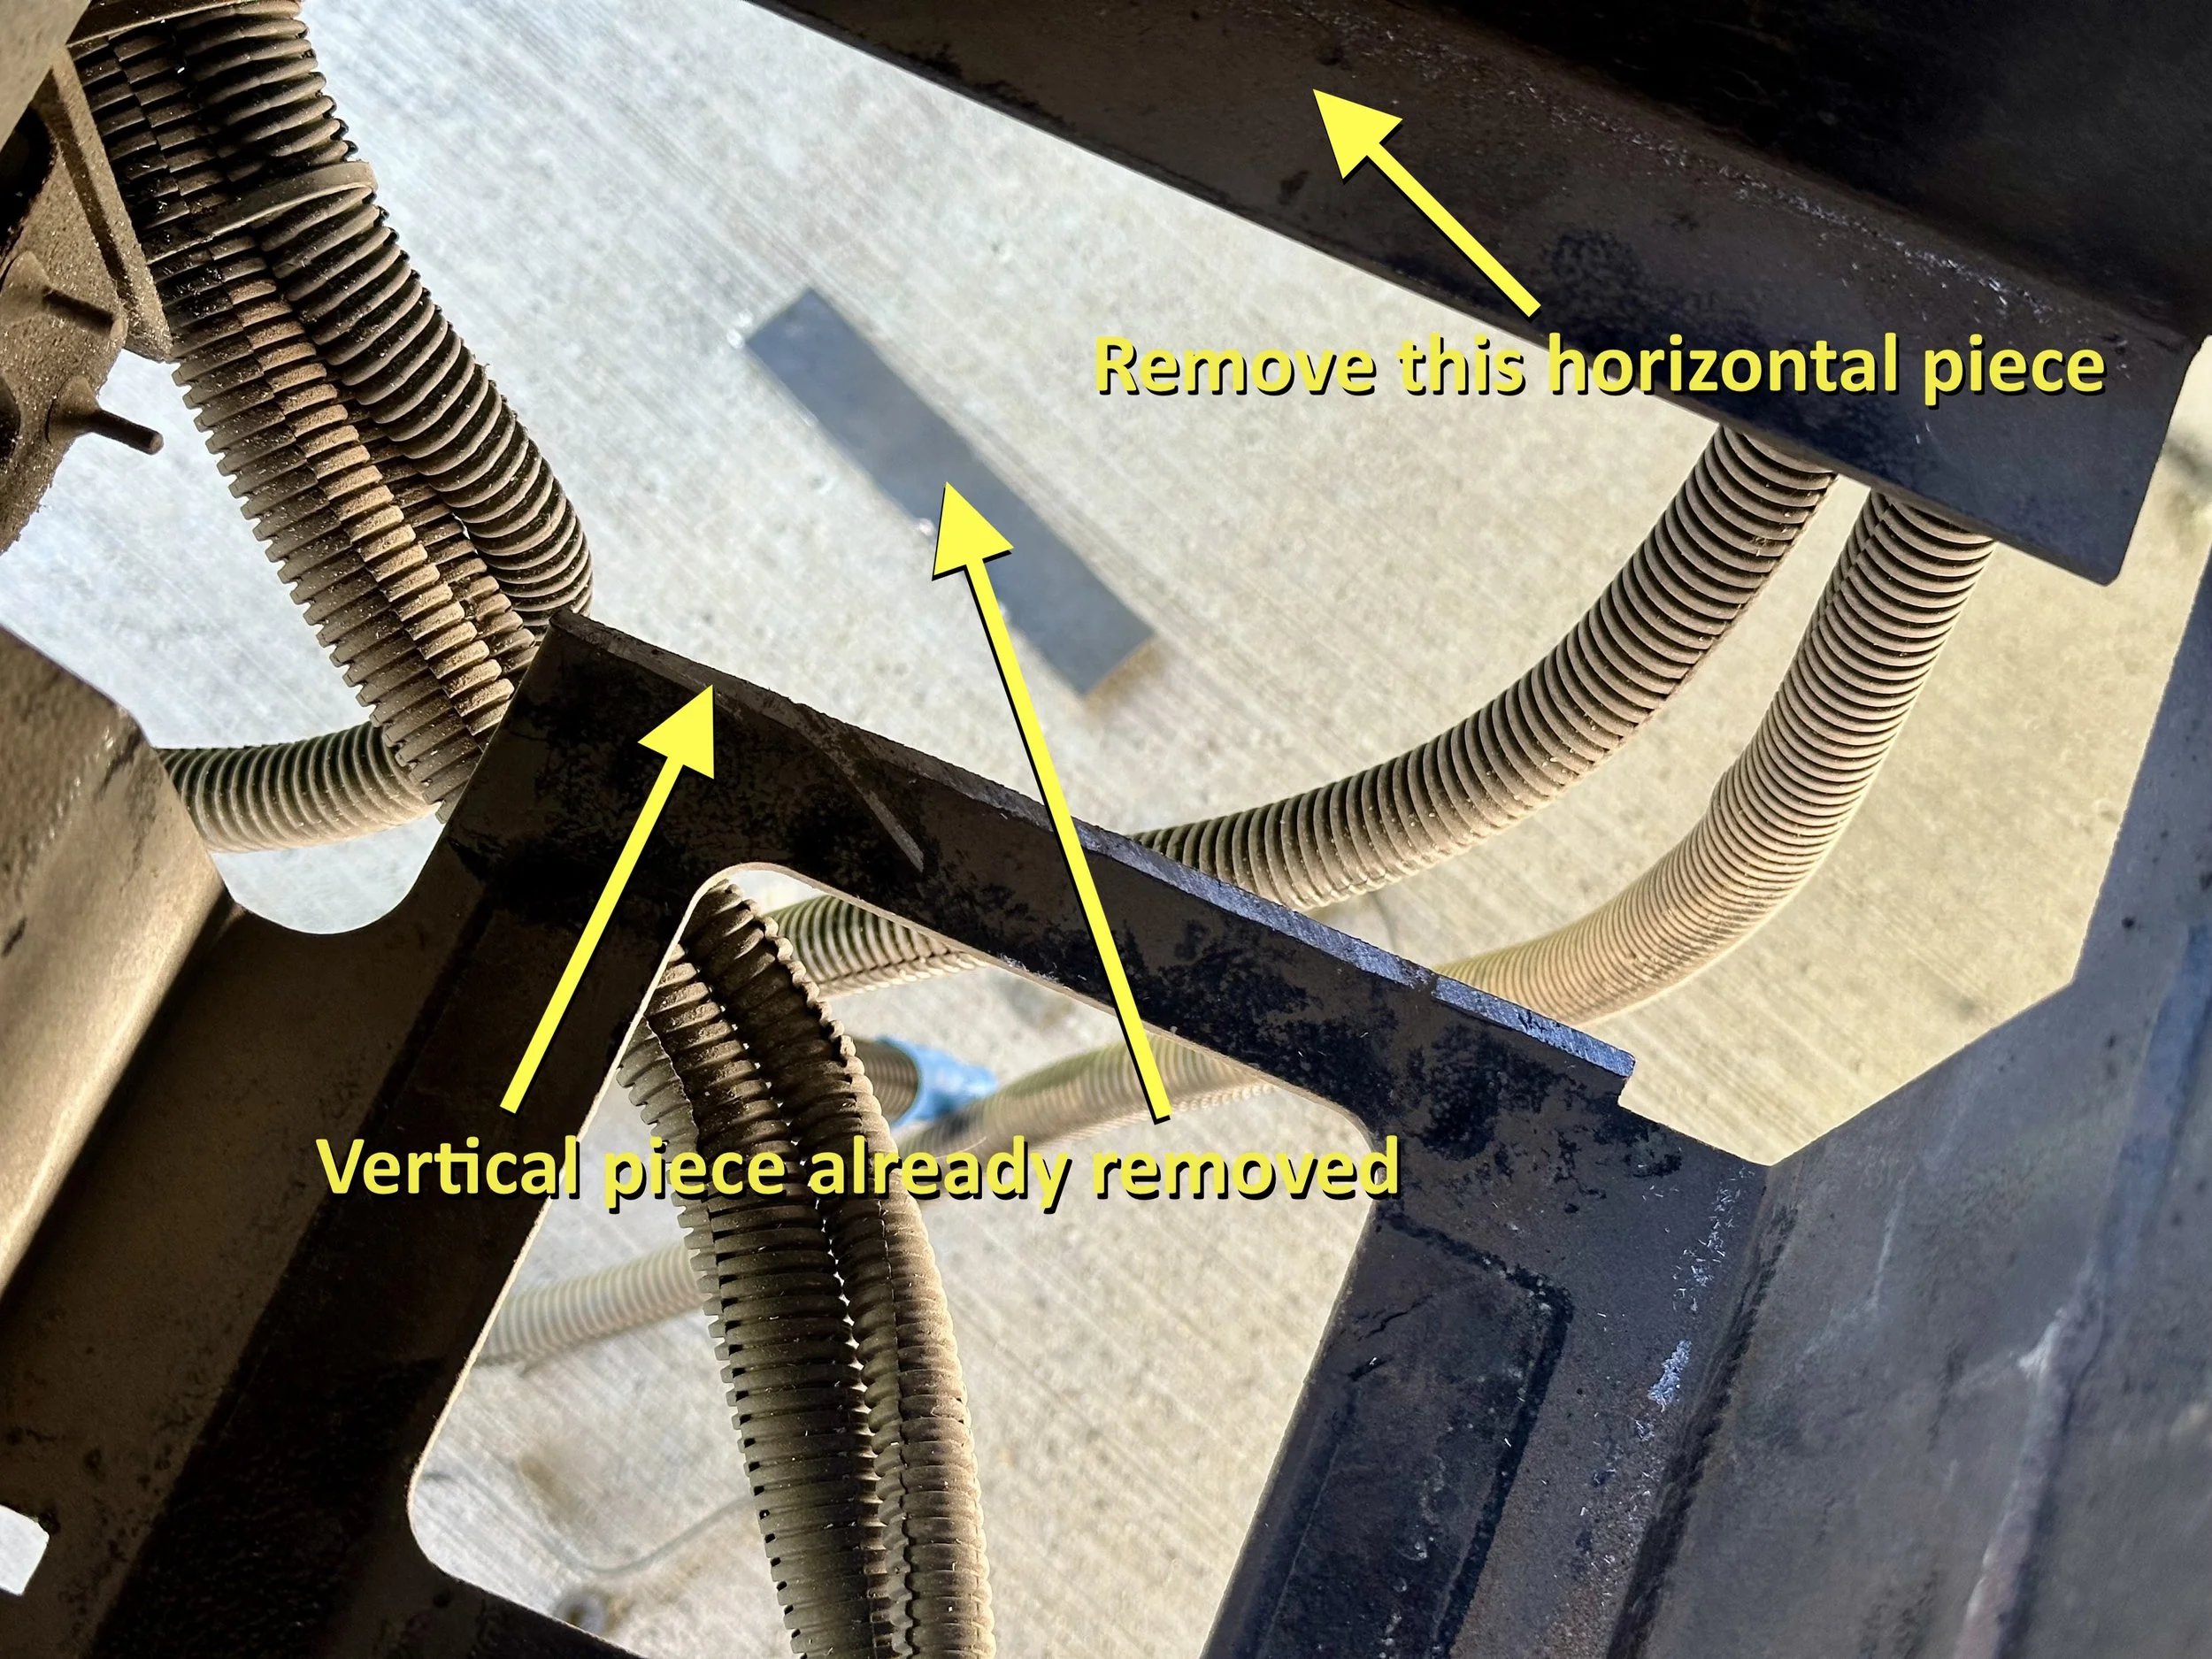
Two of the four rounded corners need to be squared off (the two toward the front of the RV). Next, on the lower front/back walls of the battery box, the two horizontal “wings” will need to be cut flush. Then, the two vertical “stops” in the lower battery tray need to be cut flush. Last but not least, you need to trim the top front edge of the opening (between the two rounded corners that you squared off). I needed to remove another 1/4” of material for the batteries to slide in.
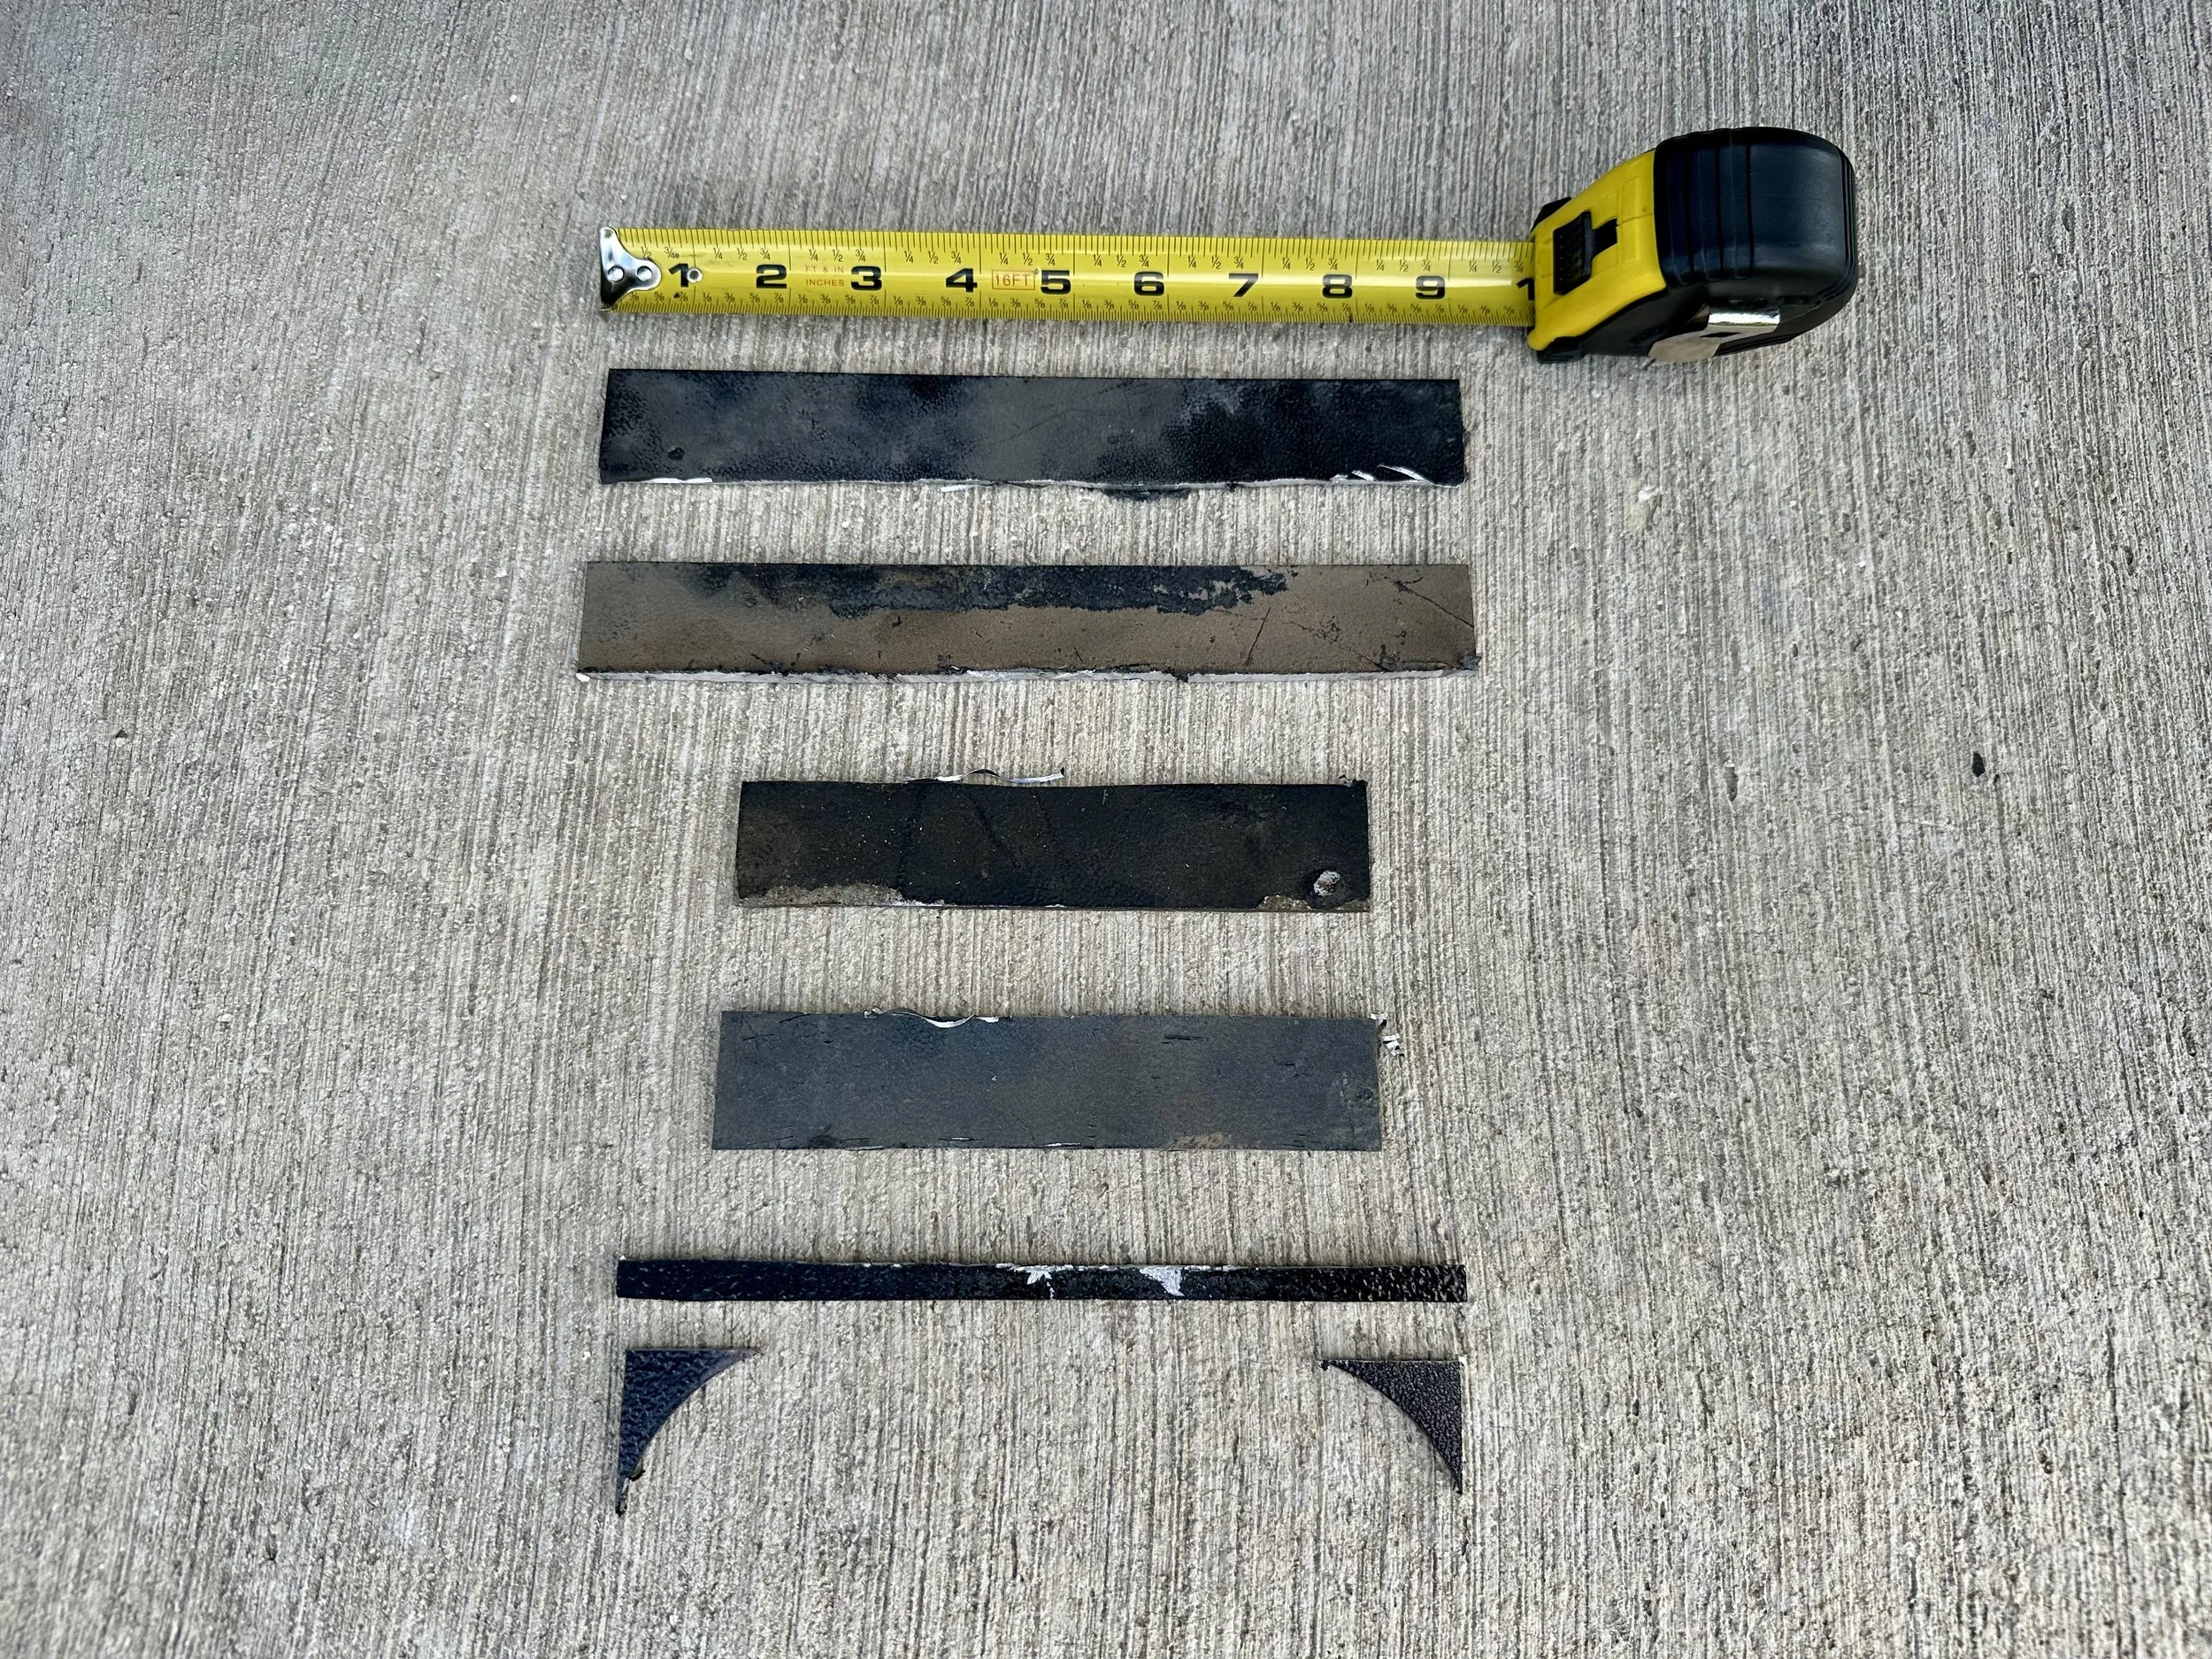
Note the photo of the metal scraps on the ground — that is the sum of the metal pieces that I removed. Before installing the batteries, I wrapped 2” wide black Gorilla tape around the cut edges in the battery box to protect the batteries from the freshly-cut and sharp edges (taped edges not pictured).
Installing the Batteries
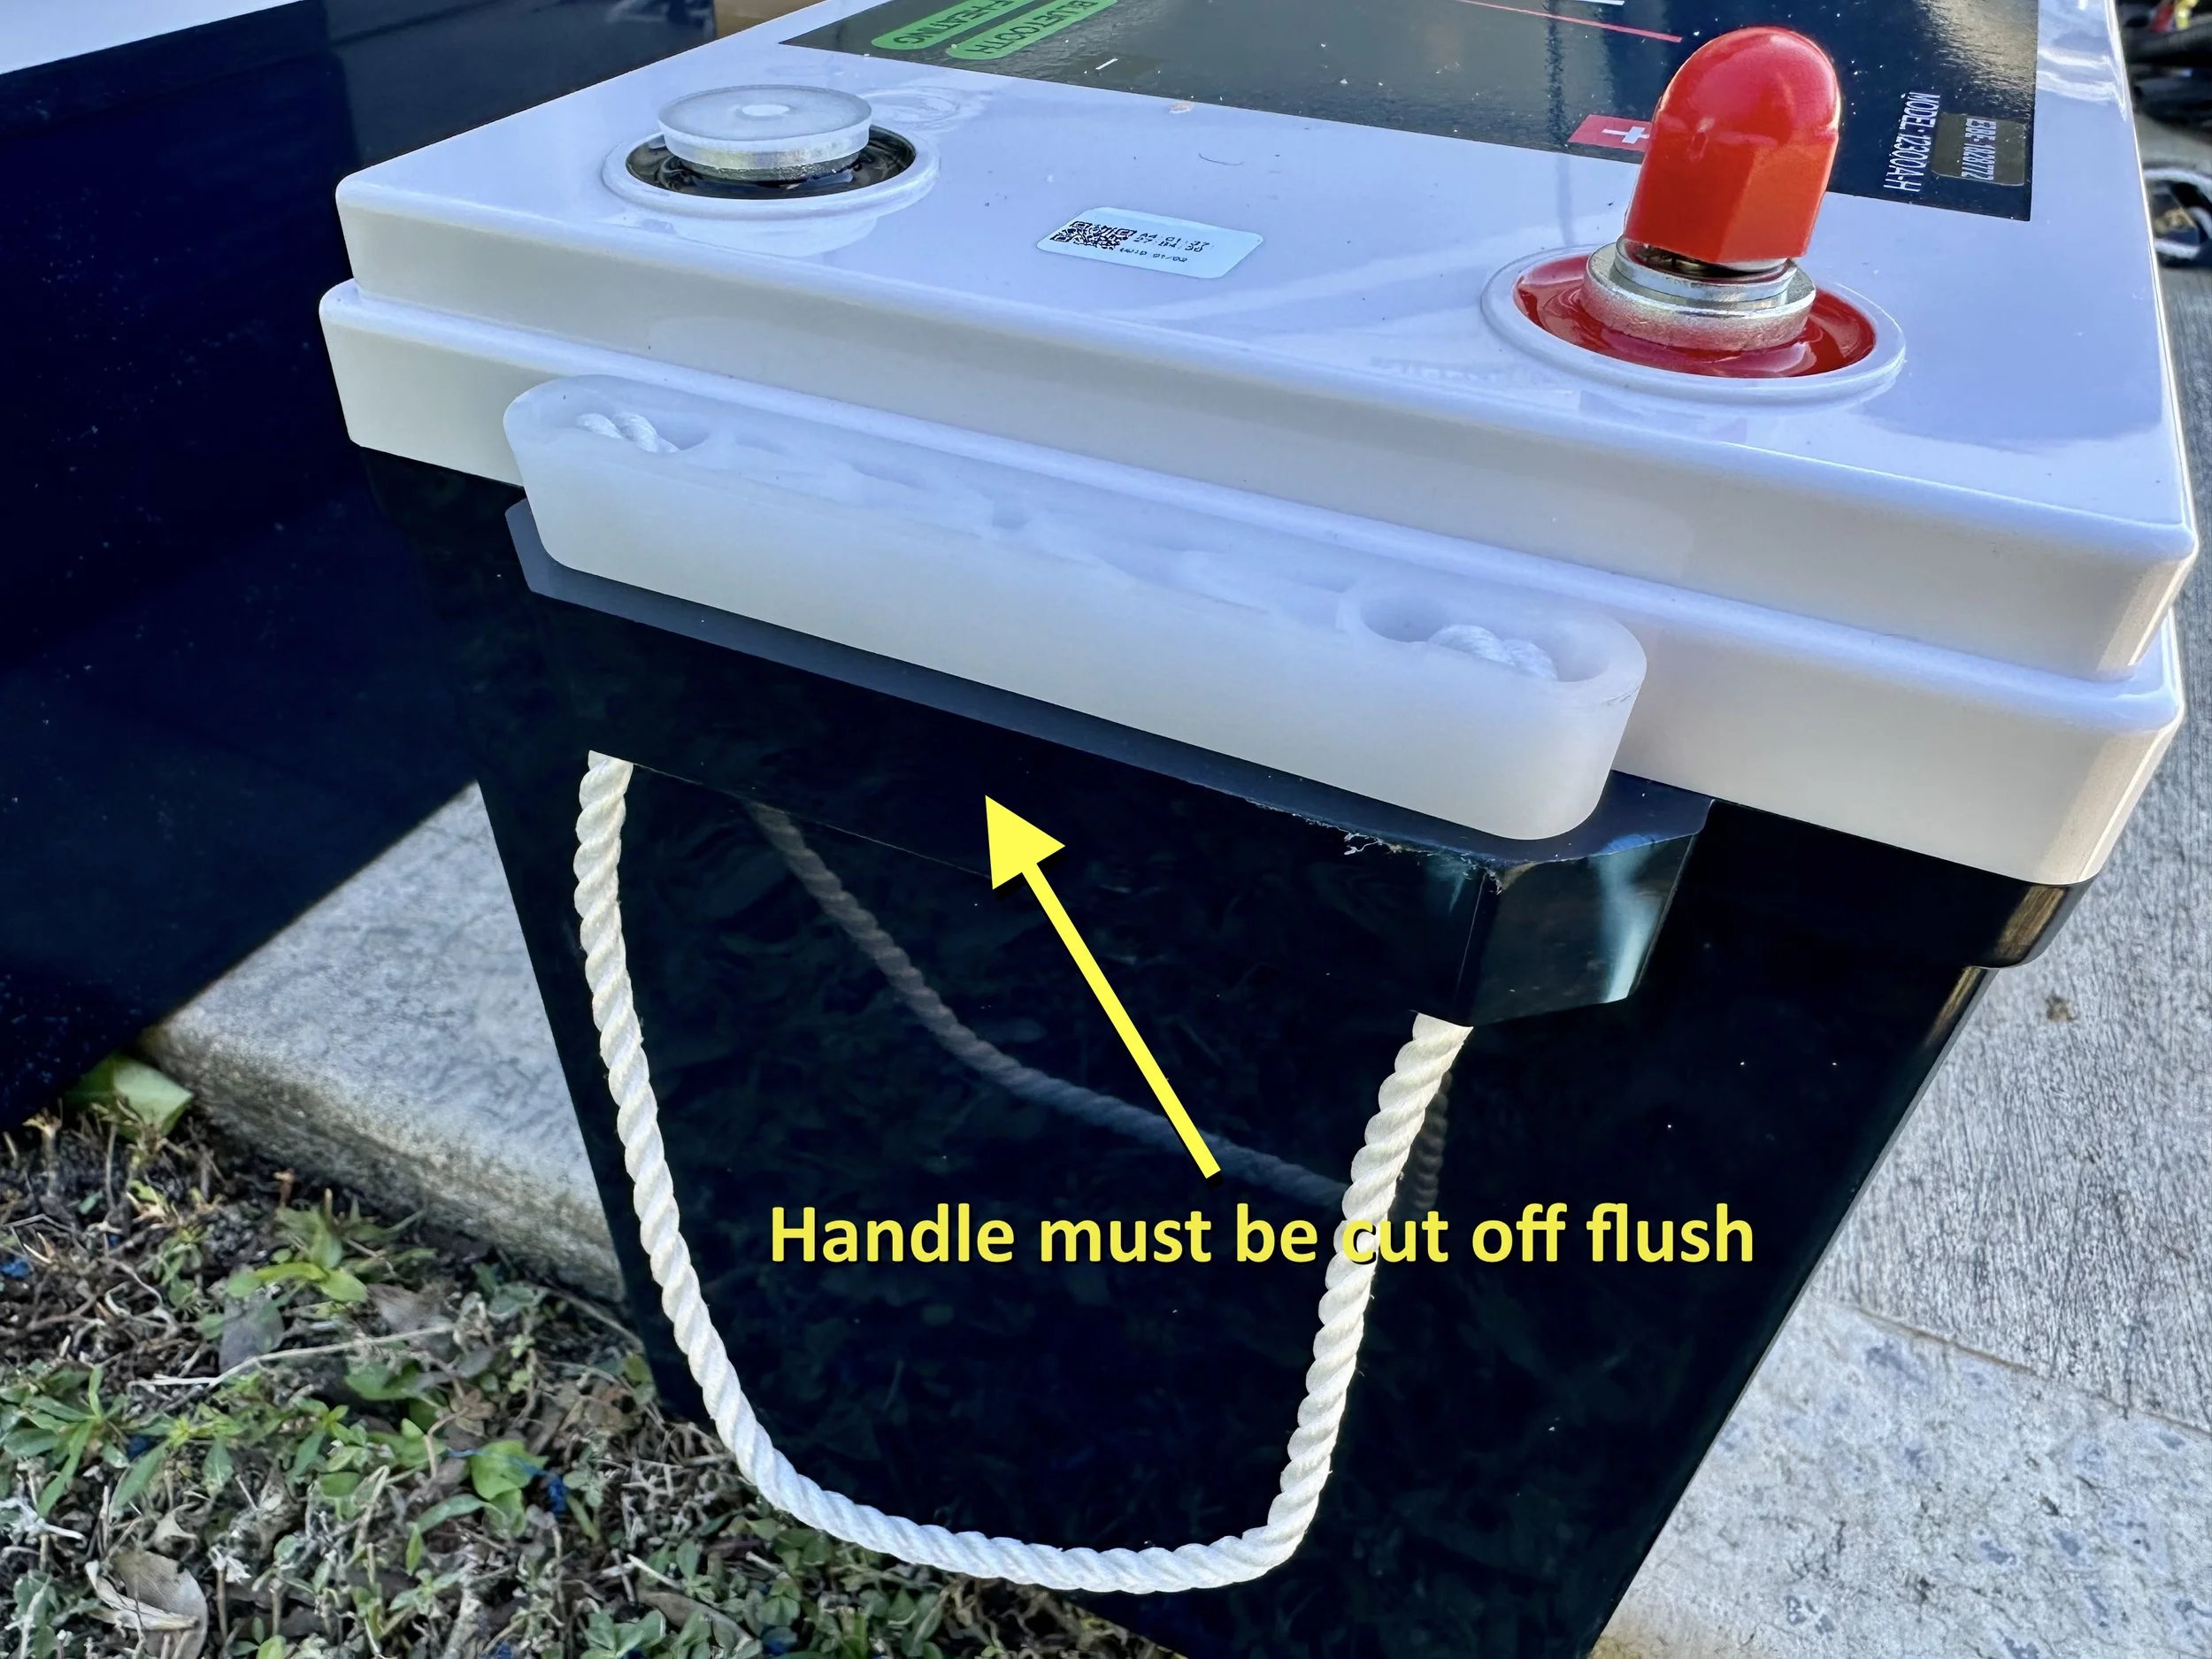
Both handles on both batteries need to be cut flush (I used the multitool with a wood blade). I then used a pair of straps to lower each battery into the box, starting with the rear battery. Once lowered, push the rear battery all the way to the back wall (toward the rear of the RV). Then, lower the front battery with a slight angle to squeeze it into the front position. If it doesn’t make it through the top opening, you’ll need to remove a bit more metal material between the once-rounded corners on the frontside of the opening (see the thin 1/4” metal strip in the photo of metal parts).
Before wiring up everything, I cleaned all of my battery cable connections with a file to remove corrosion. There is no better time to ensure solid contact at each and every connection point.
Sealing the Compartment:
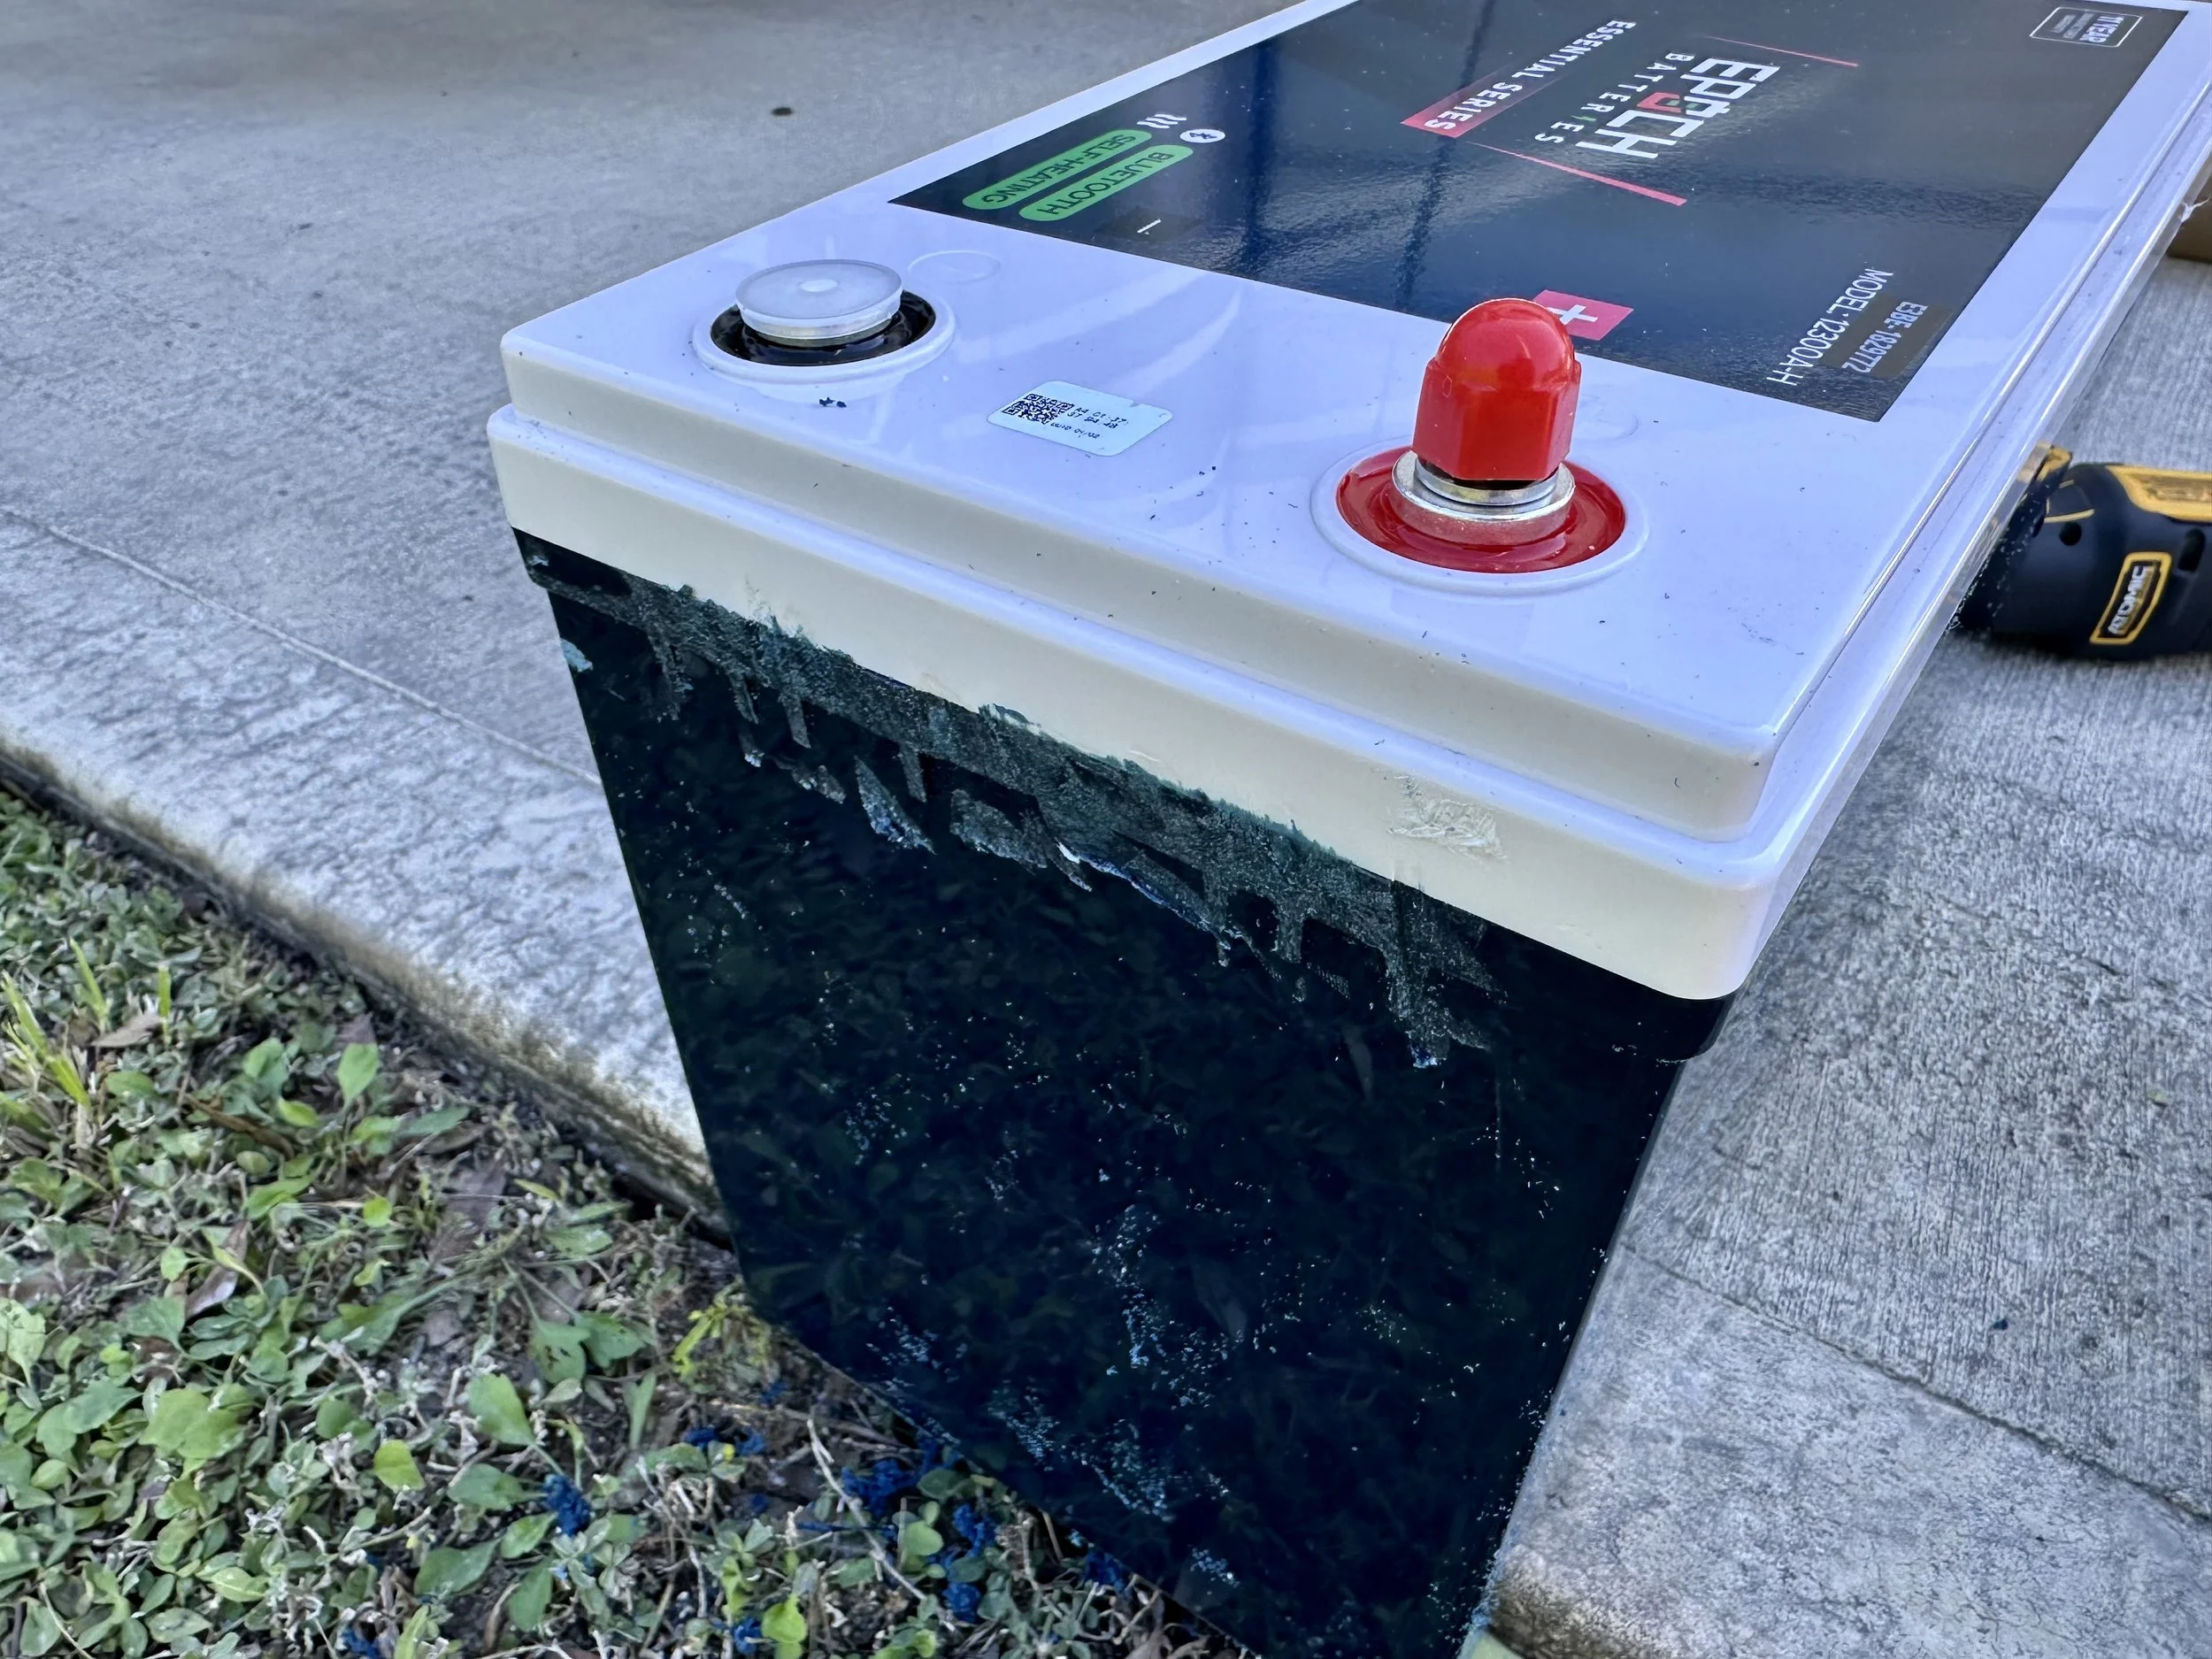
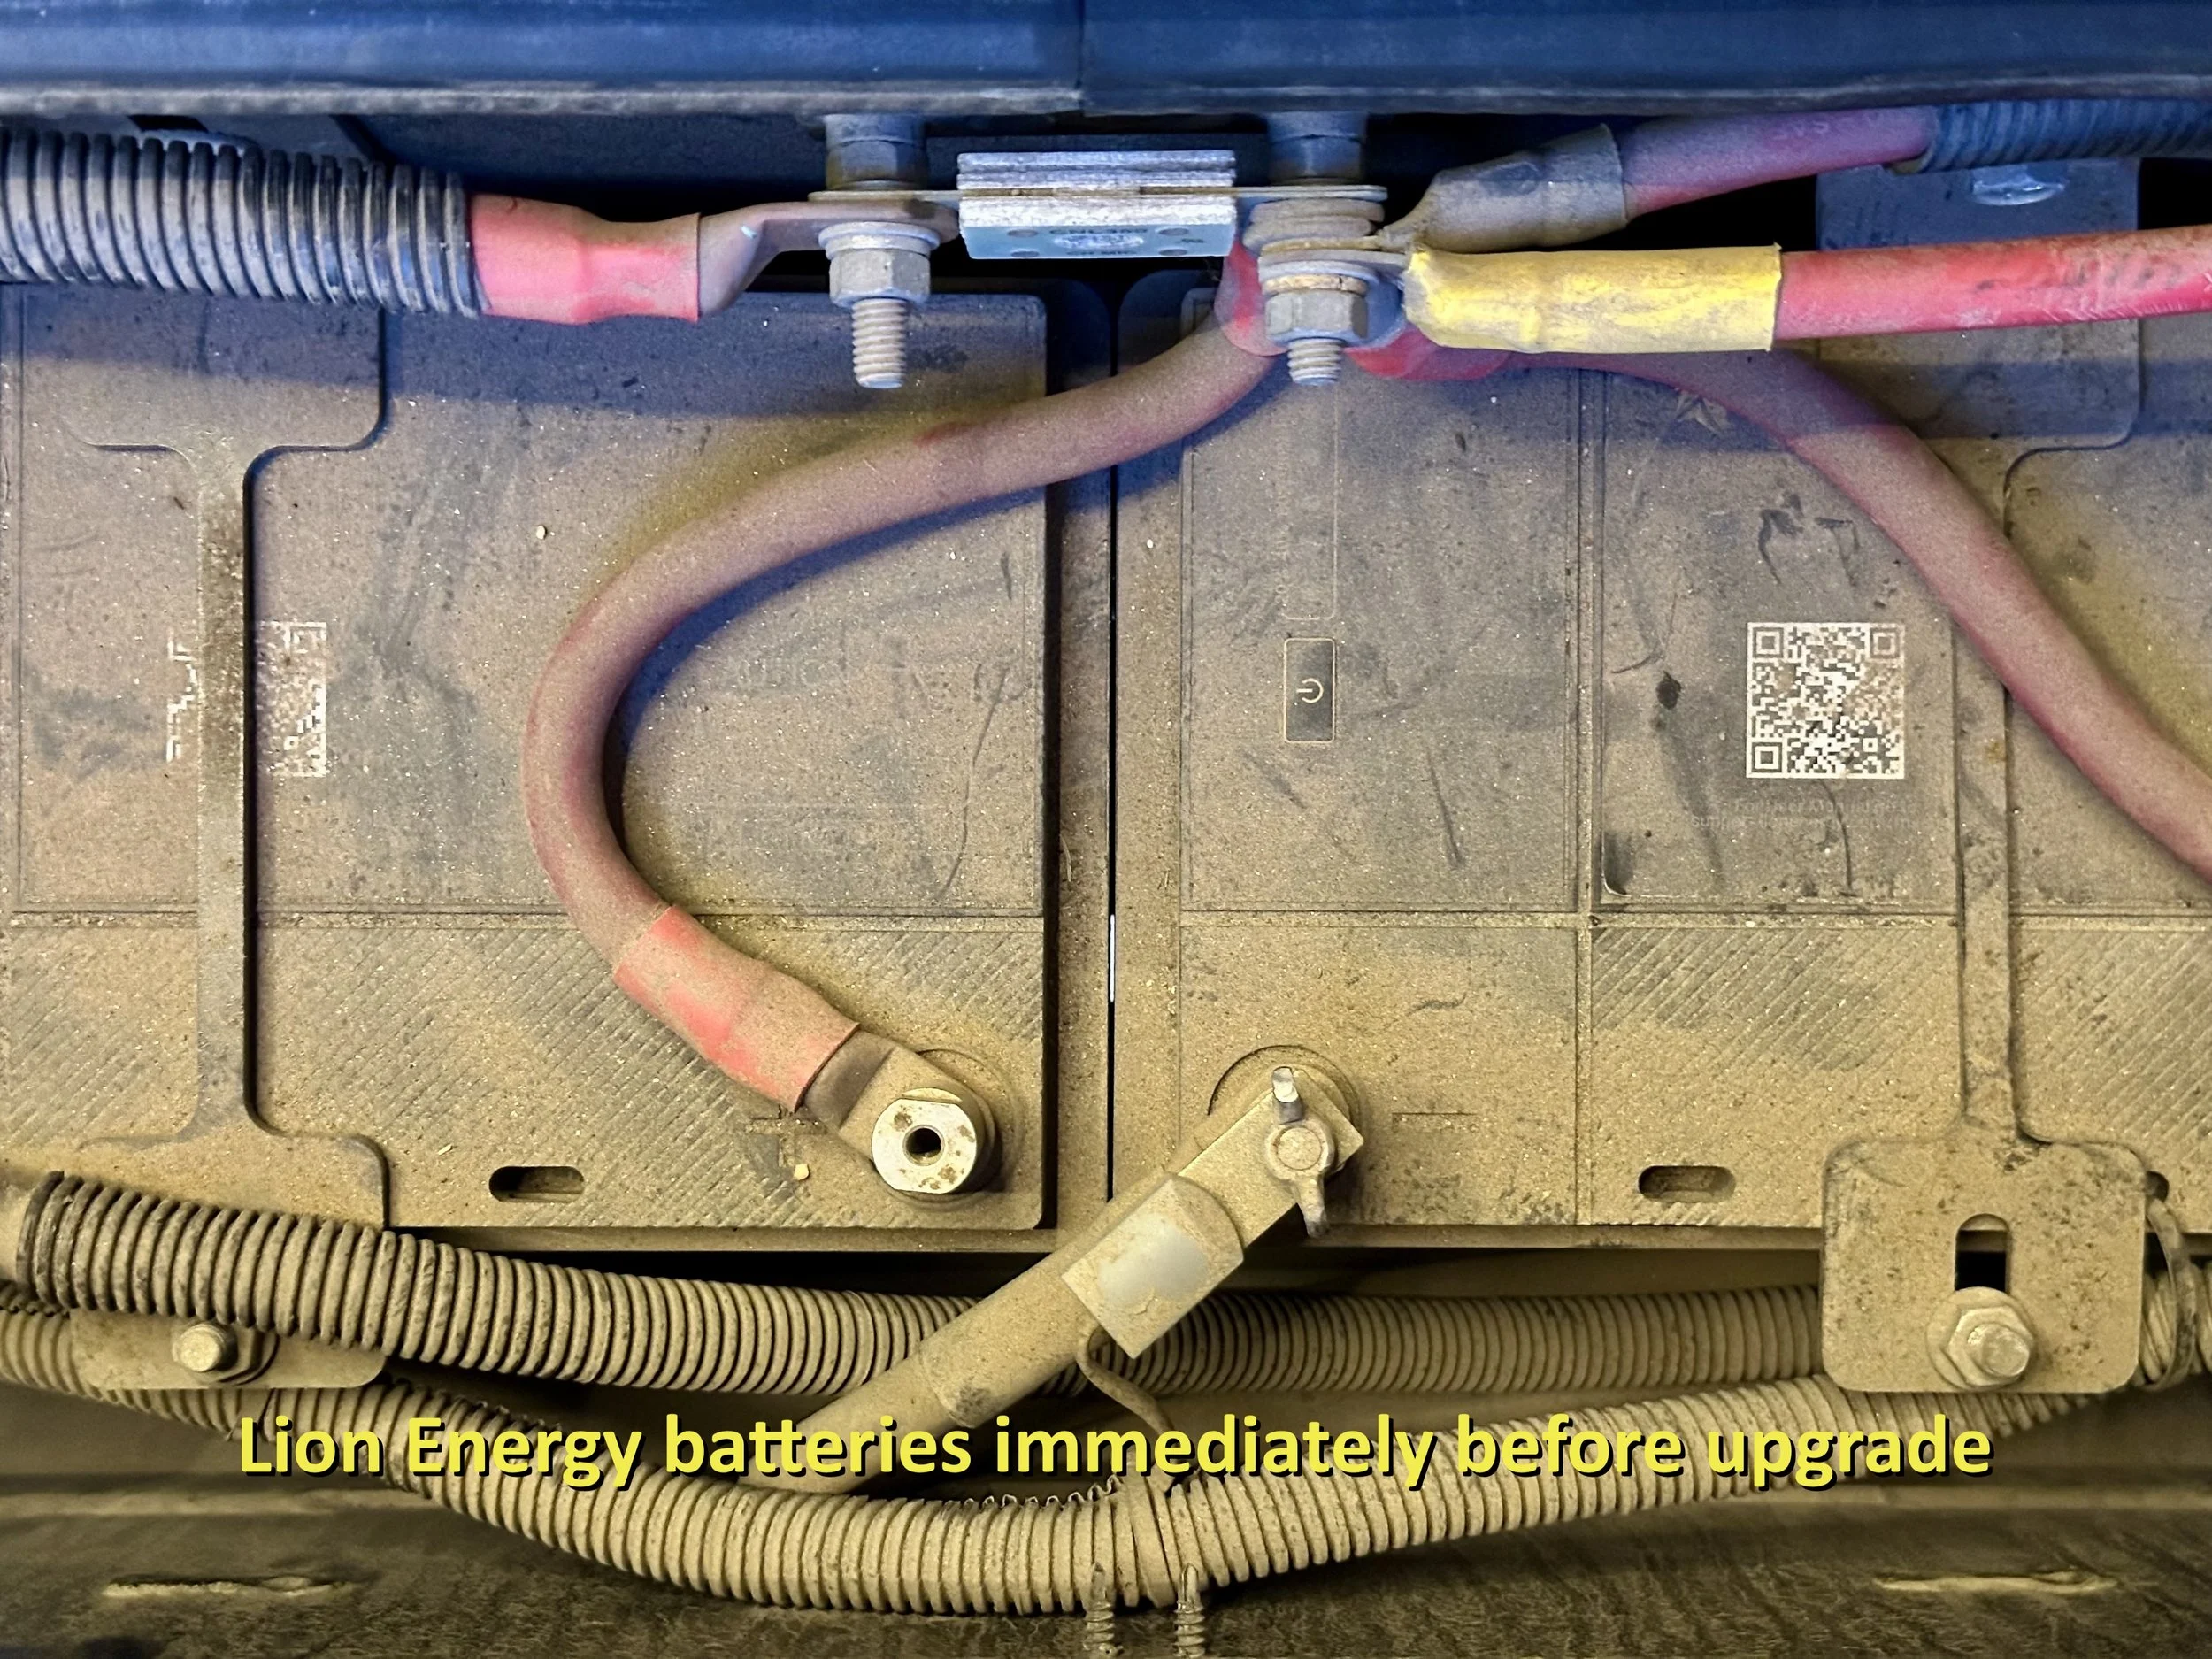
Even though sealing the compartment from the elements is not required, I find all the dirt and dust annoying (see photo of my dirty Lion batteries just before the upgrade). From the factory, my Navion came with lead acid batteries which off-gassed, so Winnebago designed the battery compartment to vent to the outside (underneath the RV). With Lithium, venting isn’t necessary — so they can operate in a closed-off compartment or in the open-air.
I wanted to seal the box from the inside by making a “box inside the battery box” with moldable ABS plastic. I didn’t get past the measuring stage because the margins were so tight for the two batteries and cables. In some places, I couldn’t spare even 1/8” of clearance and the ABS plastic took up too much space.
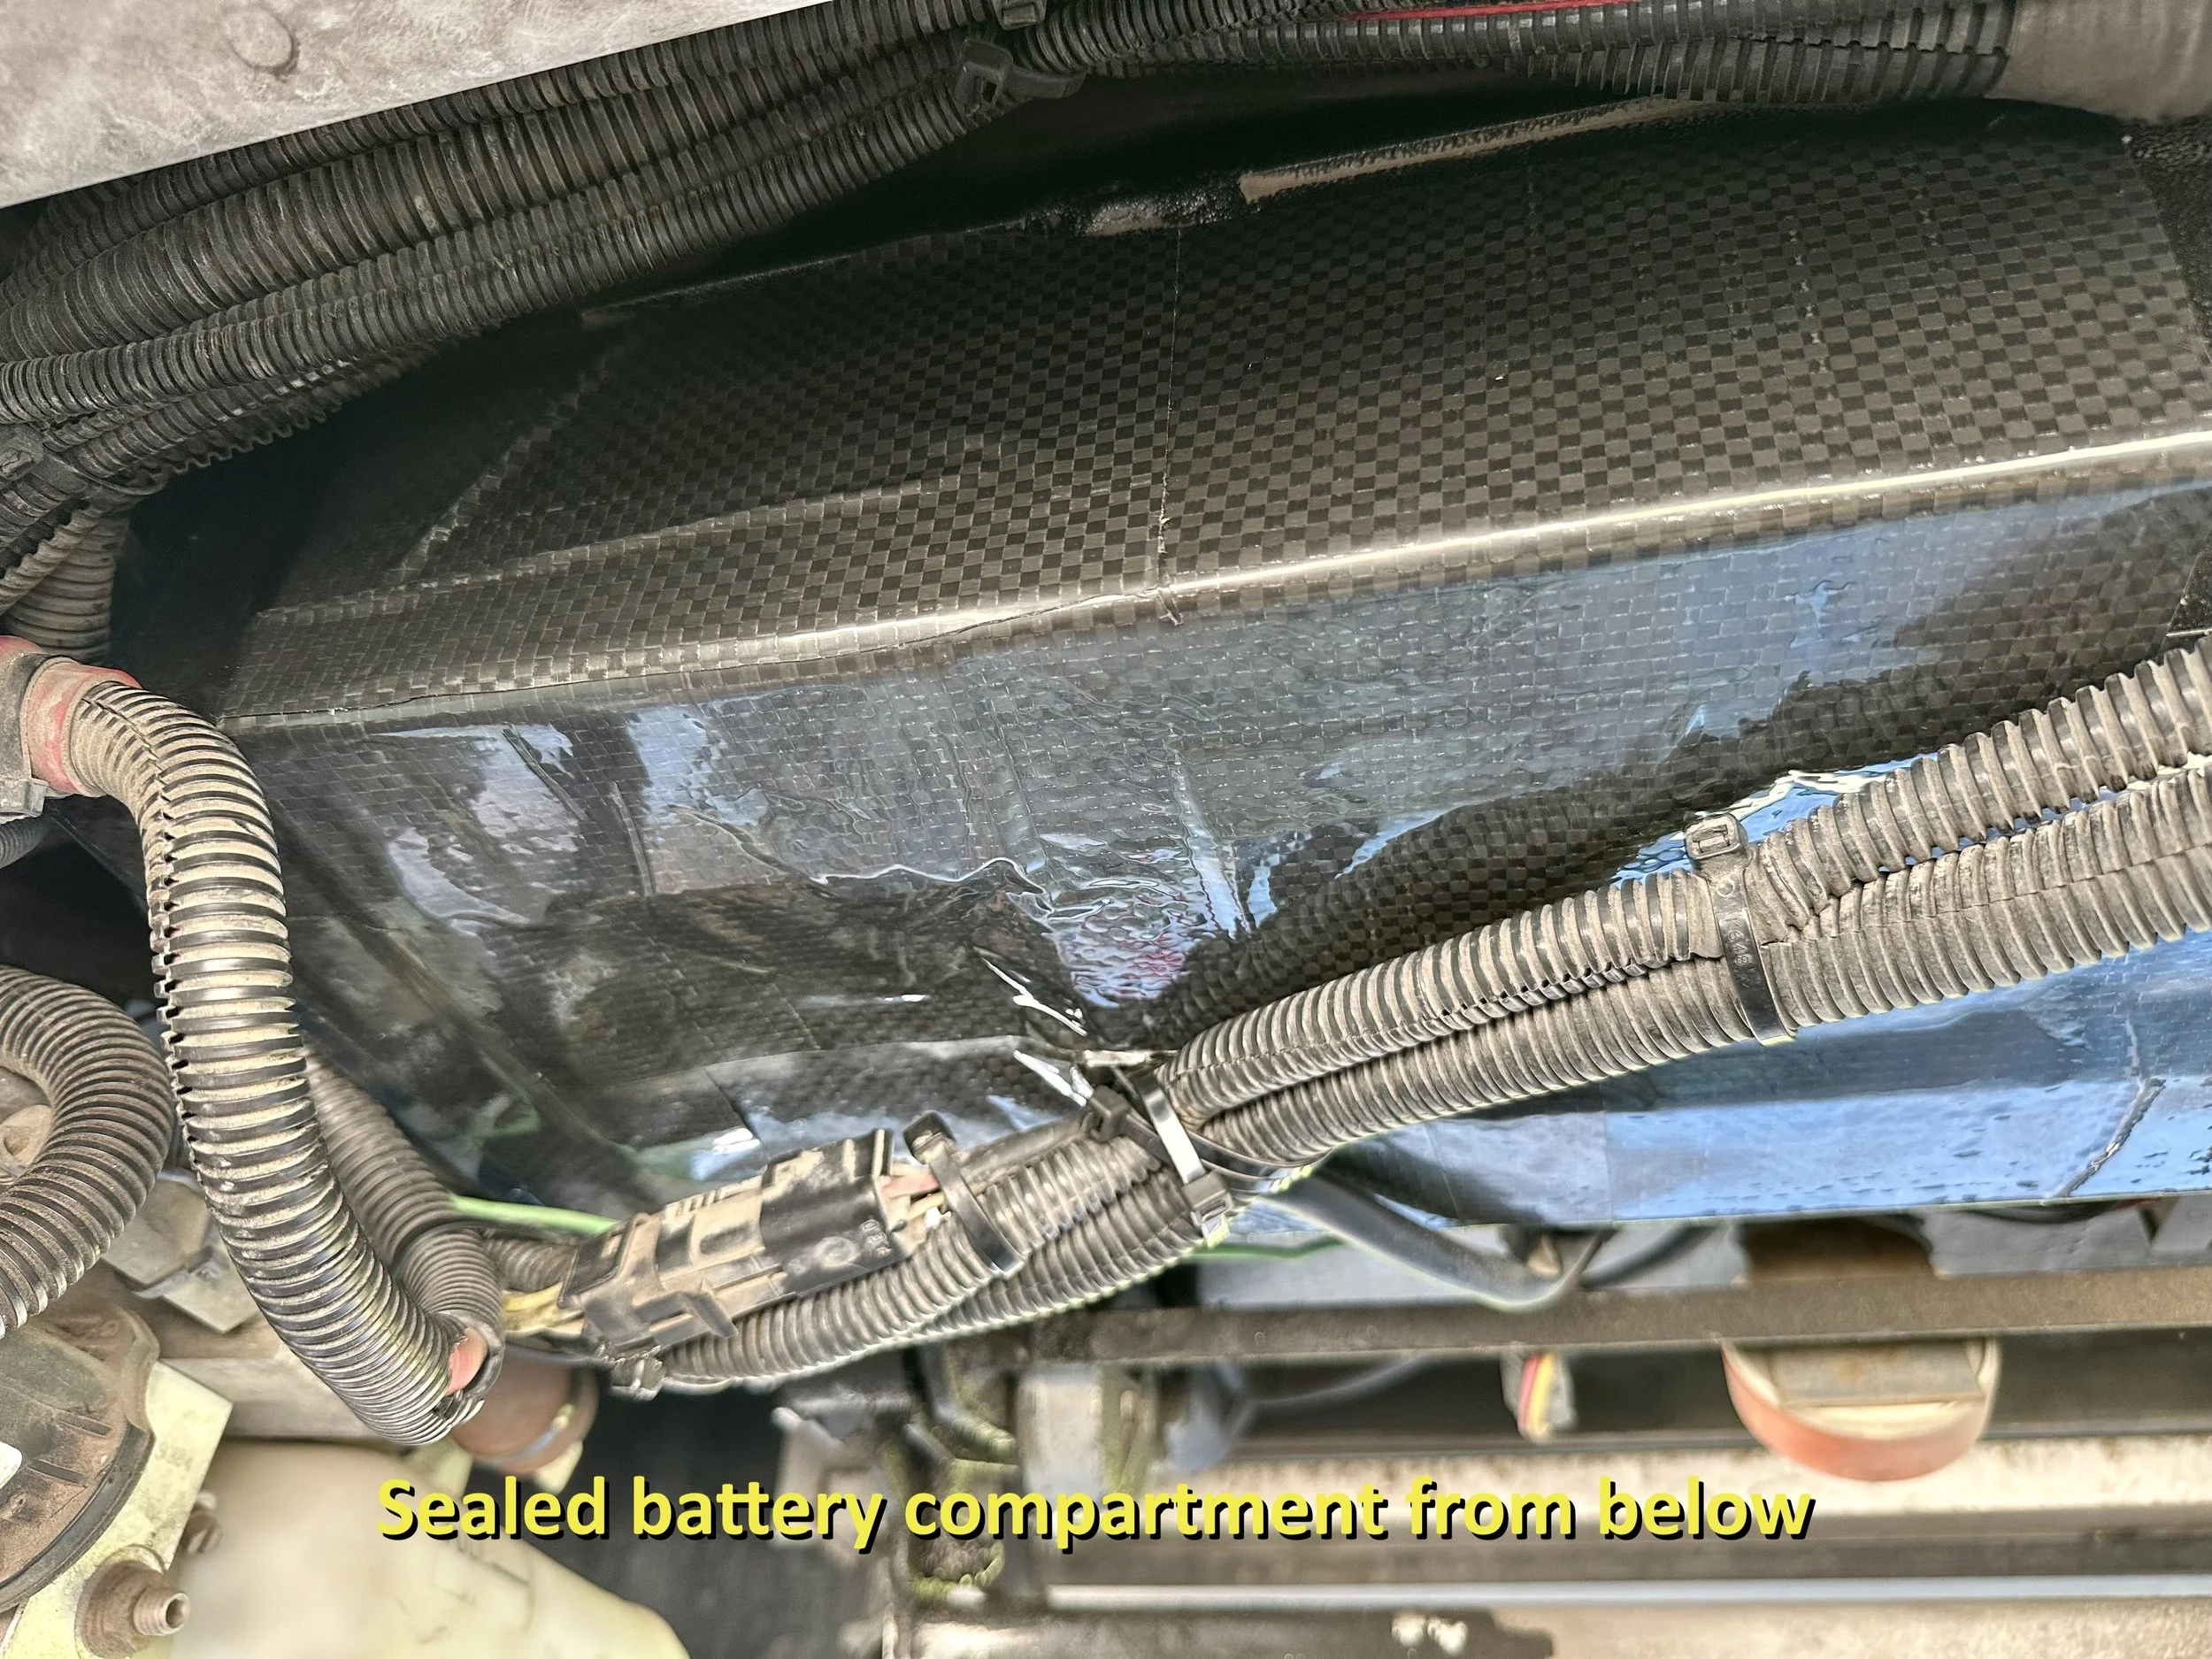
I ended up sealing the battery compartment from underneath with RV Underbelly Tape. It’s 8” wide and comes on a roll. It’s designed to patch up the underside of a trailer, a breach in a holding tank, etc. It’s heavy-duty and multi-layered. I wasn’t looking to insulate, just seal off the battery box from dirt, dust, etc. (see photo). The tape is removable without uninstalling the batteries.
As a final touch, I put a bright light on the ground at night underneath the battery box to see any light leaks around cables that needed more sealing (I was inside the RV looking down around the edges of the batteries). I blocked those areas by stuffing a fireproof felt cloth down along the edges of the batteries which I can remove easily if I decide I want some airflow in hot operating temperatures.
Miscellaneous Details:
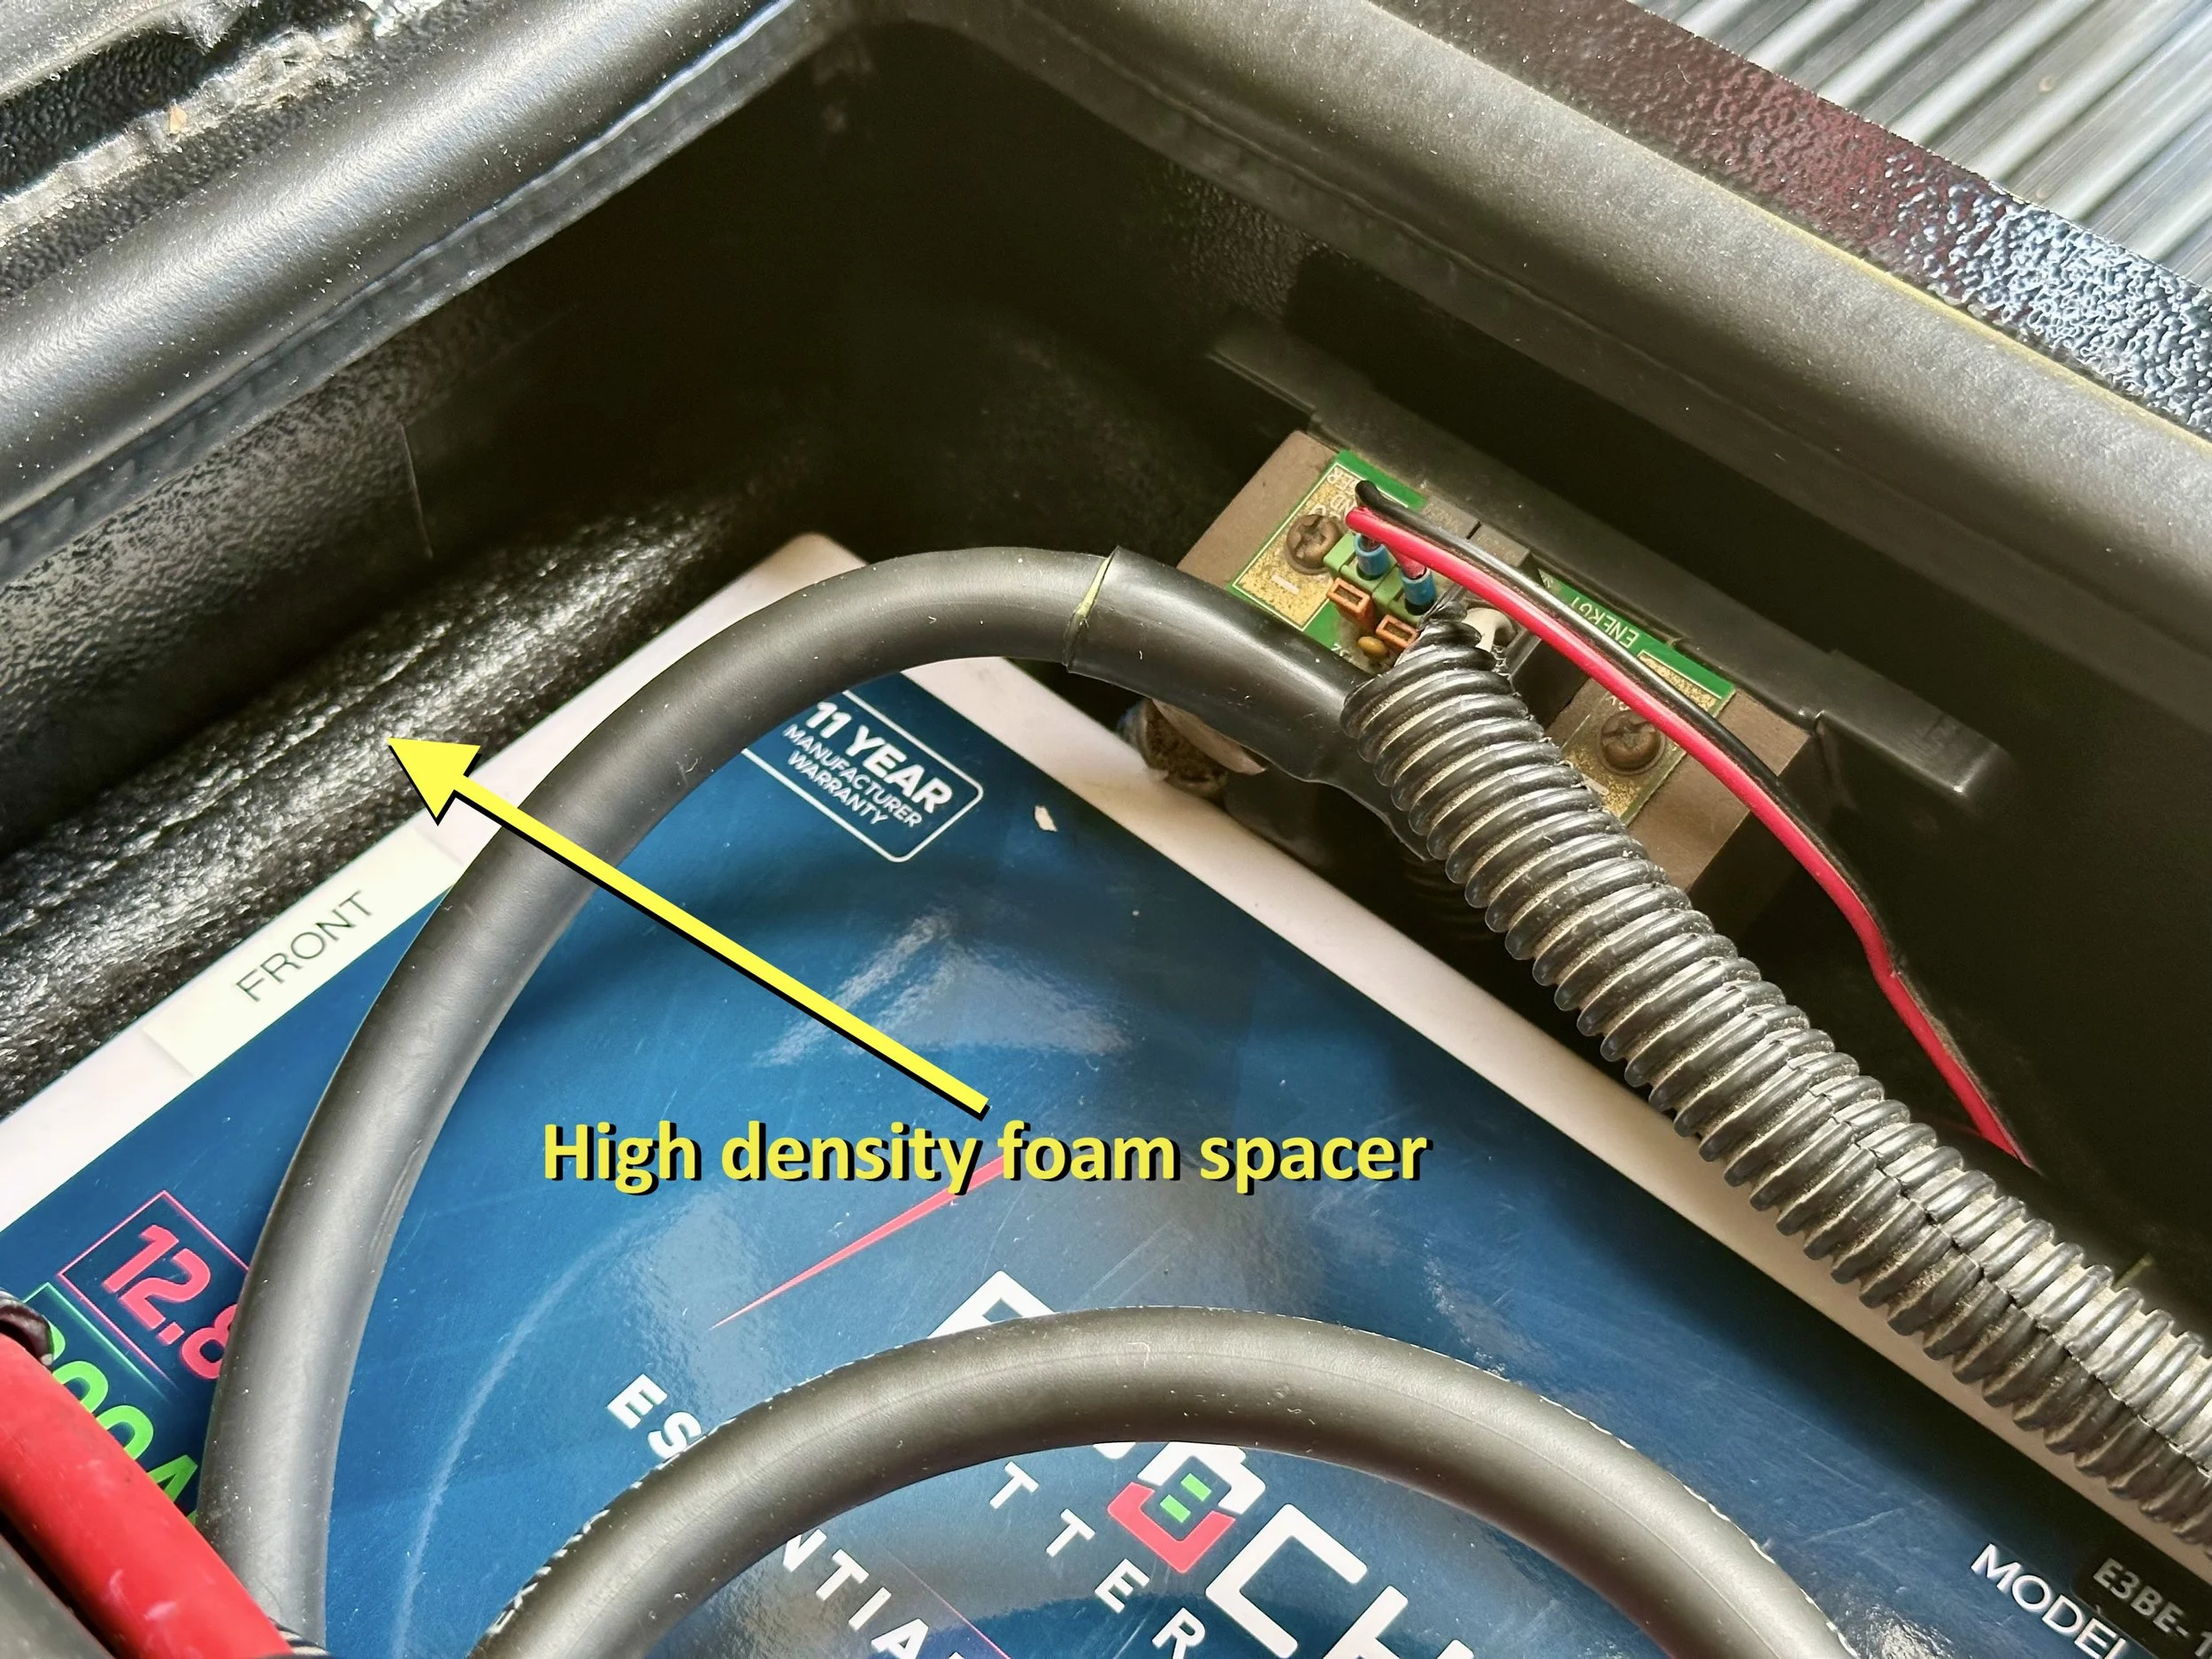
While the batteries are a snug fit, there is a 1” gap on the front side of the front battery. I bought high-density foam used to separate joints in cement. It’s 1/2” thick, and I cut two pieces and wedged it in to the space. It’s a perfect, snug fit. Those batteries aren’t going anywhere!
Last but not least, due to squaring two of the four rounded corners in the top opening, the OEM rubber gasket comes up an inch or two short when re-inserted around the lip. I bought a new (longer) one from Lichtsinn to finish off the project.
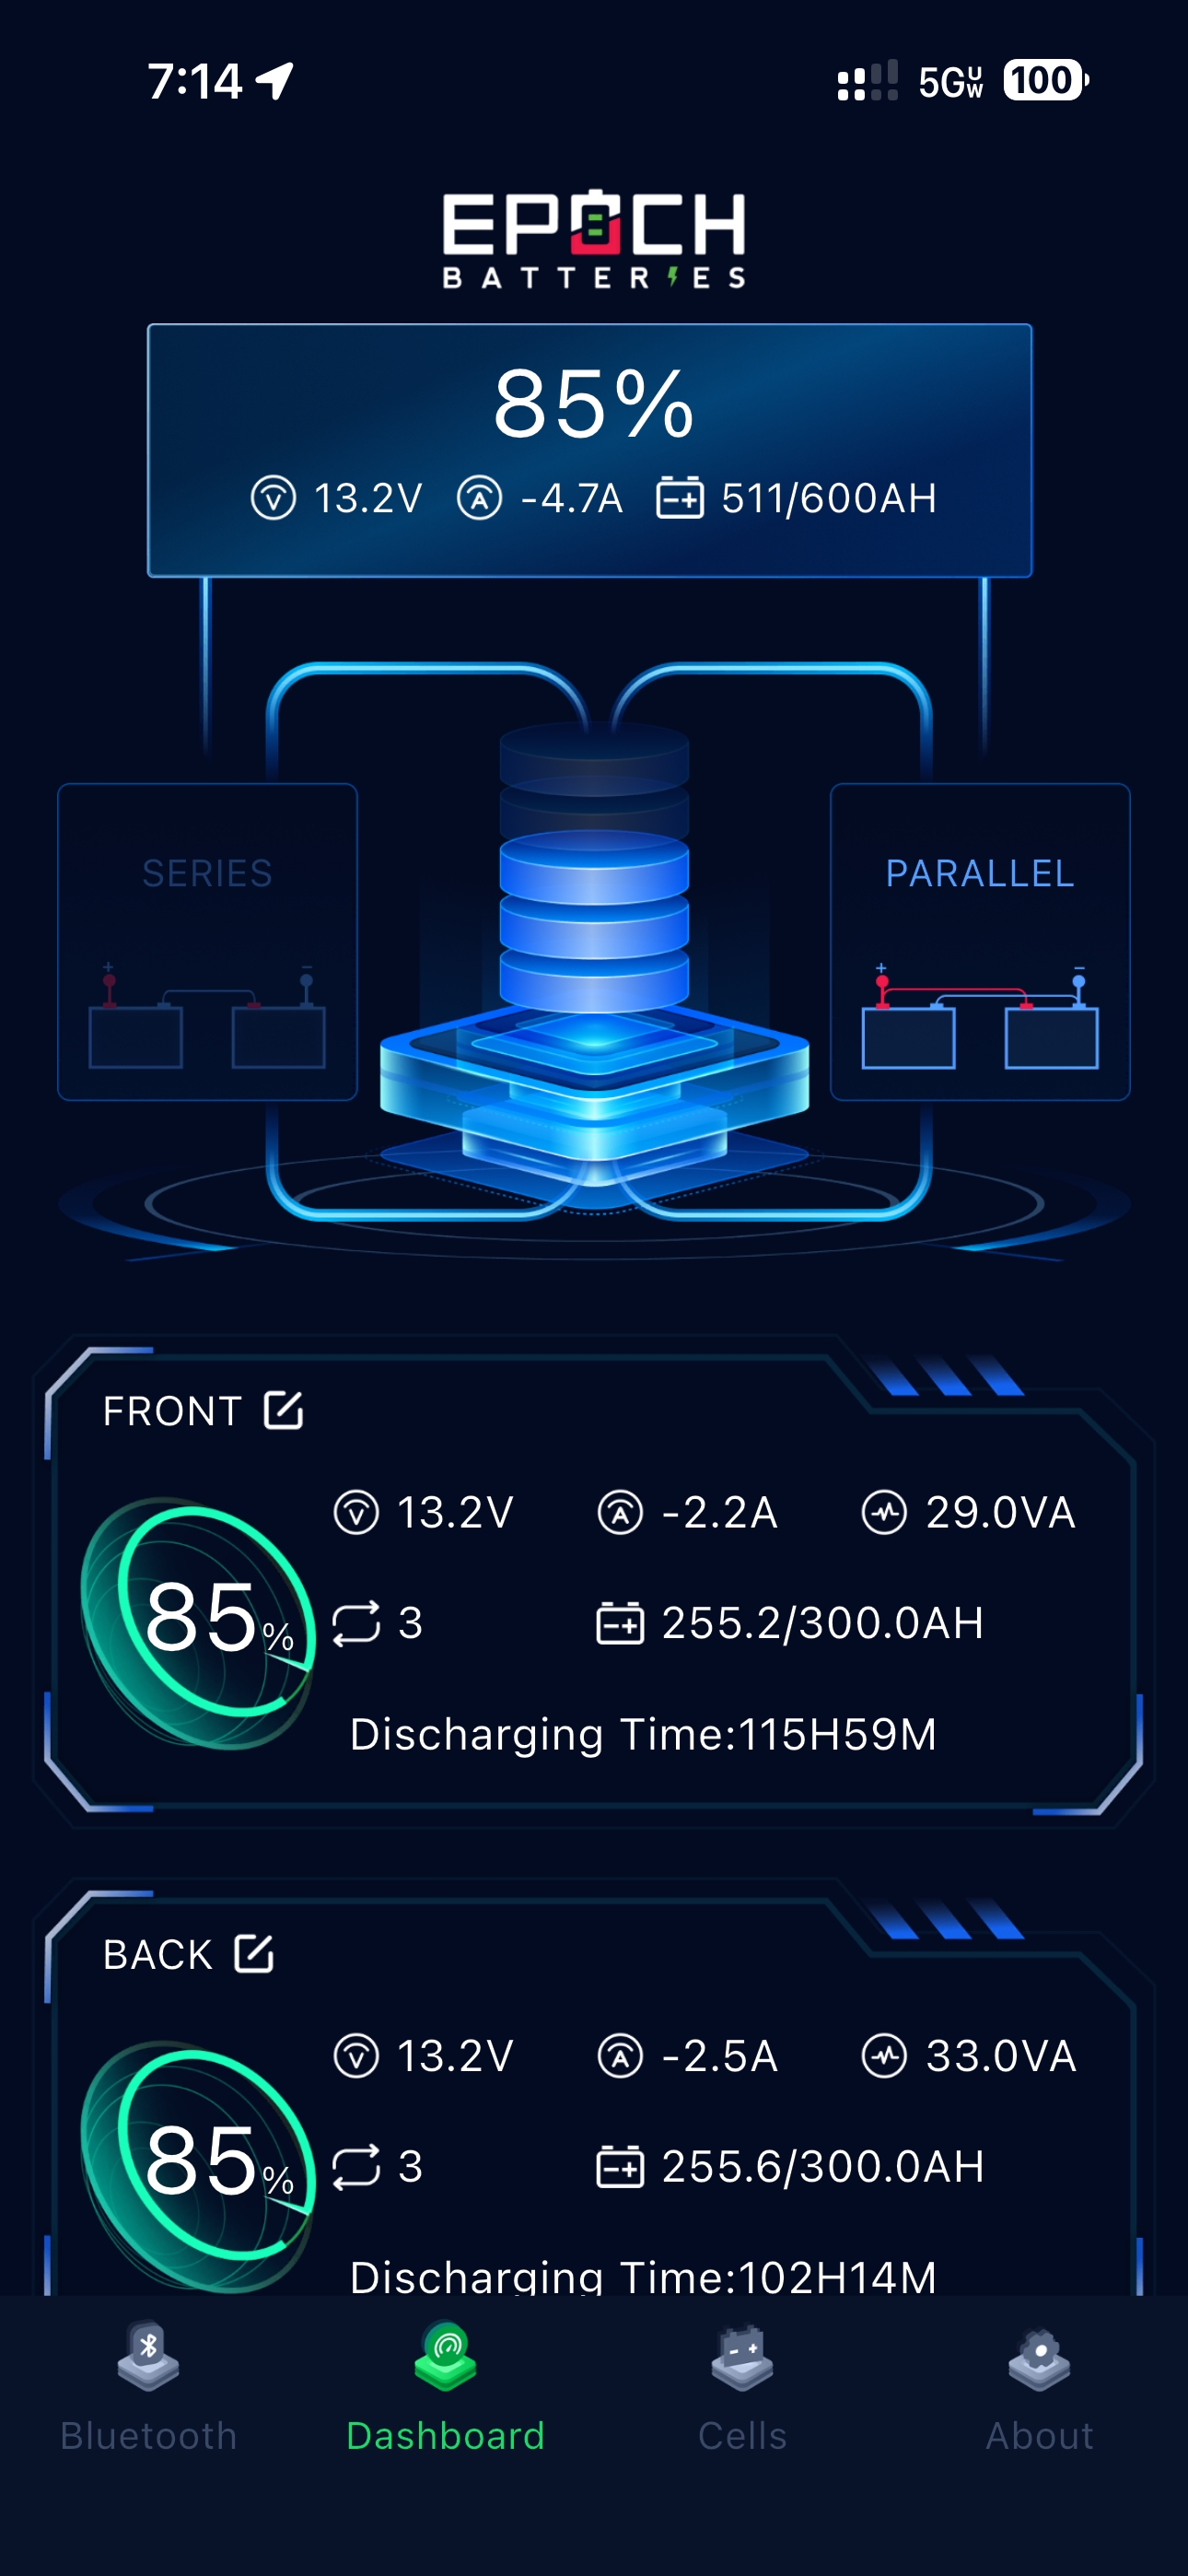
Fun fact: when my new 600ah battery bank is down to 35% state-of-charge, there are 210ah remaining until empty — this is the point where my old batteries were at 100%!
LINKS:
EPOCH 300ah Essential Batteries: www.tinyurl.com/47j3r476
DeWalt Multitool: www.amazon.com/dp/B085B253MD
Metal-cutting Blades: www.amazon.com/dp/B0DS22X5L9
RV Underbelly Tape: www.amazon.com/dp/B0BN121ZDF
Expansion Joint Foam: www.tinyurl.com/ytyuft7f
Fireproof Felt Cloth: www.amazon.com/dp/B0D12JH8BM