ELECTRICAL
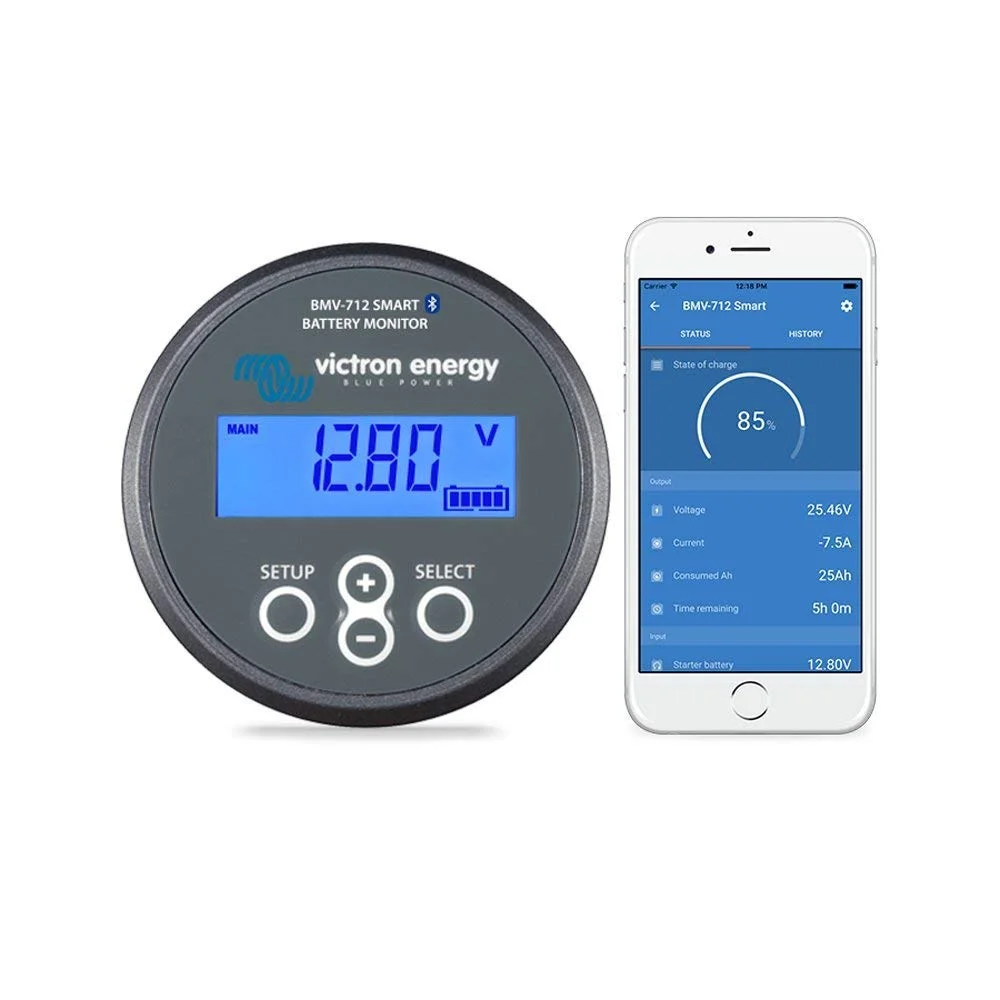
This product is like a fuel gauge for your house batteries! It will accurately track your battery level in a percentage by calculating all amps going in (charge) and out (load) of your house batteries. For a detailed description of installation, click here.

This device is a diagnostic scan tool that connects to your OBDII port. It can display dozens of engine parameters including real-time fuel consumption, cost-per-mile, coolant temp, engine temp, horsepower, and most importantly error codes if/when your check engine light illuminates.

This small module mounts on the bottom/center of your propane tank and sends an accurate level reading to your smartphone via Bluetooth. You’ll never have to guess again how much propane you have left!

I recently upgraded to this incredible inverter/charger/transfer switch. I have it wired as a whole-house inverter that runs every outlet and appliance (including the microwave and air conditioner). The 150a charger can charge my 210ah Lithium battery bank from 30% to 100% in less than an hour! And it seamlessly transfers power to/from shore power or generator when you connect/disconnect.

This Bluetooth-enabled remote panel connects to the inverter with an included 6-pin cable. The remote panel allows you to view and manage all of the functions of the inverter/charger. It also includes a Bluetooth module that connects to a smart phone app that also allows you to view/manage all of the inverter’s functions and settings.

This DC/DC charger gets installed under the passenger seat when you upgrade to Lithium. It limits the current between the alternator and the house batteries. For details about installation, click here.

I replaced my 30 amp Zamp solar charge controller with this 50 amp Victron version. It supports more watts of solar and uses a more efficient method (MPPT instead of PWM) to capture the sun.

This is a replacement for the propane detector that comes with the RV. After 60 months, they need to be replaced. If not, they will start beeping until replaced. I did it proactively 59 months after the RV left the factory. This model includes a built-in CO alarm as well.

Adding this Bluetooth module to your awning’s wiring enables several new useful functions; remote control of your awning from your phone/tablet, dimmable LED light and auto-retraction with wind sensor. For detailed installation instructions, click here to see the mod.

These tail lights are an optional replacement of the OEM vertical tail lights on the back of the coach. In addition to a brake light, they can simultaneously be wired to be blinkers (and therefore hazard lights).

This insulating cover is used to protect the Victron BMV-712 Battery Monitor’s shunt. It’s not required for the installation, but it’s a perfect fit and it will protect the shunt’s wiring from touching anything else inside the battery compartment.

An Electrical Management System (EMS) is one of the top 5 most important things I’ve purchased. Without some kind of EMS, there’s no way to know the quality of power at a campground’s electrical post. It detects open ground, open neutral, reverse polarity, high/low voltage as well as provides accidental 240V and A/C frequency protection. To see how/where to install, click here. For the portable version, click here.

This add-on to the Progressive Industries EMS enables a second remote/monitor to be connected to the same EMS. I have one remote/monitor outside in the electrical bay which helps immediately indicate whether I have “clean” power upon plugging in. The second remote/monitor is mounted inside the RV to help budget the amps used at any one time. To see how/where to install, click here.

www.dyersonline.com/coleman-mach-blu-tooth-wall-thermostat.html
If your existing OEM thermostat looks identical, then this is a plug-and-play replacement that adds the functionality of Bluetooth control via a smart phone app! This should work for all Coleman-Mach units with heat pump. For more details about which model to choose, click here.

This dimmer is compatible with the OEM LED lights. It does, however, require additional wiring and a larger hole. For more info about installation, see this step-by-step guide.

My 2018 Navion came pre-wired with a 100w Zamp panel, Zamp controller and a 3-way port on the roof. This 170w panel expands the system easily and keeps the same brand of hardware throughout the entire solar system.

Click here to email Leonard Casella who builds and sells this mod.
This mod reduces the electrical draw that the Propane Solenoid Valve uses by at least 80%. It’s an additional switch that you add which allows you to turn the mod on and off. Since I have a 3-way refrigerator, I need to have my propane valve open 24/7 when boondocking. Instead of using 20Ah a day to keep the propane valve open, this mod uses approximately 5Ah a day total, a savings of 15Ah.

The Easy-Start™ reduces the required start current of the rooftop AC by 65-75%, practically eliminating the jolt and associated noise/vibration of the AC compressor start. It also enables the AC to start (and then run) on a 15-amp household outlet, a small Honda (or similar) generator or even a 2,000w inverter. For a detailed description of installation, click here.

I’ve used this when driveway-camping and the main RV cord wasn’t long enough to reach the outlet. If you run any high amperage equipment like the air conditioner, you want to use a thick gauge cord all the way to the outlet.

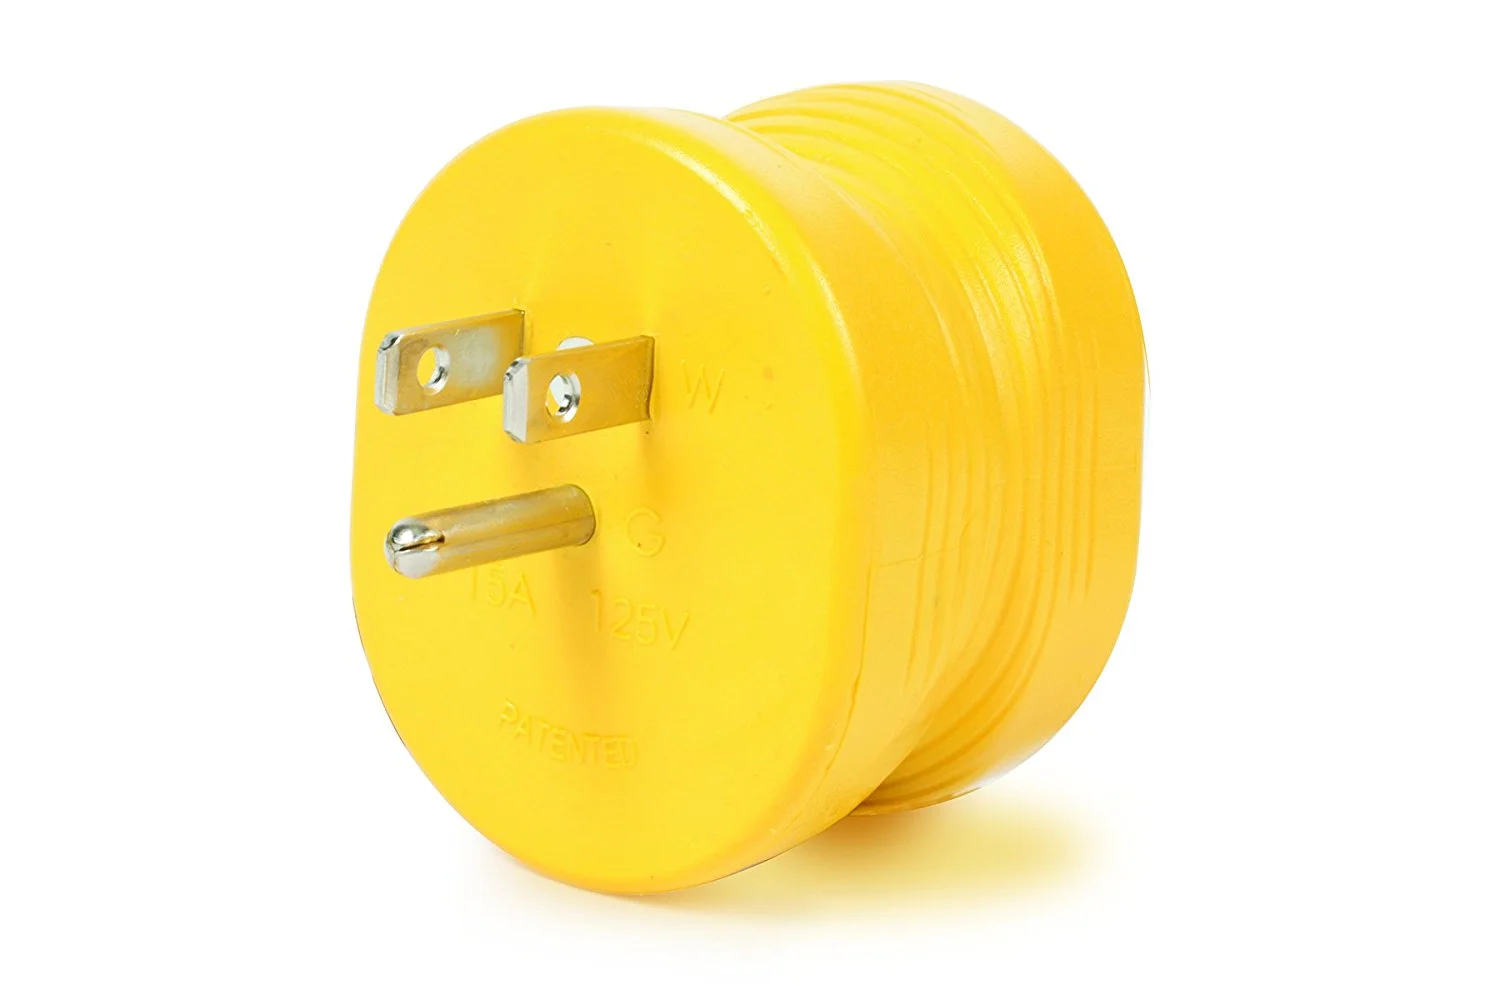
This adaptor connects a 50 amp post at a campground to the 30 amp shore power cord attached to the RV. Sometimes a campground only has a site available with 50 amp service, in which case this adaptor will come in handy.
This adaptor converts your 30 amp shore power cord to a household outlet.

This is useful to keep in the cabinet behind the TV for electronics such as a printer, Apple TV, Roku and/or Blu-ray player. Its primary purpose is to add available electrical outlets for the devices since there’s only one outlet available otherwise.

The stock boost solenoid is known to go bad, which then restricts the charging of your batteries. This is the recommended replacement. I carry it as a spare since my stock solenoid is still working.

Ready to replace the factory clown horn? Look no further! This twin tone electric horn makes your presence known if/when you need to get someone’s attention. To listen to the horn and get details about installation, click here.

These bulbs are one of many brands that serve as a direct replacement of the factory halogen headlight bulbs. The key is to buy an “H7” size bulb. This pack of 2 is bright and was very easy to replace. It’s best practice to replace both headlight bulbs, even when only one burns out.
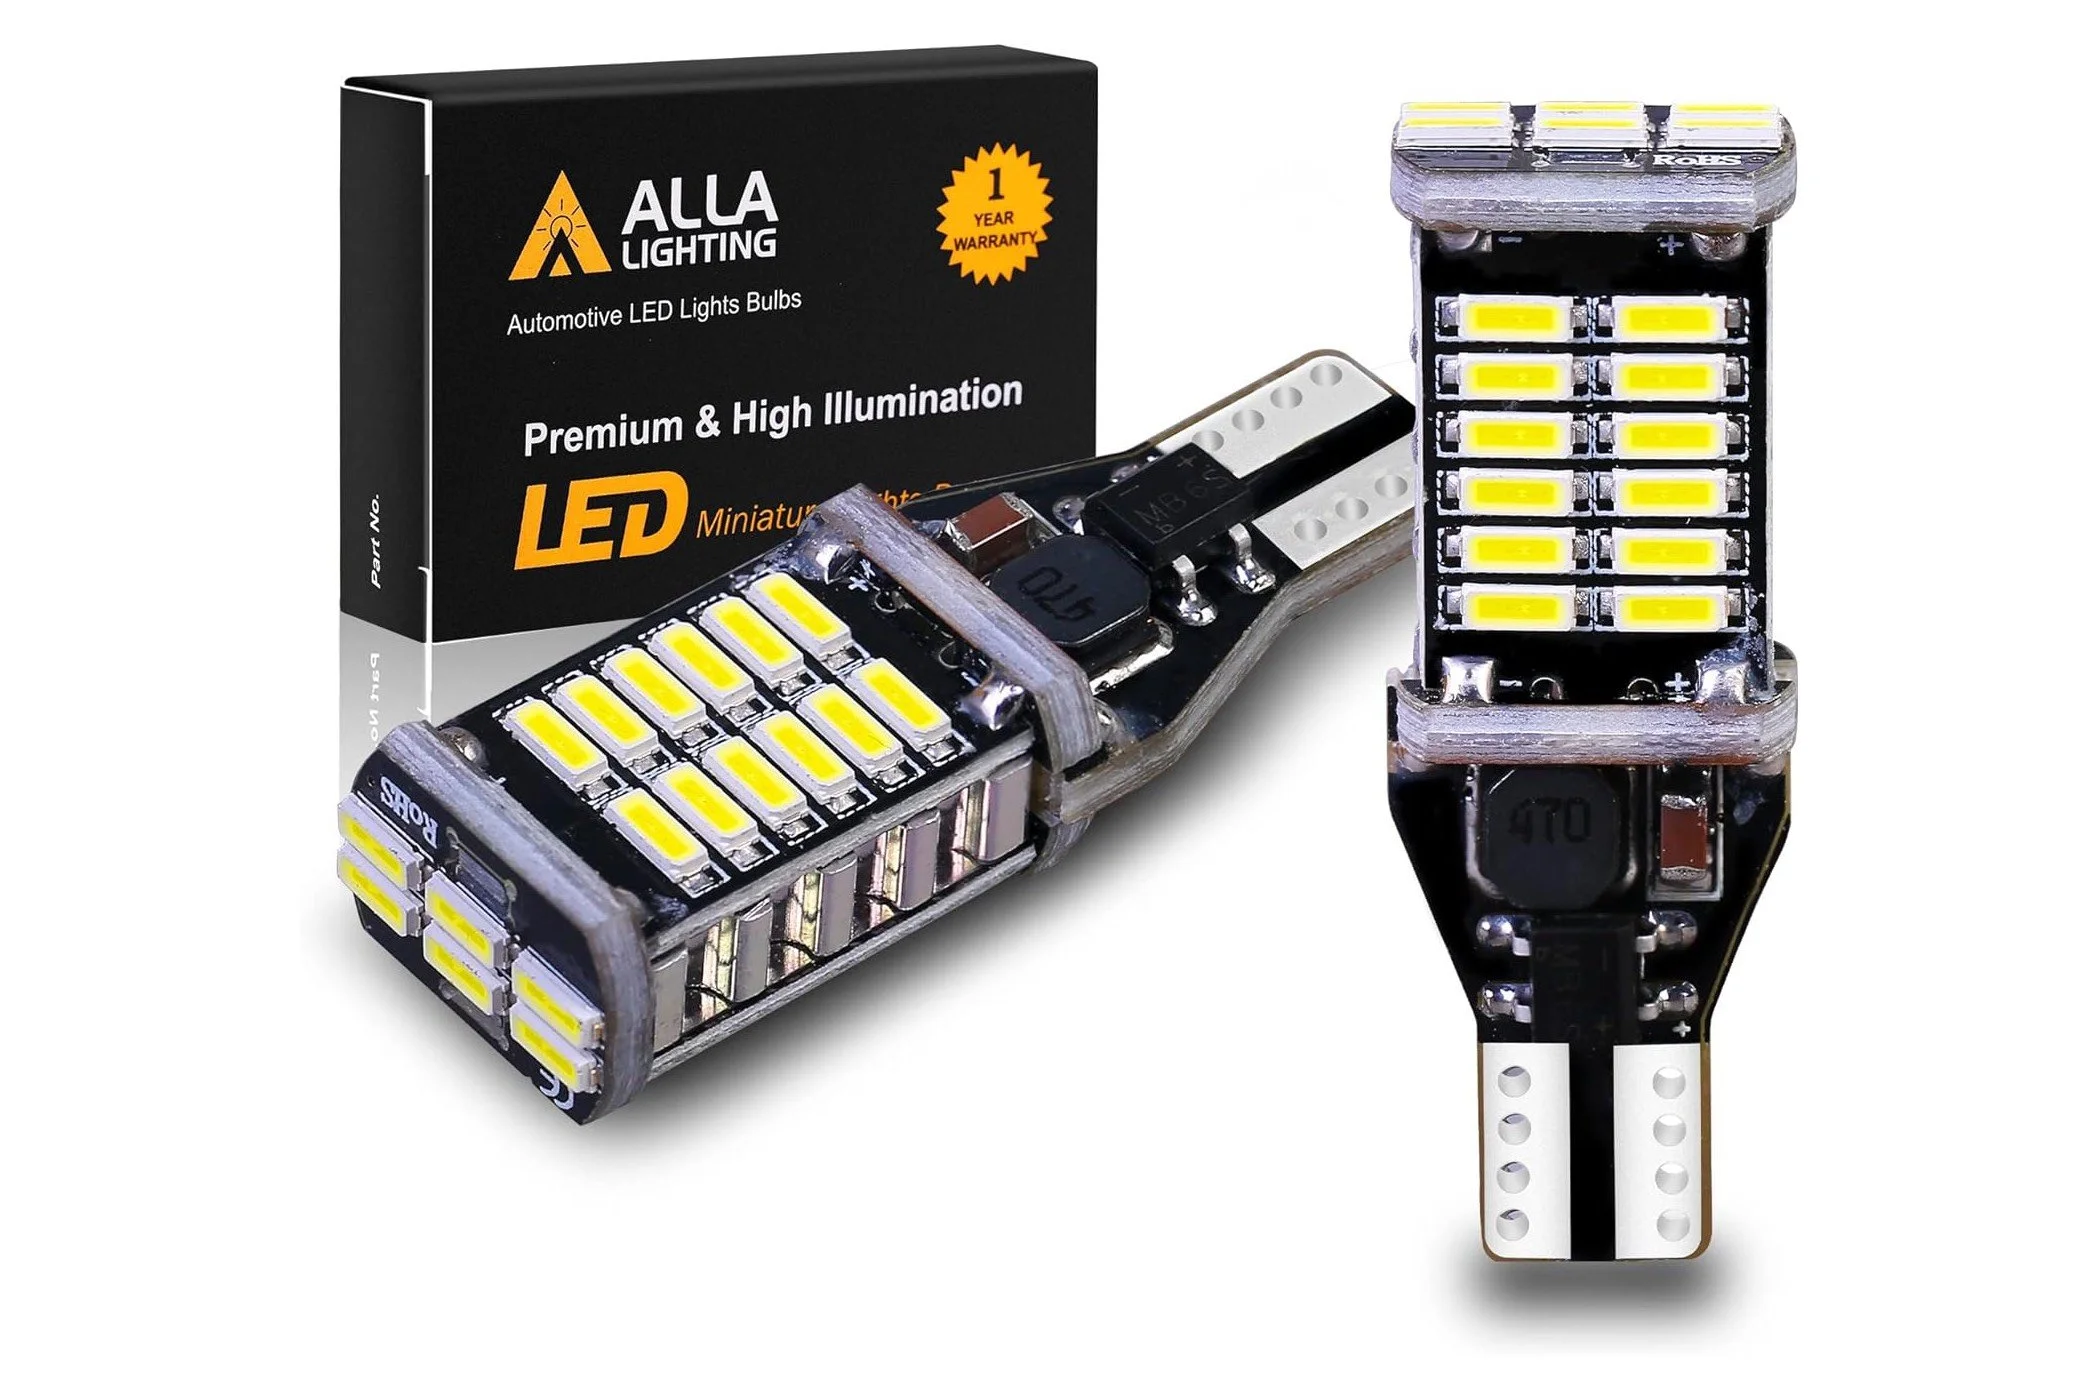
Underwhelmed by your reverse lights when backing in at night? These are BRIGHT LEDs! They are direct replacements for the Mercedes Sprinter's reverse lights with no adaptor needed. They take less than a minute each to replace (accessed from behind the reverse light fixture under the bumper).

I installed this in my control center on the positive wire of my Zamp solar controller. I use the breaker as a switch so that I can turn off my solar any time (without climbing on the roof and unplugging all three panels). The primary occasions I turn off my solar is if my speakers are buzzing mid-day and I’m watching a movie, or if I’m working on my batteries and I need to shut off all power.

This 49.5w high speed charger will charge your phone and USB-C compatible laptop in record time — and without the use of your inverter. For Mac users with a late 2016 or newer MacBook Pro, just unplug the white USB-C cable from the white charging block and plug the cable directly into this device.

This is a plug-and-play replacement of the USB port that Winnebago installed above the dinette and above the bed. This version has two USB ports, displays battery voltage and charges at twice the speed of the OEM version. I installed two of these in the area behind the TV above the galley sink (there were none in this area prior).

This is a plug-and-play replacement of the USB port that Winnebago installed above the dinette and above the bed. This version only has one USB port, but it charges at twice the speed. It also features an on/off switch and a voltage reading (when switched in the on position).

I hard-wired two of these in my RV. One is in the cab and is wired “behind the scenes” to discreetly hide the 12v charging adaptor and wire that powers my phone. I installed a second 12v socket under the dinette seats in the house to charge my Dyson D7 Car+Boat Cordless Vacuum without needing to use the inverter.

This module steps down 12vdc to 5vdc. I’ve used this to hard-wire devices that use a 120vac wall adaptor that steps down to 5vdc (i.e. Ring alarm system, weather station, etc.). Now, the devices are wired directly into the RV’s 12v system.

This module steps down 12vdc to any lesser voltage (i.e. 9vdc, 5vdc, etc.) via an adjustable potentiometer. I’ve used this to hard-wire devices that use a 120vac wall adaptor that steps down to a lower DC voltage (i.e. Ring alarm system, weather station, etc.). Now, the devices are wired directly into the RV’s 12v system.

This kit will give you spare 12v blade fuses for both the Mercedes chassis as well as the Winnebago house electrical system. Includes everything you need and more: 2A, 3A, 5A, 7.5A, 10A, 15A, 20A, 25A, 30A, 35A.

These “Add-a-Circuits” allow you to easily tap into a 12v fuse box. You can either add a new circuit, or piggyback on an existing circuit. I used these to hardwire my Garmin 56 dash cam into the chassis’ 12v fuse box.

I purchased three of these fans and mounted them behind my exterior refrigerator vent grille. They help draw hot air from behind the fridge and blow it out the top exterior vent. As a result, my 3-way fridge runs more efficiently in hot weather.